Wednesday, February 25, 2015

Biting the Bullet

by Staci Louise Smith

Last week we lost two members of our family.  It was a very tough week.  I was honored when I was asked to make a memorial pendant to honor my uncle.  His children were looking for something that could hold ashes but also be made without.  His daughter said it would be cool if we could do something like a bullet, since he loved weapons.

And I was off...................

I have been saving brass casings thinking someday I will make something jewelry related with them and I have just never done it.

I figured to make an easy pendant, by adding a hole, a bail, and polymer clay.  But as I thought about it, I wanted to make it extra special, and I know you can etch the brass casings............so............

I messaged Karen since I know she etches all the time.  She walked me through the basics as I was terrified to use acid in my house.

I also Googled etching brass casings since they are an odd shape.  I got some great tips.  I thought I'd walk you through the process with pictures.  By no means is this a tutorial, but I thought it was cool to see them come together!

I am so glad I "bit the bullet" and dove into etching brass!  I am hooked.

first I drilled each one through the top.  some did NOT drill well and got tossed aside.  I also broke one drill bit during the process.

then I used my Dremel to clean up the drill holes

Then I cleaned the surface of each bullet casing with a scrubbie to remove any oils and made it ready to take the ink

I used both sharpies to draw on designs and stayz on ink.  I definitely prefered the stayz on designs best and did them for most.

I strung them on wire so I could dunk them in the acid and remove them easily.

acid bath for about 20 minutes

Then they got taken out, neutralized and rinsed.  this was a painstaking part for me, and I used a TON of baking soda because I am so paranoid!  It was messier then I expected as well, and next time, I will probably do this outside- although I manage to contain all that needed to be.  I also bought a plastic place mat to put under everything in case of mess and to protect my counter.  It worked great!

After they were all etched, then I used a brass brush to remove any ink, and rinsed them again, and threw them into the tumbler to shine them up and clean them thoroughly.


post brass brush, pre-tumbler

After the tumbler they got antiqued with liver of sulfur, polished with polish pads and were ready for the next phase.

(I made over 50 of these, so it took me all week)

I torched some brass wire to antique it a bit, and made bails through each of the holes at the top.


After they had bails, I added black polymer clay to the inside.  I stuffed it way in so it went around the wire inside to grab it- and formed the bottom like a bullet shape.


That is the finished product.  I did run into some problems with the polymer in the brass though.  It kept cracking at the edge of the bullet casing....sometimes it just made a ridge and other times a huge crack that made the entire tip break off.  So I filled the ridges with more clay and re-baked.  The broken ones I dug out some of the center, and added sculpey glue and more sculpey and re-baked.  they were better.  I spoke with Ginger of Blue Bottle Tree and she thought perhaps the clay was packed so tight the gasses couldn't ecaspe. I never even thought of that, plus, the brass gets hotter then the clay.......

So I did a batch packing a little at a time, and I cooked the first two fillings at a lower temp to set them but hopefully not overheat it......and they still had some ridges to fill, but not as bad.

Just something to think about and be ready for if you fill bullet casings with polymer.
ready to bake

The last batch had the ashes mixed in with the clay for those who wanted it that way.  That was emotionally tougher for me then I thought it would be.  How I did it was, I put some bigger pieces inside and mixed some thinner ash into the clay, then proceeded as I had for the others.

In the end, I was so happy with them, as was everyone else.  If they didn't want them as a necklace, they could use them as a key chain, or hang it from a car mirror.  I think my uncle would have been pleased and got a kick out of it.  I am so happy I had a chance to go outside my comfort zone and make something special like this.
you could pick a ball chain and pendant off the memorial table, since each one was a little bit different.

Of course, everyone got a ball chain to put it on, but I had to make something I'd wear more often, so I make another charm necklace.


And since there were extra's I put one on my key chain too.


Art really is healing, and it was nice to listen to music and make these throughout the week.  

Have you ever made something special for someone?  A keepsake, or memento?  Jewelry is such a great way to wear a remembrance, that I am sure you all have.  I'd love to hear about what you made- and if you want to share the story and a picture on the groups facebook page, I think that would be really great- and a way to honor those they were made for as well.


Tuesday, February 24, 2015

TUTORIAL TUESDAY! Etching Aluminum by Karen McGovern

Want to come over to my place to see my etchings?

I recently had a virtual conversation with Staci Louise Smith about etching.  She is going to describe her project in a later post—it’s amazing and beautiful and you all will love it.

In the course of the conversation I decided to do a tutorial on etching aluminum.  There are many ways to etch brass, copper and silver, but few options when etching aluminum.  I will be showing how to etch with ferric chloride. 

YES, ferric chloride is a caustic material that has to be disposed of in a VERY RESPONSIBLE MANNER, and yes, there are “green” etch recipes all over the web, but many do not work with aluminum.  I do have the recipe for a green etchant that works with aluminum, but haven’t tried it yet because I haven’t found a source for some of the ingredients.  When I do, I’ll be sure to post it.  This tutorial will discuss the proper handling and disposal of ferric chloride, which easily etches copper, brass and aluminum beautifully.

Etching has been around forever.  Ferric chloride historically has been used in the computer and electronics world to etch copper mother boards, among its many uses. Use the Google Machine and you will find loads of videos and tutorials on how to etch copper and brass with it.

Aluminum is a whole other ball game.  If you were/are into crazy science experiments, you will love etching aluminum.  It’s FAST (less than two minutes usually) and a bit scary (can you say CHEMICAL REACTION?), and the results are pretty great.

Aluminum will not patina conventionally like other metals.  By its very nature it will not rust, tarnish or discolor. Coloring this material is difficult using conventional methods and requires effort to keep the color you achieve if you use inks, dye patinas, etc.  Ferric chloride will permanently color and etch aluminum in a dreamy, monochromatic way.  Let’s give it a go, shall we????

First, the scary disclaimers and safety stuff:

1.    WORK IN A VENTILATED AREA, LIKE OUTDOORS.  For real.  Do not use ferric chloride in a room without TONS of ventilation because, HYDROGEN GAS.  Hydrogen gas is NOT TOXIC, and a small amount is produced when you etch aluminum with ferric chloride and it is pretty startling the first few times you do this.  EXCITED YET?  I etch in my garage with the doors wide open.

2   Use rubber gloves (I use surgical gloves which you can get at any pharmacy) because you will be handling the ferric chloride coated metal more than you would etching copper or brass.  Ferric chloride won’t burn you on contact or anything like that, but it isn't the best thing to have on your skin for prolonged periods and it does stain EVERYTHING (clothes, counter-tops, concrete, you name it) so bear that in mind.

3.   Wear a mask if you have one, just to be extra safe. You can find bulk, inexpensive  disposable painter’s masks at any hardware store.

4.      Wear safety glasses.  YOU DO NOT WANT FERRIC CHLORIDE IN YOUR EYES!!!

5.     Spent and neutralized ferric chloride must be stored properly and disposed of at a recycling center in the same manner spent oil from your car is recycled.  I keep a few empty plastic jugs in my garage, fill them with spent FC using a plastic funnel, and then take them to my local recycling center when full.  FC must be kept in plastic containers!

My FC storage jug.

 Okay, terrified yet?  Don’t be.  FC is scarier sounding that it is.  I promise.

What you’ll need:

Aluminum bracelet blanks.  I get mine from Gotta Get A Deal on Etsy.
Ferric chloride.  I get mine from Allied Electronics, but you can also find it at places like Radio Shack or other electronic supply stores. (Note: When you get it, take a few minutes to read the information that comes with it.  Familiarize yourself with this liquid as much as you can prior to use.)
Three empty plastic containers with lids large enough for your blank to sit in.
Packing tape
Sharpie marker and/or Staze On Ink (Michaels Crafts)
Rubber stamps of your choice (Michaels)
Sanding sponges and polishing cloths
Newspaper
Baking soda
Old towel or washcloth


Here we go!  Cover your work space with newspaper.  It is nice to have a sink nearby just for easy access to water.  When I etch with aluminum I set up right next to my shop sink in the garage.  The sink itself is heavy plastic and meant for grungy work.  Fill one plastic container with fresh water, one with enough FC to cover your bracelet blank, and leave one empty.  You don’t need to fill the container with FC, just a couple inches in the bottom so that you can immerse the aluminum easily.  Set them up in a row--FC, plain water, then the empty container.

I have found that these Band Aid plastic containers are perfect for etching cuffs!
Left to right, FC, water, and empty container.  Baking soda ready to go!

Clean your bracelet blank using a sanding sponge or fine steel wool. Stamp or draw a pattern with Staze On ink or a Sharpie, let dry completely.  Cover the back of the bracelet blank with packing tape, leaving a long tail on either end.  Fold over a bit of tape on either end to act as “handles” so you can easily dip and lift the bracelet blank in and out of the FC.  Be sure the tape is flat and covers the back of the blank completely.  Use a pen or chopstick to burnish the tape to the back.  You do not want any FC getting under the blank!

Put on your rubber gloves. Hold the tape by either end and immerse the blank, stamped side UP, into the FC, covering completely.  Immediately lift it out of the FC, holding it over the container.  LET THE FIZZING BEGIN!!!  FC reacts instantly with aluminum.  The fizz is the production and release of harmless but kind of scary hydrogen gas.  You will smell it and the metal will actually get warm. I count to between 20-25 seconds in my head..  Basically I wait until the surface of the metal begins to really fizz and the metal gets warm. Immerse the aluminum in the container of clean water.  Lift out immediately, and immerse in the FC again, lifting out right away.  FIZZZZZZZ, count to 20 or o, then dunk in the clean water container.  I do this three or four times depending on the thickness of the aluminum, which will turn BLACK at this point.  Run your gloved finger over the design, you will feel it when it is etched enough.  FC will LITERALLY DISSOLVE ALUMINUM.  I learned this the hard way the first time I etched aluminum.  I left the blank in the FC like you would copper or brass (around 20 MINUTES) because I was too impatient to actually READ ABOUT THE PROCESS.  When I came back I pulled up the tape and THERE WAS NOTHING THERE.  Just a foamy pile of goo on the surface of the FC.  SMH.  Stupid. 

Here are a couple videos of the process. In the first video you will see that I dipped the blank a couple times in the FC to get the FIZZ started. I was using fresh FC and it took a few seconds to "bite" the metal and begin the process.


Anyway, at this point you will say to yourself, “What have I done?” because the aluminum will be a dull, deep black and look ruined.  FEAR NOT!  Place it in the empty plastic container and dump some baking soda on it to completely neutralize the FC.  Some fizzing will occur.  Rinse it in the sink under running water.  You have neutralized the FC on the metal with the baking soda, so it is now harmless and can go down the drain as you rinse. I keep a bristle scrub brush in my sink and use it to scrub the surface of the metal, the black will go away as you scrub.  You can also use a soft wet/dry sanding sponge here. You want all the black to be gone, and the etched surface to begin to shine. Rinse well, remove and discard the packing tape. You can also take your gloves off now.


Now for the REVEAL.  Dry the metal. Using a very fine grit sanding sponge, clean the surface of the blank.  The black is gone, and your stamped pattern will shine up beautifully. Anywhere the etchant touched will now be a matte misty grey.  Once you have revealed the etched pattern, you can then polish with a polishing cloth.  Bend the cuff using your handy dandy bracelet bender or a bracelet mandrel and you are DONE!!!  I use a steel bracelet bender from Gotta Get A Deal in my vise. Bends a cuff into the perfect oval shape in SECONDS. I love this thing.


Cool!!!  As you can see, I chose a wheat pattern stamp for this cuff.  TIP: I went over the stamped image with a fine line Sharpie, filling in any areas I wanted darker, or that I missed when I stamped the blank. 

Voila!

Now, you do not have to dispose of all of your FC every time you use it.  The container holding just FC can be closed and saved to use again and again. It is good for multiple etchings.  You will know when it is spent when it takes longer and longer to actually etch.  At that point I dump in some baking soda,then dump the mix into a plastic jug.  You do need to neutralize and dispose the water you used to dunk the bracelet in as you etched.  Add some baking soda and pour this into your storage/recycle jug with any other spent FC.  Seal the jug and keep in the garage until it’s full (which will take a long time unless you etch a million things a day).  When the jugs are full take to a recycling center that also accepts things like paint, oil, etc.

Now, I promised that I would give away the cuff that I created for this tutorial.  Okay, here’s the deal.  You can win this cuff by posting a comment here about the scariest technique you mastered in your artistic journey.  Did you learn how to use a torch even though you are terrified you will burn your house down?  Spend your last buck on a kiln because you JUST HAD TO LEARN HOW TO MAKE CERAMIC BEADS?  Whatever it is, post it here and I will use some sort of computer program to randomly pick a winner on FRIDAY, FEB 27th.  Oh, AND SHARE THIS BLOG POST, OKAY??? Thanks. And good luck.  And don’t be afraid of etching, or kilns, or torches, or anything that stands between you and your artistic dreams.  Read, research, and DO IT. Now, GO MAKE SOMETHING AMAZING!

Wednesday, February 18, 2015

Wire-wrapped double bail for pendants

Carol Dekle-Foss
Last week, I was able to finish my pendants and I wanted to share how I wire-wrap them with a double bail. I like using double bails because they help prevent larger pendants from turning around when worn. For the life of me, I cannot remember where I learned this. Probably a found video somewhere, most likely YouTube.

This is a simple technique that takes just a little bit of practice. I hope you find it helpful in your jewelry creations!


The below video shows how I do this with a side-drilled pendant but this process also works with a front-drilled pendant as well. It's a bit blurry in a few places. Duh, the camera cannot focus when things are so close up.


What you will need:

Pendant: The ones pictured are 30x40mm and the small one is 20x30mm

Wire: I use about 28" of 22 gauge soft wire. It's a bit easier to wrap the pendants with than 20 gauge and to me, it doesn't look as bulky. Although the smaller tree of life necklace in the right hand corner is 24 gauge. Also, I give my wire a bath of liver of sulfur first, and then clean off with a Pro Polish pad before starting the wire wrap process.

Tools: Wire-cutters, chain nose and round nose pliers.


First, put wire through hole about 2 1/2" out the other side. Then fold both wires over the top of the pendant, crossing each other, and twist together. Bend both wires perpendicular to the pendant and wrap them around the round nose pliers to make the loop. Then wrap both wires around the bottom of the loop a few times. Snip off the smaller wire with wire cutters, and then using chain nose pliers, squeeze wire in the back of pendant to hide. Continue to wrap longer wire around pendant holding tight as you go so it it nice and snug to the pendant. Wrap as far down as you would like and then start wrapping back up the pendant. Continue until you reach the top of the pendant and then cut the wire, hiding the end in the back. I then use the round nose pliers to position where I want the bail and separate loops with the chain nose pliers. To finish, I touch up with a Pro Polish pad. Whew! I think the video will help to show the process better.

Once you get the hang of it, it's a fairly easy and fun to do, plus it will give your pendants a simple, rustic feel.

Try it for yourself and if you have any questions please feel free to contact me!

Tuesday, February 17, 2015

Who Am I? By Karen McGovern

As I read Mary Jane Dodd's post from Valentine's Day, I realize it is the perfect prelude to today's post.  THANKS, MARY JANE!

I have been following a couple threads online, and found myself contributing comments to a post by an artist who was asking about finding her "artistic voice". She was worried about this, about creating a body of work that was reflective of who she is as an artist, and a body of work that would be recognized as "hers".  We've touched on this topic before here at LMAJ, but I figure any post that gets a flood of replies (over 60 in just a few hours) meant that it is a topic that many of us are very interested in.

We all have, on the tips of our tongues, artists whose work we instantly recognize on sight, whether the artist name is listed or not.  I just attended a fabulous art, jewelry and antique show over the past weekend and found myself zeroing in with laser precision on works instantly recognizable to me.  Oh, that's a Calder!  Tiffany!  Lalique! Iconic creations from famous jewelers and artists.

Calder, Tiffany and Lalique......sigh......

I'm no Lalique. But I do feel I have, after many years, found what I consider to be my "voice" artistically.  

What does that mean, and more importantly, how do we as artists get to this point? Hmmmmmm. Hard to explain, actually.

What does it mean to have a "body of work"?  Words like "cohesion" and "line" are often used when discussing jewelry of a particular artist. Artists that are well-known create works of a certain recognizable style.  You know a Susan Lenart Kazmer design on site (at least I do...).  Richard Salley is another artist I can pick out of a crowd of work. (AND, completely off topic, I just purchased my first Salley design and I am VIBRATING WITH EXCITEMENT and holding my breath continually until it arrives. EEEEP!)  

Richard Salley and it's MINE, MINE I TELL YOU!!!!! HAHAHAHA!

I read this quote from Cynthia Tinapple of Polymer Clay Daily's Studio Mojo Newsletter (thanks Ronna Sarvas Weltman for posting this). Cynthia makes a very important point here...."How would you describe your work and your intentions?  Can you say why you are obsessed with the colors, the patterns, the objects you choose to make? Thinking about the "why" of your work can be the first step toward getting your studio mojo in gear." This resonates with me, because we all, whether we know it or not, have a reason (or reasons) we create.  Initially, that reason may be as simple as creating just to see if we can. Early in my jewelry design journey, I created randomly, learning techniques and basic stuff. This is what we all do.  But, as we evolve and grow as artists, I believe that finding the "why" of your work will lead you directly to your "voice" or style.


I always called myself a schizophrenic artist. I don't like to create the same thing twice, and I am always trying new techniques.  But, this doesn't mean I have a random, unconnected body of work. Far from it.  BUT, early on, I worried about this just like you may be doing now. Was my work "cohesive" did I have what a gallery might consider a "line"? I was extremely envious of those artists I so admired that did have an obvious, recognizable style....until I wasn't.

For me, the moment I "clicked" creatively is when I really started creating according to the "why" of my work.  I create jewelry inspired by nature.  That is a simple, simple statement that a gazillion artists also give when asked what inspires them.  But, for me, it is the true reason I create.  And, I have hit on some key design elements that have become the underlying thread--the "melody" if you will--of my work.  And, without even really "realizing" it, I found that I did, in fact, have a story to tell, and a body of work that reflects this story. Figuring out why you create what you create, why a particular technique or material blows your skirt up or makes your hair stand on end will pretty much pave the way for you in your journey to find your voice.

A recent design of mine that reflects where I am at the moment, exploring
spirals and the continuous flow of nature and our world. 

To inject a bit of a giggle here...artists are often asked to create an "Artist Statement" for themselves. This is sometimes required when entering shows, etc. I find that writing an artist statement is EXTREMELY DIFFICULT and very frustrating.  How can you condense your entire journey as an artist into a few sentences? AND, many artist statements I read sound so FAKE to me and also seemed to be taken WAAAAAY too seriously. That's when I found the Artist Statement Generator. HA!!!!

This is my screensaver...for reals.

Moving on....

They say you find love when you stop looking for it. I believe the same thing applies here. Finding your style will be impossible if you over think it or try to force it. Take classes if you can afford it. Scour the Internet for videos and tutorials offered by artists you love.  READ, READ, READ.  There are SO MANY GREAT BLOGS AND WEBSITES that offer wonderful advice. Join an art/jewelry forum or groups online.  LMAJ is great, Creative Bead Chat is great, Aspiring Metalsmiths is GREAT. These are all found on Facebook and are filled with generous, wonderful artists that will answer your questions and welcome new artists with open virtual arms. AND, be aware that your style and voice will evolve and CHANGE over time. Embrace the process and the changes!  Who you are artistically today may be nothing like who you are in a few months or years.

AND, back to what Mary Jane touched on in her last post.  If you create from the heart, you cannot go wrong.  Make what YOU like, what makes YOU happy. If you can do this, without distracting yourself with outside influences or worries about "trends" or fear, you will create something that is truly reflective of who you are and the story you want to tell.  Don't rush it, don't obsess on it.  Don't take yourself too seriously. Respect yourself and your work. BE PATIENT. You will find yourself reaching for that one "thing" over and over, creating with a flow you didn't even know you had. You will find that each piece you create is another sentence or chapter in your story to tell.  You'll get there, I promise.  Now, go make something AMAZING!

Saturday, February 14, 2015

make with heart

mjd 2015 - offering bowl

as experimenters, we move from technique and medium searching for what fits, for what allows our imaginations, muses, brains and hands to come into harmony (do not read this as without challenge). 

this is good, this search keeps us honest to ourselves. and even when we find 'it', we continue to experiment. instead of throwing out a fisherman's net and trying many things, we narrow down. and narrowing down allows you to start digging. digging deeply so that your heart might sing.  

and this is very good. 

----------

there is nowhere else to go
there is no one else to be

you are home. 

there is no

treasure hunt
to find yourself -
you already are
an inextinguishable light.

learn to be
grow quiet
dig in

right here
right now.

know that all you need
to find inner peace

already exists within you.

----------

on this valentine's day - may you love yourself as much as you are loved. 


Wednesday, February 11, 2015

Needle Felting with Wool, Wire and Beads

My first class in needle felting was late 2013.
It was around my friends kitchen table with a talented artist Sara Renzulli of Sarafina Fiber Art.
We made ornaments for Christmas: a gnome, a snowman and a seal.

Fast forward to a year later, Sara has a brick and mortar store where she teaches workshops and sells her fibers (most of the business is online order fulfillment. Wow for technology!)
Insert me into a job helping with orders and inventory a year later in her shop, and you get a new person (me) that gets to put her experience to work, yet learn a ton of new stuff about wool.


At the shop, I have been shown how to use the carding machines to mix up special blends of fibers for projects. On my own time, I wanted to make up some custom colors for myself in larger batches (the smaller batch way is by using large wire bristle dog hair brushes - but meant for wool). And the photo above are some of my first color blends.


And right about the time when I am feeling comfortable with using the machines and wanting to take the next steps creatively, my friend Sasha told me about a cool "Fun a Day" project happening in Wilmington, DE where every day in February you create something small. Then on the First Friday in March, all the participants that signed up will show off their work, all 28 pieces, at the DCCA gallery.

You can check it out via Social Media with #defunaday.
Maybe there is a Fun A Day project in your area too?!


So for me - I finally have a reason to fiddle with needle felting with wire, wool, adding seed beads, and my using my ceramic work to pull it all together. 
Each day I am learning a bit about forms and color blending. 
And how to layer beads and secure them to the wool and wire forms in different ways.

Slowly I am feeling the pull of wanting to create again.
It's hard sometimes dealing with life and a bit of burnout.
I love having a job outside of my creative art business that allows me to tap into my creativity knowledge base without having the pressure on my creativity to pay the bills directly.
We'll see where this goes!

PS - I am also able to teach classes and workshops at Sarafina!
I've got a square stitch bracelet class coming up in March.
Super excited about teaching that one as I love the peace that comes from bead weaving.

Until next time...

Thursday, February 5, 2015

Bronze Clay: Workspace Sneak Peek

by Staci L. Smith

Today I just thought I would go over some stuff about working with bronze clay, and how I incorporate that into my work.
As you may know, I make jewelry, AND I also make most of my components, in both polymer clay and metal clay.

I started out years ago in silver clay, until the price skyrocketed, forcing me to try out the newer base metal clay.  I am very grateful for that drastic change in market, because I am soooo sold on the earthy base metals!

My favorite of which is Fast Fire bronze clay.  Copper clay is actually easier to work and more consistent in firings, but I love the look of the bronze best.  Fast fire bronze also doesn't shrink as much as copper, which is nice when you like to work big like me.

Since I do both polymer and metal clay, I use the same stamps and texture sheets for both.  I wasn't going to share tools in the beginning, but, I have so many favorites that it just made sense.  The best part is being able to use polymer to make molds of both metal clay and polymer beads that I like, so i can do them again.  I have also been carving my own texture sheets in polymer to use with both.


 some of my texture sheets in the background....my worksurface, stamps and molds

Before starting my metal clay, I clean them all really good with soap and water, and then coat them with oil or this easy spray I love from Cool Tools.  

http://www.cooltools.us/CoolSlip-Anti-Stick-Solution-p/nst-201.htm
I get no endorsement for this, I just love this stuff

I use many of the same tools I do for polymer- needle tool, shaping tools, roller.........everything needs to be coated in oil of some sort- including your hands- so the metal clay doesn't stick.


My set up is pretty basic, I have a cutting board (different one for each type of clay).  I work on that and once a piece is done shaping, I place it on the coffee mug warmer (I have two, and could use more at times).

I make my own slip and have a designated rinse cup full of distilled water as well.  These both come in handy for sealing small cracks and attaching pieces together.

 slip

 rinse cup

  coffee and dried pieces ready to be sanded

I try to sand over the slip dish, and then add distilled water to make it a consistency that I need. (and always wear a mask to sand)

After all this they go in the kiln to be fired in carbon.

Hope you enjoyed a little sneak peek into my studio.  

Wednesday, February 4, 2015

Marriage of Metals-Lamination inlay

Carol Dekle-Foss
The absolute best part about being a jewelry designer, for me, is creating from the heart. This is something very personal, and everyone does it in a different way. A few things I do to help me get into my creative center is meditate, listen to good music, create a positive space, and make myself a warm cup of tea.


Also, we are all unique in what we have to offer. What matters is finding OUR niche and what speaks to each of us and makes our heart beat a bit faster. What's the fun in emulating another's work and not speaking our own story? Sometimes we just have to play with different mediums and different techniques to figure out our calling.  It may take more time to develop our own style, but in the end the reward is... oh so sweet. 

Here is a technique that makes my heart sing. I hope you find it useful on your creative journey! 

Marriage of Metals-Lamination Inlay
Tutorial

A few months back I did a tutorial on a different type of Marriage of metals that you can find here. This technique is slightly different in that you are soldering a top metal layer and then raising the layer underneath.


Here are the steps:

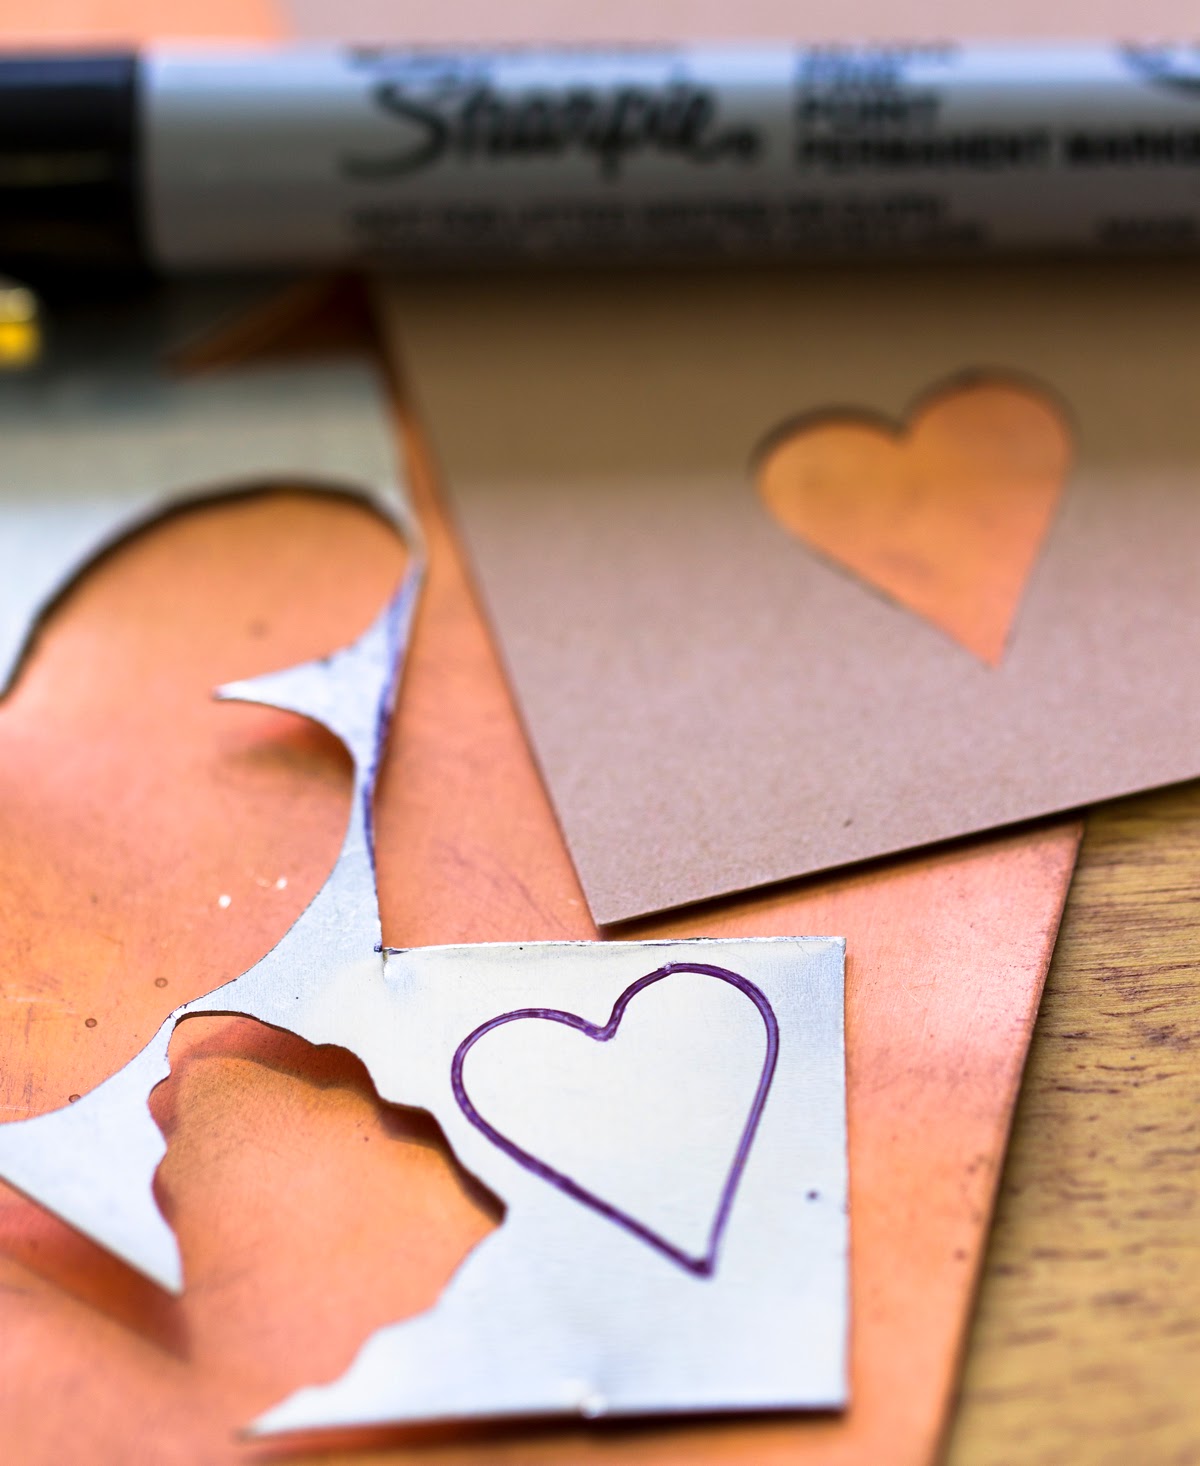
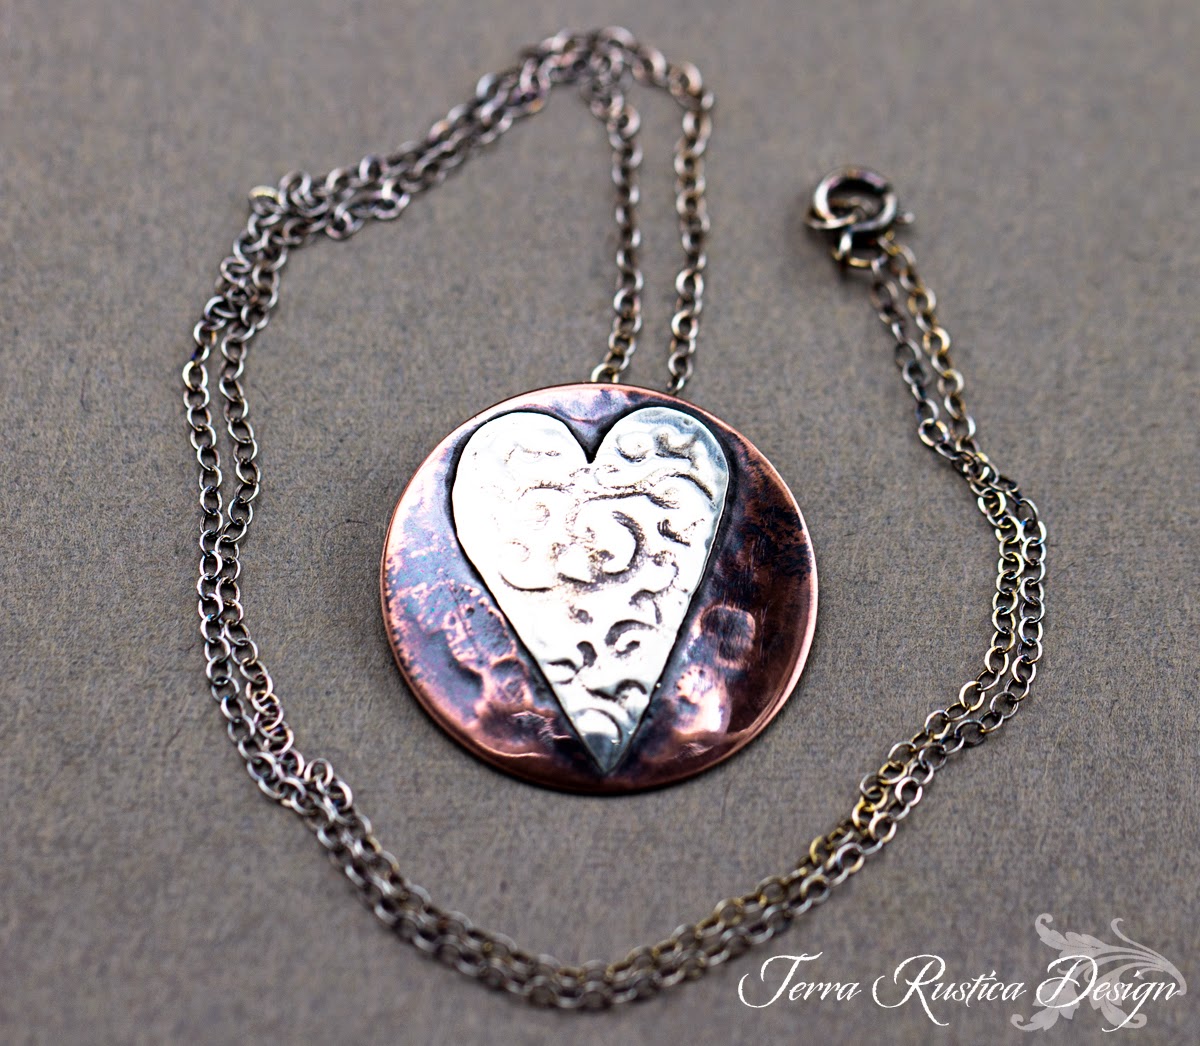
First, choose your metal. For this pendant, I used sterling silver and copper, both in 24g. Then draw your heart with a template or freehand using a permanent marker. Saw out your heart and file the edges.

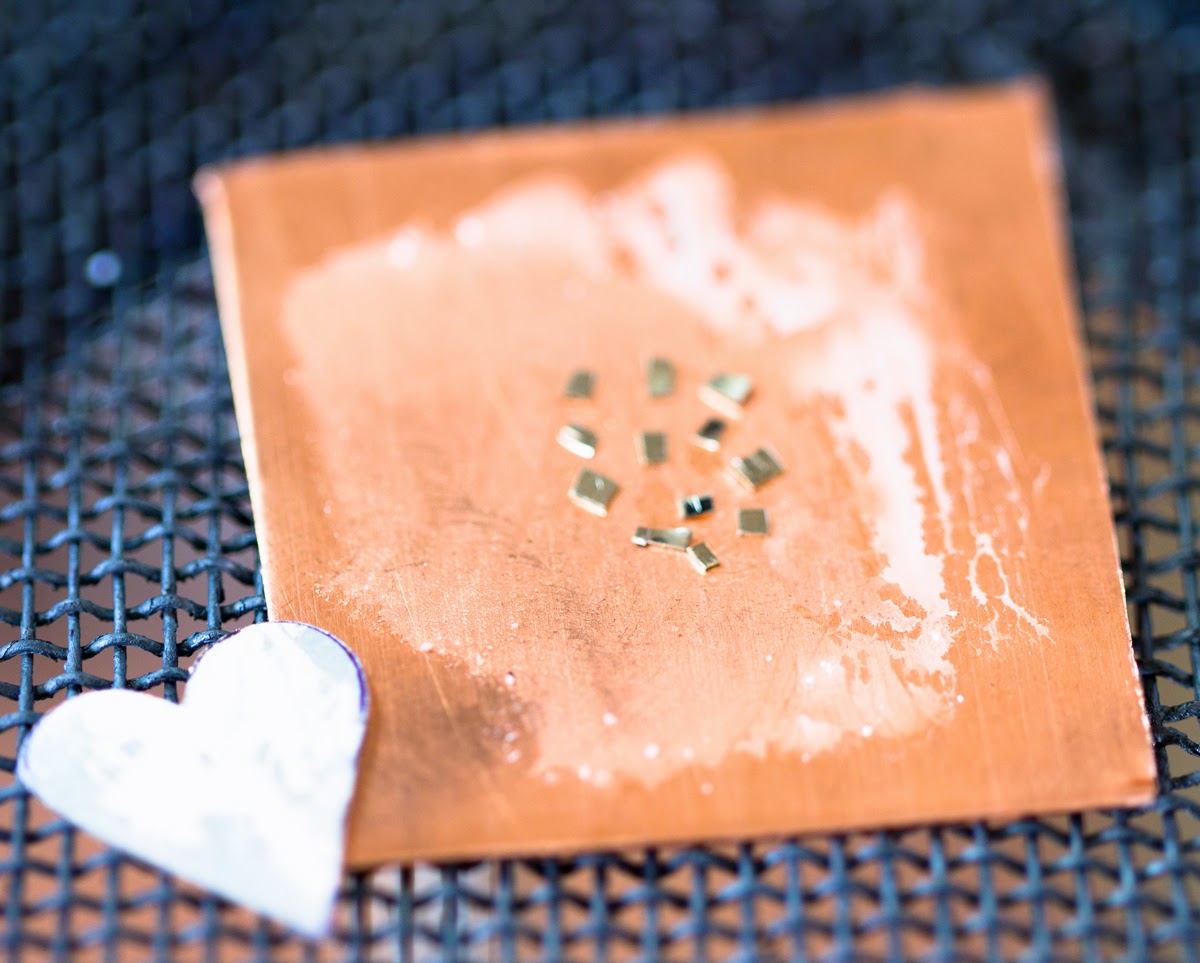
 Solder heart to copper.

I love that special moment when the solder flows. 

Next, I used a rolling mill, but if you don't have one you can skip this step and go straight to hammering.

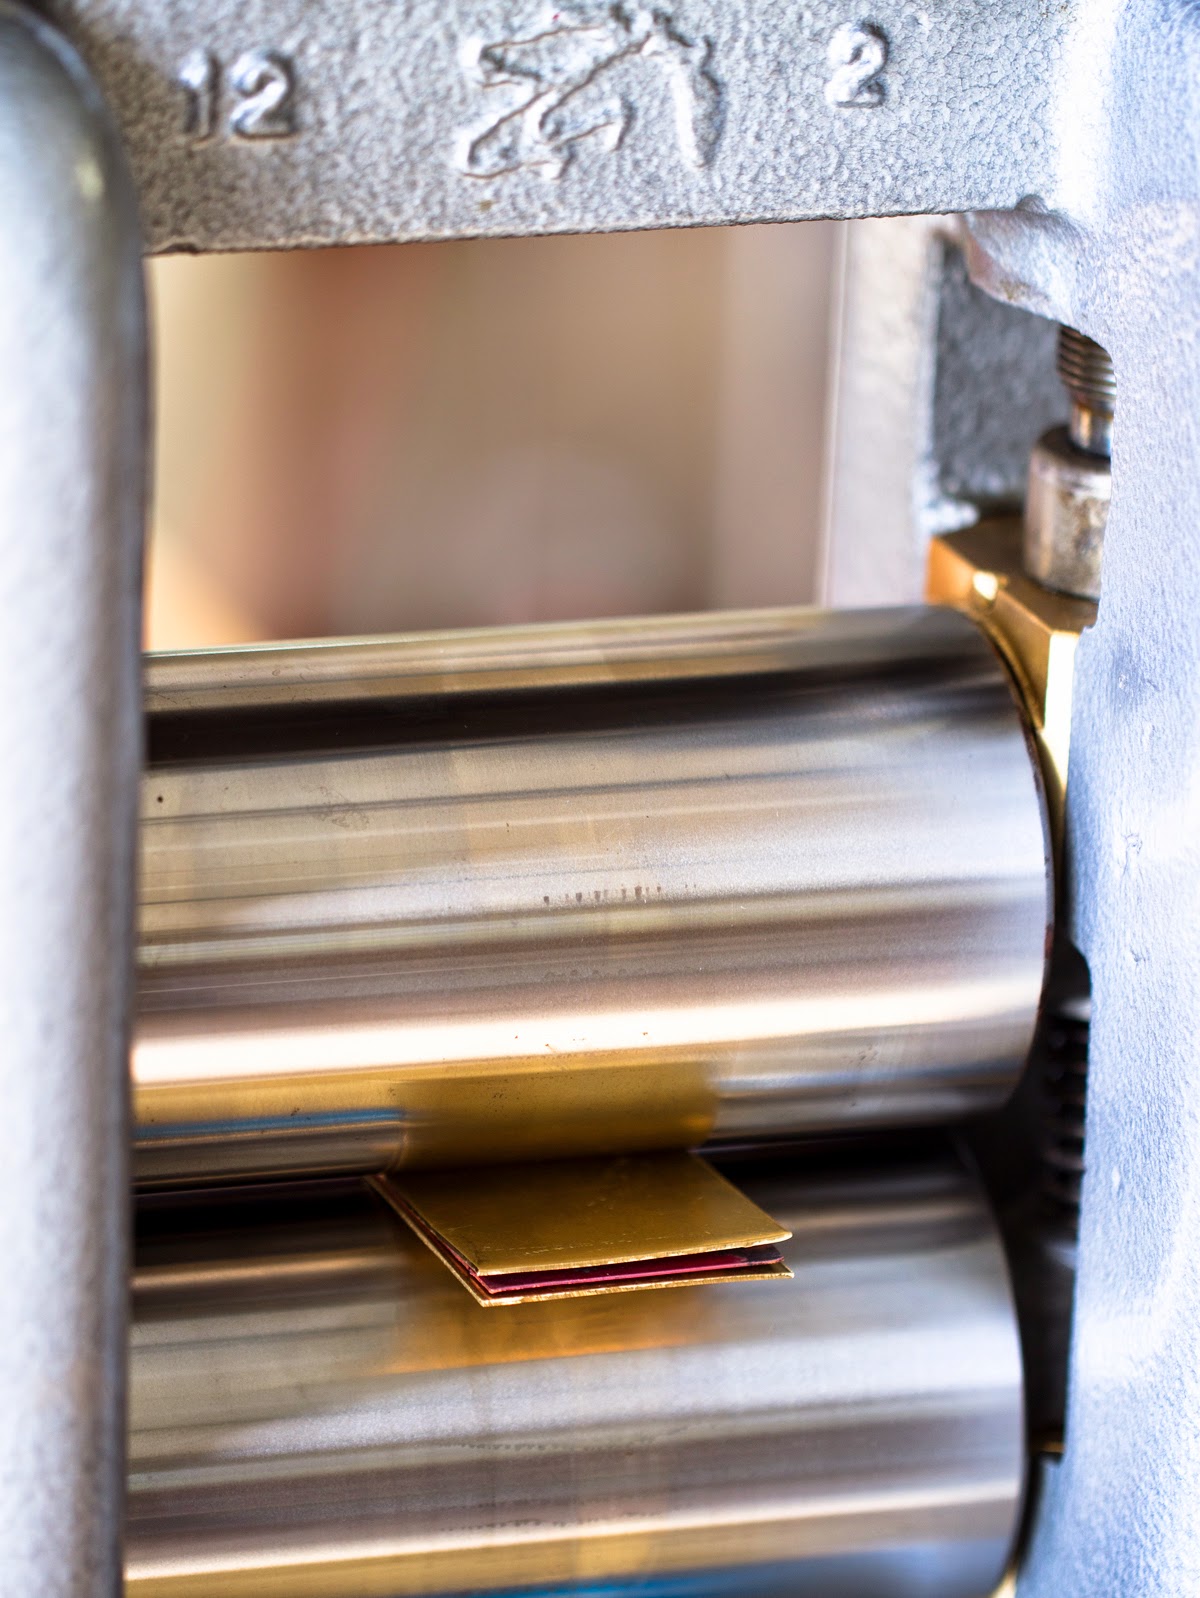
 I sandwiched the the heart between two brass sheets and rolled 3 times through the rolling mill. This is so I had less hammering to do in the next step.

 The metal has already started to laminate.

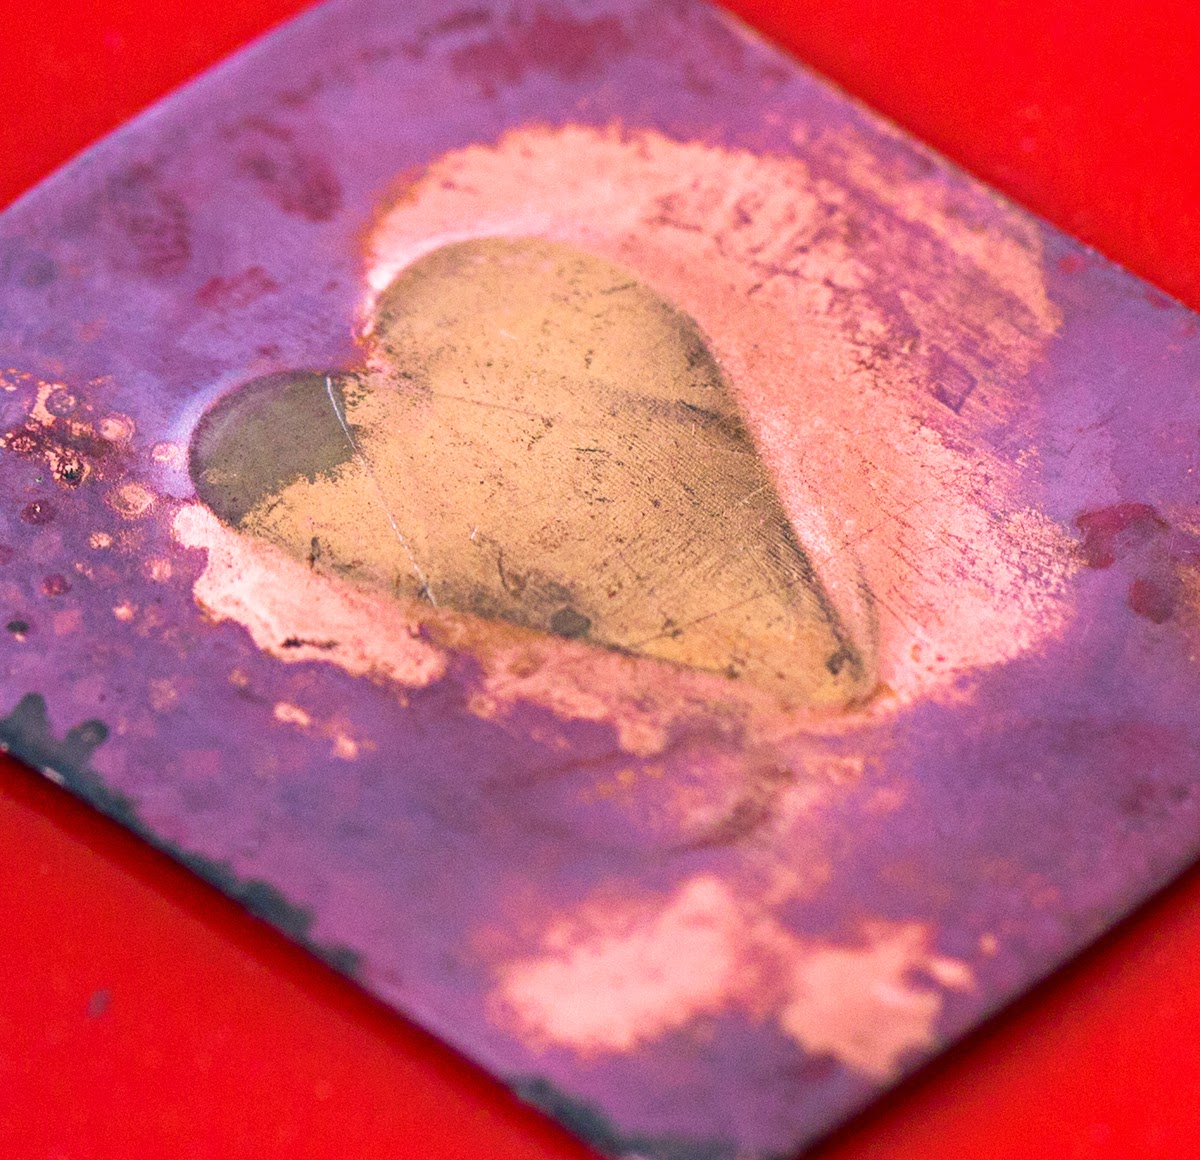
On the back you can see a heart shape.

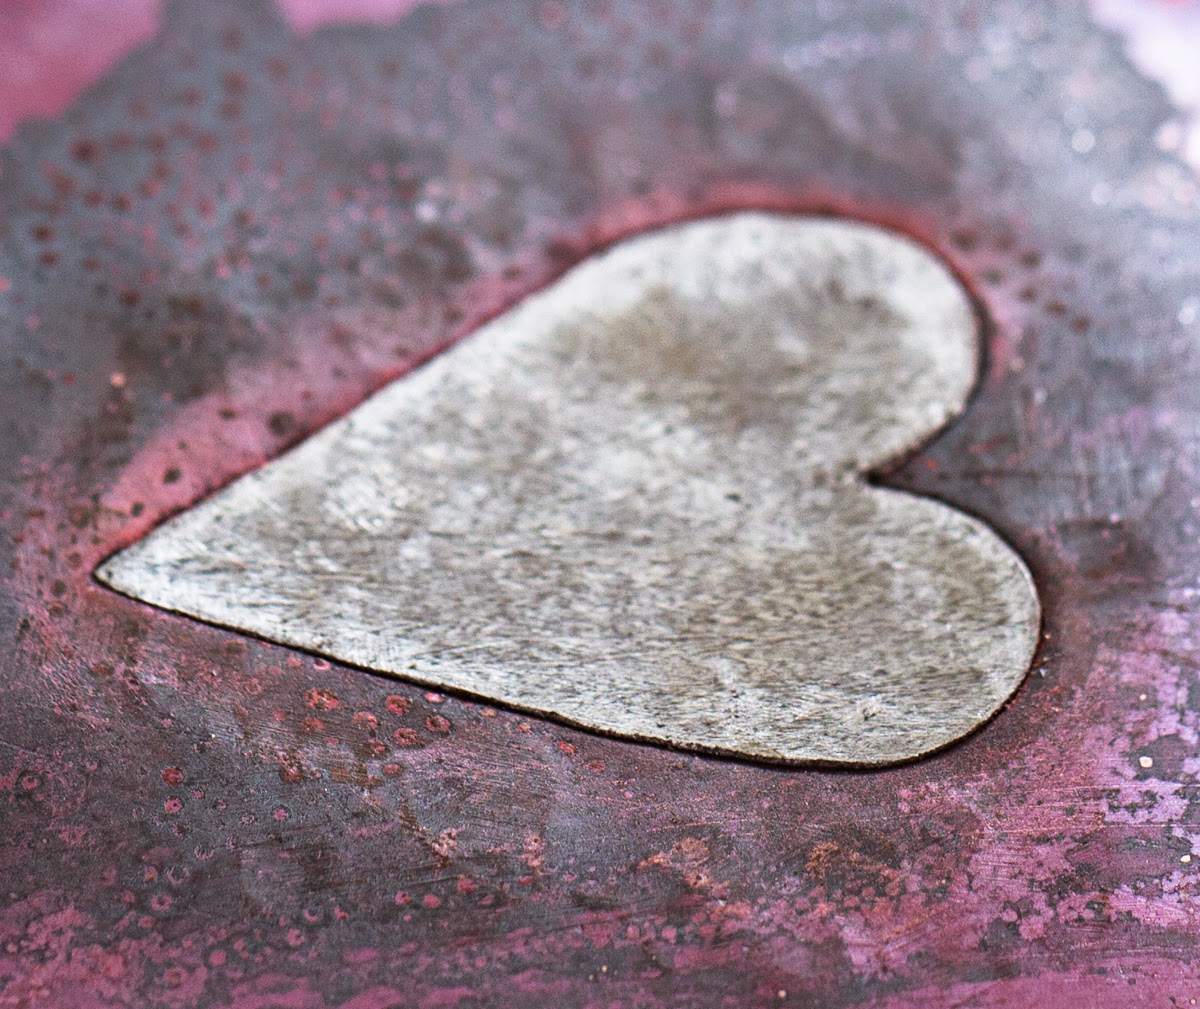
I then used the ball-peen side of a chasing hammer and hammered the BACK side, where the outline of the heart was.

 Here is the back showing the hammer marks.

Front side.

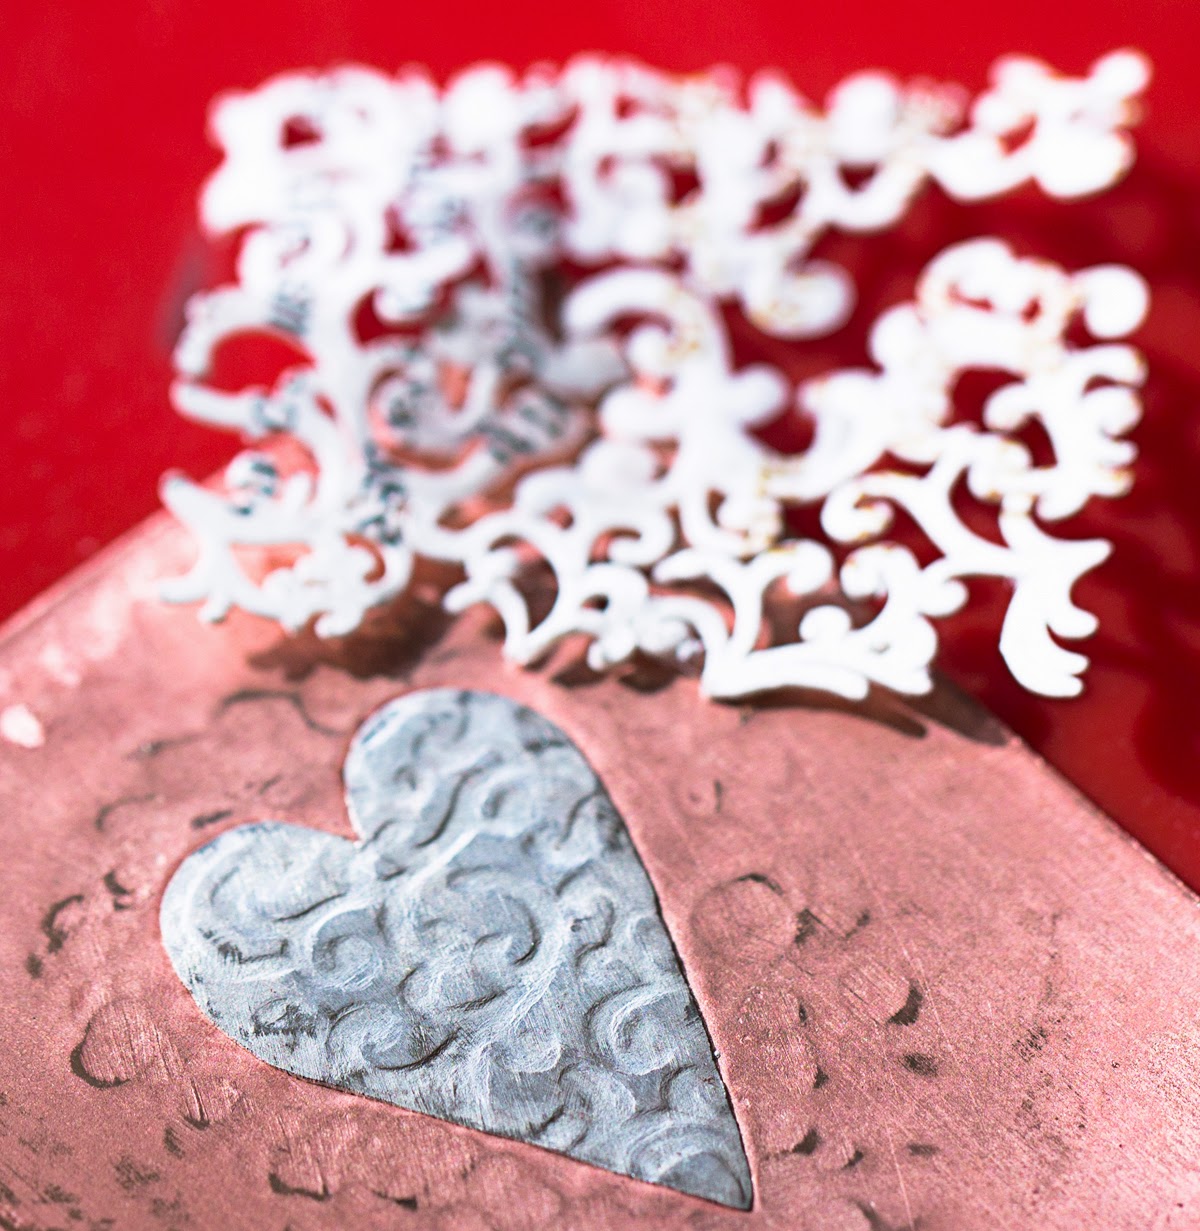
I then roll printed a pattern cut from my Silhouette Cameo.

 Cut out a circle pattern.

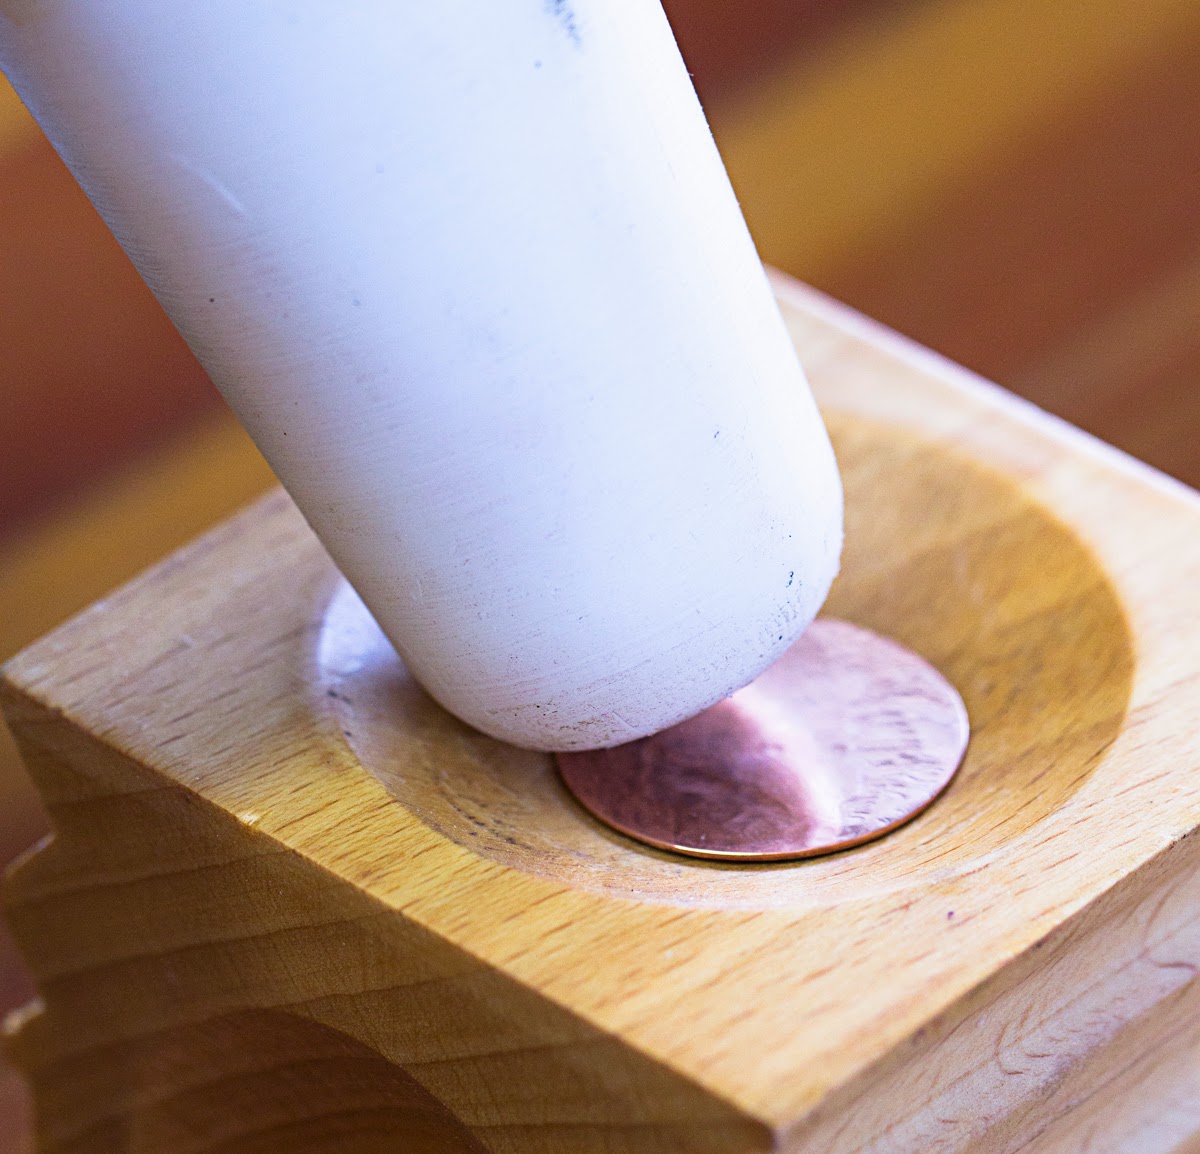
Slightly domed the disk.

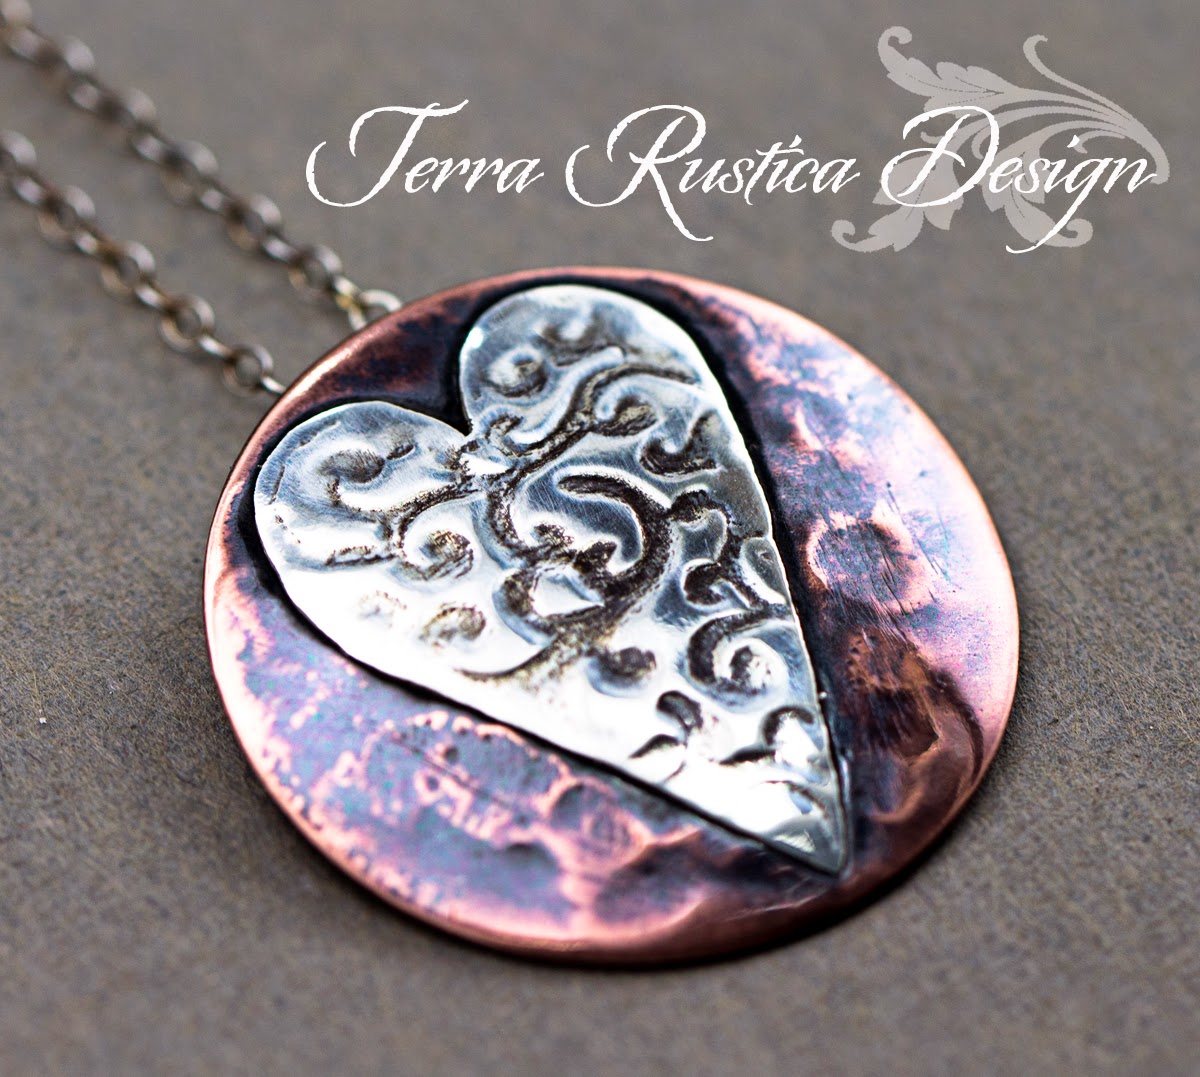
Soldered a copper bail to the back, and finished the pendant and chain in a bath of liver of sulfur.

Now for the lucky winner of THIS pendant.

First of all, thank you all so much for your very kind words. It means a lot to me to be able to share with you what I create and also to be part of such a talented group of ladies.

Congratulations Kathy Cazes!!!! Please contact me here with your mailing information.

Thank you for reading!