Showing posts with label . love my art jewelry. Show all posts

Friday, December 4, 2015

8 Tips to Improve Your Jewelry Making Skills

by Sherri Stokey

Perhaps I should clarify:  even though I've titled this piece 8 Tips to Improve Your Jewelry Making Skills, please don't stop reading if you don't make jewelry.  Most of these tips (if not all) can apply to other crafts as well.  Either way, I've put a lot of thought into this article and since you're already here anyway, you might as well finish reading it.  Plus it's good manners.  If you get to the end and feel I've wasted your time or you don't agree with me on one point or another, you can always leave a comment and give me a piece of your mind.  With that out of the way, let's get to the list.  


1.  Practice!  Although we all like to think we are the 1% who can pick up something and do it perfectly the first time, it just doesn't work that way.  If you ask your most admired artists, they will tell you that they've come a long way and devoted a lot of hours to perfecting their craft.  Which leads us to #2...


2.  Strive for perfection.   This one might not apply to every art equally, but in some mediums, like micro macrame, neatness counts.  It's all about keeping the knots even with the same tension, crisp corners and straight lines.  In other mediums it might be a matter of getting a smooth solder or a perfectly coiled wire.  Mediocre isn't good enough - strive to do the best work you can.  You won't get this one without #1 (practice).  Fact.


3.  Play!  #1 and #2 make it sound like making jewelry is drudgery and it couldn't be further from the truth.  Allow yourself time to play around in whatever way is fun for you.  Sometimes I like to goof around with random knotting just to see what develops and sometimes I like to try the strangest color combination I can dream up.  Just for fun.


4.  Take a class.  I had never been able to take a class until last year, and I thought I'd done okay for myself with the self-teaching bit.  And I had.  But when I had a chance to take a class I was really excited by the whole experience.  There's just no substitute for learning from someone who really knows what he or she is doing.  I picked up some great tips and got a fresh infusion of enthusiasm for possibilities I hadn't considered.  
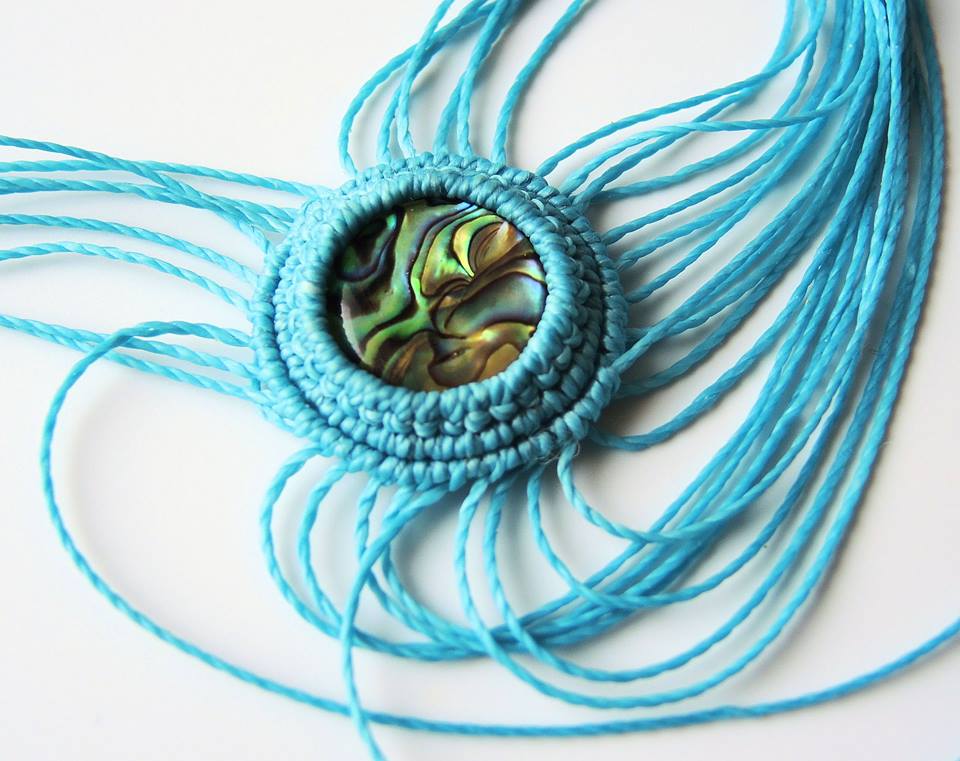

Even if you live in the middle of nowhere like me, with no access to local bead shops or experts, there are online classes available. Although a live class is nice so you can interact with the instructor and other students, online classes have some strong points of their own: you can pause them, replay portions and tailor the experience to your own schedule without disrupting other students.  Whether live or recorded, classes offer you an opportunity to grow and develop your skills.


5.  Network.  Find a local group of like-minded enthusiasts or join an online community.  It's fun!  I belong to several groups on Facebook and I really enjoy them.  I love to see the different styles of  artists from all over the world. Plus, having a group of friends who have the same interests can be helpful if you get stuck.  Usually there's someone  who has faced the same issue you're experiencing , or at least someone who can offer some creative solutions.  It's also a great way to find inspiration, which leads to #6...


6.  Look for inspiration.  Whether you find inspiration by taking a stroll through the park or a hike in the mountains or a trip to the zoo, or something more sedentary like scouring the Internet, inspiration is there and free for the taking.  Clear your mind and take a fresh look at everyday objects.  Think in terms of texture or color or lines, then try to replicate even one part of that in the medium of your choice.


7.  Experiment.  Don't be afraid to fail.  Try something different - if you usually work with polymer clay, try your hand at micro macrame.  If you are a knotter, pick up a bead weaving tutorial and give it a go.  Try torch fired enameling (make sure the blinds are out of the way first and don't ask me how I know that).  The point is to step outside your comfort zone, color outside the lines.  Sometimes when you do that, it blurs where you thought your boundaries were and opens the door to some amazing things!


8.  Find your style.   It has taken me a long time to put my finger on what makes one piece fantastic and another mediocre, even when the two are very similar and I've finally boiled it down to one thing:  authenticity.  The whole point of art is to express yourself.  It's great to learn from a class or follow someone's pattern, but in the end, you need to find a way to make it yours if you want to take your art to the next level.  Find your voice and then sing like nobody's listening (cliche, cliche, cliche - but accurate).  Do you like no one else can!


Thursday, November 19, 2015

Art is a Blessing: Polymer Play and Mixed Media Musings

by Staci Louise Smith


Art is such a blessing.  I think someday's I take creativity and that I get to do this for a living for granted.  Art is such a huge part of who I am.  I see art in almost anything.  I take in colors, and textures and composition no matter what I look at.  It leaks into all parts of my life, and for that, I am grateful!

It's that time of year, where I have spent the entire year making beads and jewelry.  I try to allow myself some playtime around the holidays.  It allows time to make gifts for people and get out some of my other art supplies.

One of the blessings, is that my children get to be creative too.  they learn the fun of play, and the business of selling their work too.

To start off the season of creative playtime, Julia and I worked on some polymer pendants for the Hereford Bazaar.  It's a craft show her school puts on.  All three of my kids made stuff for it and I got them a "real" crafter table there!  

It was a lot of fun to prep for a show that was NOT my own.

Now, Julia (age 11) is not known for her organizational skills, and she brought me these bags of polymer clay.  They contained every color of the rainbow and then some.  So I said, how about we mix them up and swirl them, and then she could use that as a base to stamp her designs onto!  


We had a blast putting odd colors together and running them through the pasta machine and finding the  surprise patterns that arose.  She is a color junkie, so she was in rainbow heaven!


After that was done, she stamped them and cut out the circles to add to her bezels.


I had so much fun with the kids in the studio.

Collin (9) made little owls and got to use alcohol inks for the first time.  I showed him how to make these easy little "squish" owls and he picked it right up!


My oldest, Aiden (14) makes jewelry.  
Here they were at the show- they all did really good and had a blast, and I must say, IT WAS THE MOST FUN SHOW I DID ALL YEAR!

Here they all are, and yes, I am a proud mama!

Here are Collin's key chains and bracelets he made

Here is Julia's set up, with magnets and necklaces in polymer


 And here is Aiden's work.  He loves working in gemstones and beads, but has started doing more wire work and polymer too


So, that was a great week to get the creative juices flowing.

As you may know, I have dabbled in mixed media before.  But I have wanted to add more of my polymer into the mix.  I have had ideas, but no time to try them.  

So finally I gave myself a week to play.  It's almost up, and I am almost done these piece.  They are finished, all but the three in the lower right corner.  I hope to make a few more today and finish these, and then its back to business for a week.


I love being able to pull from all the different media I have worked in to create art.  It is such a blessing to my soul to be able to freely make what is in my head and heart.  It is also nice to know that I get to use all those things I have learned through the years, a million different ways.  I REALLY encourage you to always keep learning new techniques and mediums.  You never know when the skills you learn will pop back up!  

So be blessed and create art!  Never stop learning and playing.  It's all part of the process.

Wednesday, November 18, 2015

Less is More

by MaryAnn Carroll

I stole that slogan from somewhere, but I am pretty sure it isn't owned by one particular person. Anyhow, it is something I have made myself remember for many years now. I tend to have a habit of overdoing sometimes. After years of practice I have gotten much better about recognizing when I am heading down a busy road the wrong way.... Put on the brakes, turn around and head back to some tranquil spot that existed before you took that path.

I have had such crazy stuff happen to me in life. Not unlike some others, but it often seems like I am in the minority with the things that other people fear will happen has happened. Sometimes people wonder how I can do it and how I haven't dropped dead yet. I guess the answer is acceptance of what I cannot control and also to simplify what I can. Seems deep, right.

Well, lucky for you I am not going to get too deep right now (that usually comes after a glass of wine or two). I will stay focused on what I do outside of the chaos. That is beadmaking and jewelry. I say try because I always seem to have roadblocks thrown in the way, but when I find myself truly back into it, it is so enjoyable.

Just recently, I have gently removed those roadblocks that were piling and quietly tip toed back down the road of tranquility. Maybe I will be able to hang out there for awhile if all goes well.

LESS IS MORE...

I decided to redo my website that has been hurting for a couple of years. In the past, I used GoDaddy. It was a great experience for me because it was not too easy to learn. I had to teach myself many things about codes, javascript, etc. It all seemed so darn overwhelming at the time.


This time around, I wanted to keep it simple. I don't know if it is as complicated as it was a few years back, but I needed a change. I decided to check out other website builder services. I looked up reviews knowing that those may not always be accurate, but went for web.com since it had a high ranking. I fiddled away and entire day with it to discover that the cheap price was going to be ridiculously I found web.com. Given the name, I rationalized that it would be easy. It was, but when I went to publish I learned that my $4.95 a month was going to become $24.95 a month. I chalked that one up to more experience.


I cannot remember why I tried wix.com, but I an assure you that I am so happy that I did. The website builder is incredibly user friendly, For $8.95 a month (paid in full), I got everything I needed and more. I think one of the biggest things that I like is that there are free apps. Etsy is one of those. Yay!! You can literally add your Etsy shop to make it look like part of the website. If you read this blog often, you might remember the post about returning to Etsy.


It might not be the prettiest way to sell online, but it sure as heck is convenient.

So, for those of you who are hoping to simplify your own life, but you would also like to promote your shops, etc. I am going to give a confident recommendation for wix.com.


My site still needs some work, but for what it is worth, here it is.


My link was done using the jewelry template. Also, you can fix the site to work with mobile phones. I haven't gotten that far yet, but that looks pretty simple too!

Good luck!

WORD OF CAUTION: Once you choose your template, you are "kind of" stuck with it.


Tuesday, October 27, 2015

Facebook and Twitter and Paypal, OH MY! The Rabbit Hole that is the InterWebs by Karen McGovern

It's all MaryAnn Carroll's fault.

It all started with an *innocent* post by MaryAnn to the artists of  LMAJ discussing linking Facebook pages to Twitter, so that every post made to your Facebook also appears on your Twitter page. Great idea....That was Friday....

48 hours later I emerge, bleary-eyed and brain dead, hands cramped from continuous clicking and clacking on my laptop, lost in the bowels of social media rules, regulations, hacks and shortcuts.

What MaryAnn didn't realize is that once I get started on something web-wise, I do not stop until I have figured it out or hit a virtual brick wall.

Here's the deal. MaryAnn's suggestion (and a good one, I might add...) lead to more ideas and questions regarding how this all works. I have, like many artists on Facebook, more than one page. I have my personal page under my name, I have my art page under my business name (Beadkeepers). I also am in charge of the Facebook page for the organization I work for (Rare Species Conservatory Foundation). That's three pages. I also have three Twitter accounts, one for me, one for Beadkeepers and one for RSCF. Sure, it would be FABULOUS if posts to Facebook (which I use and post to almost everyday) could magically appear at the same time on the corresponding Twitter pages. I didn't even know you could do that BECAUSE I AM OLD AND DON'T GET THE TWITTER MUCH.

BUT, I do understand the value of social media when it comes to living in the 21st century, and if you have any presence online it's best to learn and UNDERSTAND as much of this stuff as possible. It's never a bad idea to expand your online toolkit if that is where you do the bulk of your communications, and frankly, it's UNAVOIDABLE. So let's USE this stuff, right????

First, I consulted the mighty oracle...Google. I learned much, and I am here to share...

Linking Facebook to Twitter is relatively easy once you stumble blindly around the Internet, which provides a solid 75% of the info you need. Lucky for you, I did all the stumbling. This link between pages and sites is great to promote your business or organization and is a huge time saver. No more posting one place, then having to start over someplace else!

Here's what you do. I am going to explain this as if you have more than one page on both Twitter and Facebook that you want to link because that is a bit tricky....First, log in to one of your Twitter accounts. Then, open a new tab and go to www.facebook.com/twitter and follow the prompts to open your Facebook page. 


Click the link allowing access from Facebook to Twitter (you need to do this for every page you link). 


You should then see a page with your personal page at the top and all your other pages listed below. Here is mine...


Next to each of your Facebook pages is a button to click that will link that page to the openTwitter account. Click the page you want to link to that account and hit Save Changes. VIOLA! You are linked!

Now, to link another page to another Twitter account, go back to Twitter, SIGN OUT and then SIGN IN to your other page. Go back to the facebook.com/twitter page and REFRESH. Find whatever page you want to link to that Twitter page, hit the Link to Twitter button and the new Twitter page will be listed as linked. Hit Save Changes and VIOLA! You have just linked two different Facebook pages (that you administer) to two different Twitter accounts (that you administer). Now whatever you post to these pages on Facebook will instantly also post to the correct Twitter page as well. THAT ONLY TOOK ME 12 HOURS TO FIGURE OUT. I'm sure a 10 year old child could have done it while I was in the bathroom. ANYWAY....It's a cool feature that can boost your presence on the 'Web and boost your sales as well.

Speaking of sales...you guys know that you can link your shops directly to your Facebook page, right? Under your cover photo on your business page should be a few tabs. As you can see on mine, I have a Shop Now button. Before it was Shop Now it read Call to Action. To link your shop to Facebook, click the Call to Action and a drop down menu appears. Select the Shop Now option, then put your direct web address in the box below for your Etsy shop, website, whatever. Since RSCF is a 501(c) 3 charitable organization, we have the option for a Donate Now button under Call to Action. I linked this to our PayPal donations account. This is super spectacular for us since we have over 15,000 followers  now and we have already gotten donations coming in since I created the button on Friday! 


In figuring out how to link the Donate Now button directly to PayPal, I also discovered something else. I figured out how to create a link in PayPal you can put in a post to SELL DIRECTLY FROM FACEBOOK USING PAYPAL ONLY. No Shopify, no middleman (other than PayPal) no FEES other than PayPal. I have to do a bit more research on this--it's so unbelievably easy it must have a catch somewhere. I've been discussing it with some webby folks and no one seems to have a 100% clear answer on Facebook's policies for selling from your page. Some say it's a no-no, others point out that selling through Facebook/Shopify is...well...SELLING, so what's the problem? I'm sure it has to do with Facebook wanting their cut somehow....Until I do some more digging I'm going to keep this nugget of info to myself. BUT I WANT TO TELL EVERYONE!!! Maybe next time....don't want to get anyone in trouble with the FACEBOOK POLICE. I'll keep you posted.....


In the meantime, I'll close with a recent design I created that is perfect for the season. An AMAZING carved labradorite skull set in sterling silver with a steel flower, brass bee, cast sterling silver twigs and a bronze dogwood flower. I created this in honor of Dia De los Muertos, or Day of the Dead. This wonderful holiday is celebrated on November 1st and 2nd. The traditionally Mexican holiday is a celebration and remembrance of those who have passed on, and feature elaborately decorated skulls called Sugar Skulls. I have created many sugar skull designs, but this by far is my favorite and my first carved gemstone skull. The labradorite is ELECTRIC! 


I hope everyone has a safe and happy Halloween (if you celebrate) or a wonderful and heartfelt Dia De los Muertos. 

Now, GO MAKE SOMETHING AMAZING!

Friday, September 25, 2015

by Staci Louise Smith

I have been wanting to do some posts like this for awhile, but like always, busy busy busy!  

I have a bunch of Sugar Skull focals in the shop, as well as some other focals similar to the sugar skulls, and I wanted to give you guys some idea of what you can do with them. 


I had a few laid out on my desk, as I am prepping for a show this weekend, not sure what to do with them.  

At first I wanted to just add chain and a dangle and keep them super simple.  But it was too simple.............so I planned to add charms to the chain.  I wasn't sure how much to do charm wise, and was sort of thinking they needed chunky charms.
I hadn't finished figuring out that part, when Linda Landig posted a necklace she had made with one of my old bronze skulls, 
(you can purchase Linda's necklace here

and seeing her little dangles sealed the deal for me.  That is what my plain old necklace needed.  Just some simple dangles.  It really captures the Dia de los Muertos feel I think.

So I added my double dangly charms (flower beads by Lisa Peters Art- they were the perfect match!!!)
And I added my chain, and picked out charms to accent the colors in my skull, and voila!  I love the results!


(ceramic stars by Starry Road Studio)

So here are my tips when doing a charm style necklace- not quite a tutorial, but this should help if you tend to struggle with them.

1.  pick out way more stones and beads in a variety of sizes then you will use
2.  lay them out, spacing out larger beads, and filling in the spaces between them with smaller beads
3.  when you use a cable chain, like this one, only hang charms on EVERY OTHER LINK so they lay properly.  the links alternate directions and your charms won't hang right otherwise.  Also, be sure to keep the chain from turning.  I pick it up and make sure the chain is laying correctly so the charms are always added to the bottom of the link
4.  skip a few "hangable" links for each big piece.  I like to hold the piece up to my neck and look at it each time I add a bead to make sure they hang right
5.  Fill the links you skipped with tiny beads to create movement and fill the space without them bumping into the other beads causing them to lay inccorectly.
6.  Try to use beads of a consistent thickness.  if you use beads that are tooooo round they will stick out when you wear it and roll around.
And there you have it.  A simple necklace that is not too plain, not too much!  I haven't taken this one off yet and I cannot wait to design the others on my table.

Remember, you too can make some "charming" necklaces using the components in my shop.  Lots of sugar skulls left.  I love taking the form of a skull and making it pretty.  So fun!

Friday, August 28, 2015

Just a little bit about us.......

by Staci Louise Smith

I just got back from Bead Fest, where I was both vending and teaching.  If you want to read about the fun trip from a behind the scenes perspective, you can check out my personal blog here


There is something really energizing about being around other creative people.  Bead Fest, as I am sure other bead shows and guilds are too, is just buzzing with energy.  Everyone is happy, and friendly, and you can stop just about anyone to talk about what they made in class or what or who they are wearing!  

While I was there I met a lot of new people, and directed many of them to this site.  So, I just wanted to take a minute to talk about our little creative group here.  Love my Art Jewelry is made up of a variety of artists from many different backgrounds.  We try to share what we have learned, and hopefully save you some of the trial and error we have all inevitably experienced.  

Did you know we have a great tab at the top of the page for "tutorials"?  Here you will find a TON of information on wire working, soldering, tools, making clasps, resin, polishing, antiquing, metal clay, making molds and much much more.  


If you search the blog you can find things about applying to juried shows, outdoor show set ups and tips, and marketing information.

You can also click on the "shop" tab to find links to all of our shops.  There you will find tutorials for purchase, jewelry, beads and other supplies.

Are you interested in becoming a guest blogger on our blog?  check out the "guest" tab to see how.  We would love to "meet" you and see what you have to share!

Anyhow, I hope you enjoy the blog and find a little community here that supports you and helps you to learn and grow !!!!!

Happy Creating!!!!