Thursday, February 28, 2013

BEADS beads and More Beads

by Staci L. Smith

I am still up to my elbows in beads, but at least, they are all done now!  I am finally ready for the bead show.  It's really a lot of prep to re-stock inventory at the beginning of the year.  Once I have a full inventory for Berks, the rest of the year I can just do small batches as needed, but this, well, this was a HUGE undertaking.
 
Each metal clay bead is hand formed, or molded, or stamped and cut out, dried, sanded, fired, cleaned, tumbled, patinated, sealed, waxed, and has the holes re-cleaned.
 
Each polymer bead is hand formed, fired, painted, painted, painted painted, (yes, some have up to 5 layers to get the effects I like) and sealed.  The painting is very labor intensive!!!!
 
The last of the prep is pricing, and I will be finishing that up this morning.  It is my least favorite part.
 
I always do a mock up of what my table will look like as I prep, so I know where I need to fill in as I make beads.  Here she is, all ready to get packed up.  I leave tomorrow for the show.
 
You can compare where it was a week ago, to where it is today.  Here is last weeks post http://www.lovemyartjewelry.blogspot.com/2013/02/the-bead-show.html
 
Here is the whole display, complete with jewerly samples and all.
 
Here are some close up shots of the trays of beads I will be offering.  After the show there will be a massive etsy update! 


Thanks for letting me share my progress.  I promise to post about something other then making beads next post.
 
I think I actually feel ready for this show.  Which is odd for me, there is usually a whole list of things I feel I need to do that never get completed. 
 
Do you ever feel completely ready before a show? 

Wednesday, February 27, 2013

Wired


I can't add much to the discussion about wire for headpins and other handmade jewelry components.  The wire I use is cloisonné wire strip that I order from Hauser and Miller and then mill down to be thinner and taller than the original.  Wire is so prevalently used in jewelry design that I thought some more information might be helpful.

This is an informative post about wire shapes and sizes for use in jewelry making. It was written by
Tammy Powley. You can find the original article here:
http://jewelrymaking.about.com/cs/wire/a/082403.htm

One of the most often asked questions by wire workers, especially those new to wire jewelry making, is what type of wire do I use for a piece of jewelry? While I feel that the choice of wire is a personal preference for most jewelry makers and much of the decision is also connected to the type of jewelry you are making, there are a few general rules of thumb that you can follow when first starting out. Then, as you start to work with wire, feel free to experiment because these rules are often made to be broken.

Wire Hardness:
Wire comes in three different forms of hardness: dead soft, half-hard, and full-hard. Below are some basic definitions for each type:

Dead Soft: As the term indicates, this wire is very soft and can be bent with your hands. It is often used for wire-sculpted jewelry.

Half-Hard: It is harder than dead soft wire because it has been pulled through a draw plate (a tool with holes in it the same size and shape of the wire).

Full-Hard:This wire is harder than half-hard wire because it has been pulled through a draw plate more times than half-hard wire.

http://www.etsy.com/shop/Karismabykarajewelry?ref=search_shop_redirect


Wire Shapes:
Wire comes in a variety of shapes such as round, square, and half-round. In most (though not all) of the wire projects I post on this site. I use round wire, and it tends to be the most versatile. Artists who prefer to make wire wrapped style jewelry usually use a lot of square and half-round wire. They’ll use the half-round to wrap around the square when attaching the wires together.

Wire Sizes:
In the US, the size or thickness of wire is measured in gauge (also spelled gage) while in most European countries they measure it in millimeters. Below is a list of the different sizes and what I normally use each size for along with some other helpful information. The Rio Grande gems and findings catalog provides measurements in gauge, inches, and millimeters, and I used it for some of the following information.

26 and 24 gauge (.40mm - .50mm) – This size is good for beads that have small holes in them such as pearls. I usually buy this in half-hard, and I like to use if to make pearl and wire bracelets by creating a bead and wire chain. In an ounce of 26 gauge wire there is about 76 feet and in 24 gauge there is about 48 feet of wire.

22 and 21 gauge (.65mm - .71mm) – I use these sizes a lot, though not many vendors seem to carry 21 gauge. These are both very versatile sizes because they are pretty thick but most beads (like crystals and stone beads) can fit on them. I buy this normally in dead soft, and I use these sizes to make bead and wire chains and also for a variety of jewelry findings, which I often make like ear wires or head pins. I sometimes make clasps with these sizes as well but only if the piece isn’t too heavy. One ounce of 22 gauge has about 31 feet and 21 gauge has about 24 feet of wire.

20 gauge (.80mm) – This is about the thickest wire I use for the most part. It is good formaking clasps because it’s still pretty easy to work with but is strong as well. I normally buy this in dead soft. You can get about 19 feet of 20 gauge wire when you buy it by the ounce.

This is by no means a complete list of sizes, but it will give you a good place to start. As I said, it is up to you to find your own wire jewelry path, but I hope this information has at least started you on your journey.

Tuesday, February 26, 2013

Nichrome Wire In Ceramic Beads

Nichrome Wire and It's Use In Ceramic Bead Making.
Experiments with Cone 5 glaze firings using 
Porcelain and Stoneware clay.
What is Nichrome Wire?
There is a lot of information out there on the web about it, so I'll avoid the boring details. 
I will mention that it is an Alloy. 
It contains nickel and chrome.
It is commercially available in various gauges and lengths and can withstand high temperatures,
which is it why ceramic and fused glass artists that use kilns like using it.

Three major things that I often hear about Nichrome in the jewelry world (and my answers):
1. It's Nickel - a lot of people are allergic.
*Yes - Nickel. Design smart and use it where it will not contact the skin directly*

2. It's not pretty. I like things shiny.
*The firing process oxidizes the metal, which looks green or dull. Sometimes it can be taken off with a green scrubby (see below). Think about how you clean rust off of steel wire used by glass bead makers.*

3. It can be brittle.
*Yes. Depending on the gauge of wire, how hot the kiln firing was, and how much the wire was "work hardened" after the firing may make the wire more susceptible to becoming brittle. Try not to over work it. The larger the wire, the more brittle it seems to become (Thanks Elaine Ray for our conversation about that).*

So here is my process of making 
Porcelain and Stoneware Ceramic Headpins 
with 24 ga Nichrome Wire:
 Measure and cut wire ahead of time.
Insert wire into wet clay.

 After clay is dry, bisque fire to Cone 04 (@1900 degrees F)

Glaze ceramic part, wipe off any glaze that remains on wire.
I like to suspend my beads.
This means figuring out the weight of the work and how much that ga wire can hold without slumping during the firing.
I've been doing this for 10+ years.

After a successful Cone 5 (@2230 Degrees F) Glaze firing,
I can easily bend the 24 ga Nichrome wire to "straight". 

I then use a green scrubbie to clean the wire.
This is where you need to be careful to not overwork the wire as this action of cleaning and straightening is work hardening the wire.

 I am able to make a quick simple wire wrapped bale with the 24 ga Nichrome wire with my normal tools (just like steel wire though, you might want to not use your "really good" tools).

Nichrome wire in my kiln.
The elements which are in the element holders of my L&L Kiln.
The Thermocouple
(green rod sticking out of the kiln wall at 1 o'clock).
The bead tree "rods" that come standard with these
Roselli Bead Racks.
The hooks I make with the 17 ga Kemper Hi Temp Wire to suspend my work.
And now - the 24 ga (and 22 ga) for making Ceramic Head Pins.

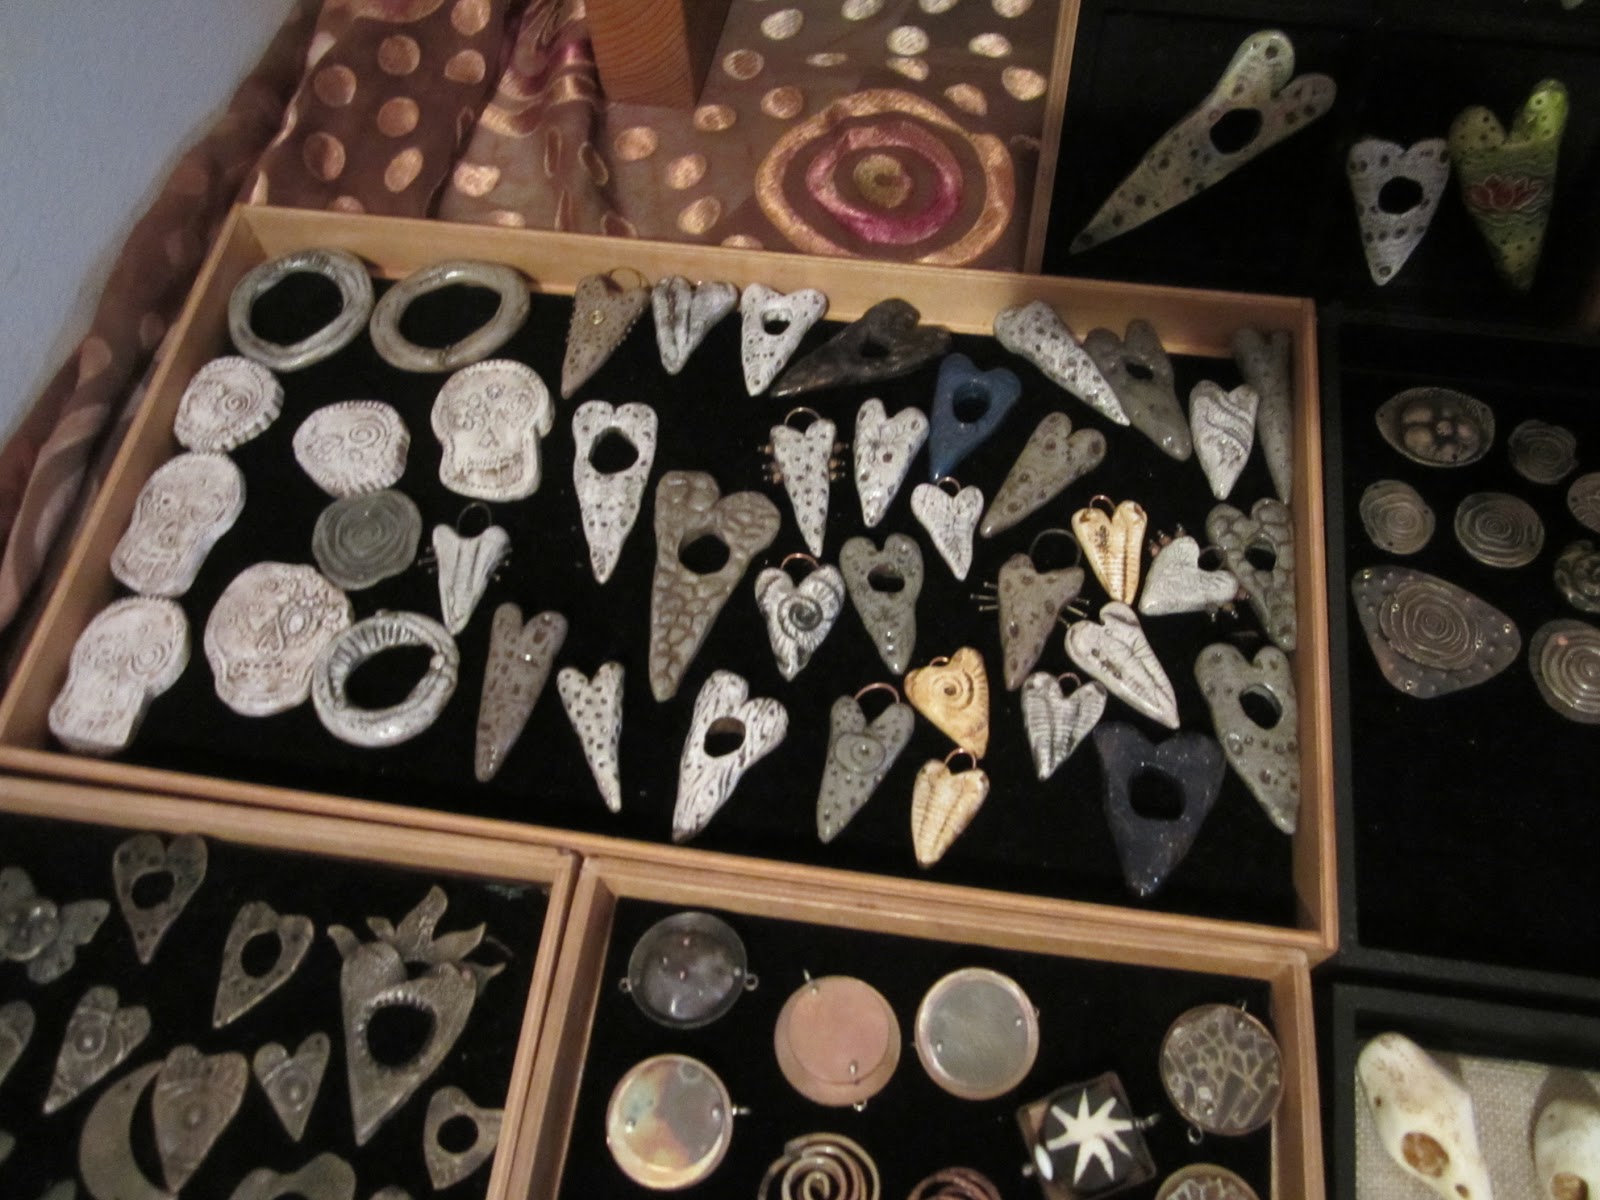
Some of the nichrome gets dark green,
while some stays just dull.
I keep noticing this and want to see why.
Maybe it is the ratio of nickel to chrome?

And then the after thought, which probably entered my mind at some point while making these:
Will they ship easily?
Did I waste wire by making them too long?

And as a bead maker there are questions:
1. How long of a wire do jewelry makers prefer? 2" or 3"or 5"?
I guess that depends on the project.

2. Do you prefer to receive your head pins ready to use?
Or should I not take extra time to clean them for you first?
Extra steps means extra time for either of us.
That of course is reflected in the price.
Either yours or mine.
I would tend to think in general people would want to receive them clean,
or at least somewhat clean with the oxidized green scale almost removed and ready to use.


And as a jewelry designer...
Well there are SO many things you could do!
Check out this post on what my "go to" jewelry designer friend Jenny Davies-Reazor quick whipped up for me with some of my head pins (we were discussing ways to "hide" the nichrome for issues #1, 2, and 3 above).

I'm going to experiment further and will post more next month here on LMAJ.
Hope to have lots more examples on use too...

4/23/15 Source update:
For those of you looking for nichrome wire there are a few good places to look.
I have ordered Kemper High Temp wire from my local ceramic supplier in the past.
I now order in larger quantities from Jacobs Online (the Nichrome 60).

Hope this helps!

Monday, February 25, 2013

Art Jewelry Boot Camp: Balled Head Pin Alternatives

So how have you been enjoying our first challenge? Today I wanted to share with you a fabulous resource on youTube, the wonderful videos of Nancy LT Hamilton!

If you haven't checked out her videos, I highly encourage you to do so. On a variety of metalsmithing topics, Nancy walks you through step by step in a relaxed, funny, and highly skilled way. If you've been browsing our challenge topics, you'll notice that there are quite a few who used the balled headpin as a cold connection and/or rivet, so I thought you would enjoy seeing this video!


Nancy posts new videos on all different techniques often, so be sure to subscribe to her youTube channel and visit her website for a variety of resources and to see her magnificent work!

Sunday, February 24, 2013

Emerald City

by Barbara Bechtel

Just a little green eye candy for you this morning loosely based on the Pantone color of the year, which is Emerald! Here are some lovelies I've picked out ranging from a bit on the mint side to teal, with some kelly and emerald too!


Emerald City

Friday, February 22, 2013

Kiln opening

                                                                                               by Kelli Pope

         With piles of beads yet to glaze, thought I'd stop and give you a glimpse into this morning's kiln opening.    Obviously, it was a red and vanilla run. :)   LOVE this deep red.    

The little bowl is a gift for my sister Sue, who helps me SO much!  
A good friend of mine, and talented artist, Jaretta, recently suggested I make bowls in which to fire my bisque beads. That way, there was not SO much time spent scraping the beads out of the bottom of the kiln after the bisque firing.  It worked GREAT!  But this bowl just begged to be glazed, and I think my sis will like it. She's a red fan, too.   


   Just started making bead caps... love how these turned out!

And as a side note, to promote our headpin Boot Camp, I just received these in the mail today, and HAD to share.  While following the blogs, I found some beautiful headpins, that  called my name!!  Thank you Marsha for posting them.  I just LOVE the vibrant colors!!  
  by Nikki Thornburg-Lanigan of Thornburg Bead Studio

Thursday, February 21, 2013

The Bead Show

by Staci L. Smith

If you follow me at all on facebook or my personal blog you will know I am prepping for a bead show.  So, either you are loving all the process pics and beady sneak peeks, or getting tired of hearing about it.  (I hope you are loving all the pics)  Anyhow, I'd like to tell you a little bit about Berks Bead Bazaar.
 
It was the first bead show I ever attended and I was immediately in love.  It's not too big, but has everything you could want and then some.  It is run by bead artists Joan Miller and Louise Mehaffey.  I think having a show run by artists brings an extra level of creativity to the show.   They pick unique bead artist, as well as wonderful vendors for gemstones, findings, ect.....
 
Last year was my first year vending as a bead artist there, I guess  Berks is a place for firsts for me.  I fell in love with it- the customers were wonderful and fun, my fellow artists and neighbors were wonderful.....great time was had by all.
 
I hope if you are local, or within travel distance, you will try to come out and visit the show.  If you do, please make sure to let me know you who you are so I can meet you in person!
 
My display will look roughly like this (minus the wall and pictures hanging in the background)...............
 
 
My daughter Julia is helping me at the show (she is 8), and has a tray of her own beads available to sell as well.  She is saving up to buy her own beads (below) at the show! (gotta start them young)
 
 
And here are some of the goodies I will have for sale.  I need to finish up another tray or two this weekend, and then pricing begins.


Prepping to vend a bead show is crazy, but I have to say, I love being up to my elbows in beads.
 
Anyone here who doesn't like being surrounded by beads?  Yeah, that's what I thought.  Who doesn't love beads?
 
Here is the link to the show again www.berksbeadbazaar.com and there is a coupon for $1 off your admission!


Tuesday, February 19, 2013

Here is what I want to do.

I have to control myself when it comes to other crafts or art forms. 
I am sure you guys go though it too. New glazes for those of you who do ceramics, or a new metal clay, for us glass beadmakers its new glass colors. 


I walk into a bead store in town and immediately feel at home. I wander the store looking at all the new beads, findings, or stones.
Everyone is ohhing and ahhing and sharing ideas. 
 I walk into a yarn/fiber store it's the same thing. Everyone is looking at the different fiber just in. The colors are just amazing.
People are talking about how this stitch will look with that yarn.
I love it.
For a while I have been lusting after Felting. Once again the colors are fabulous. The feel of it, the texture. Oh and the endless things you can do with it!
Look at these rings! How cool are these.
Oh and don't even get me started about metalworking. 

Sigh....


So here is what I want to do. Add another day to the week, some more money in my pocket and only sleep for 2 hours a night. Just so I can fit everything in.


Monday, February 18, 2013

Art Jewelry Boot Camp: Balled Headpin Blog Recap

by Barbara Bechtel

WOW! We're all so excited about the response to our very first Art Jewelry Boot Camp! Staci & I have worked really hard along with the other members here at LMAJ to come up with this new concept and there is always a little trepidation with putting your new idea out there in the Universe to see if it will take root!

Just in case you missed it, last week was our first blog hop, and we invited you to share what you have learned or challenged yourself to based on our current challenge, the balled headpin.

Not just for wire wrapping dangles, we challenged you to innovate with the balled headpin: begin making your own, double balling them, trying different metals, and using them in other ways!

Let's take a look over some of my personal favorites from the blogs and see what neat solutions and challenges were made and conquered!


Romantic Headpins with Balled Headpin WrapsGaia Copia made these stunning organic and sparkly combination polymer heapins with balled headpin embellishments!


Sterling Silver Balled Headpin Chandelier EarringsLove the subtle and sweet complexity of these handmade chandelier earrings by Libellula Jewelry!


Swirl EarringsI think turning balled wire into its own element and giving a bit of texture is a wonderful and creative solution! by silverniknats

If you missed participating, stay tuned! We'll be revealing our next new challenge in a few short weeks, followed by lots of tips and tutorials to inspire!

Sunday, February 17, 2013

Lampwork Pods Winner....

Thank-you to everyone who left messages to win a set of five of these beautiful beads created by Libby.


The lucky winner is .....

Lisa Petrillo from Lucid Mood Studio

Congratulations, Lisa!

As always, thank-you for supporting artists who create handmade with handmade,

MaryAnn

Saturday, February 16, 2013

A Little bit about Liver of Sulfur


by Staci L. Smith

Liver of Sulfur was the first chemical I used when I leaned PMC. It can be used to darken your metals for an antiqued look, or you can get color results with it too. Today I am going to show you a couple ways that I use it for antiquing.
First of all, even though I mostly use it to blacken my metal, I prefer it over Black Max, because its not as toxic or harsh. I try to keep my studio chemicals to a minimum to keep it better for the environment and my family. It may take a little longer to blacken then using Black Max, but for me, it’s worth it.

Liver of Sulfur comes in two forms.

 Lump form


Which come in pressed, concentrated dried lumps of the product.

And Gel form


First I will talk a little about the lump form.


1.  Preparing your Liver of sulfur :  It needs to be dissolved in water.  It works best with HOT water. 
I like to use a giant lump, because it gives faster and darker results.  So I do a whole bunch at ones to justify using such a large hunk.
When you get out your lump, do not get any water or moisture in your container at all.  Even the tiniest amount will ruin your entire container.  I really like working with the dry form of the product, but this is the downfall to it.   I have lost a couple of containers this way, and I am very careful.

So, using a tweezers I take a lump, place it in a plastic or glass container (that needs to designated solely for this purpose- do not ever wash and use for food purposes) and fill it with super hot, can’t touch it hot, water.

2.  Preparing your metal:  I give my metal a quick sanding with some steel wool, just the help the surface take the chemical treatment better. However, don’t do this if you are going for high shine.  Clean, non-greasy metal will take the patina better.  Metal that is shiny and very dense won’t take the patina as well.  And each metal reacts differently.

3.  Place your objects in the solution:  Here is my tub of goodies soaking.  (did I mention this is stinky stuff- you will want to use it in a well ventilated area…I do it in my bathroom and run the fan)


4. How long to soak them:   I use my tweezers to check on the progress of my pieces, it can take from 2 minutes to 15 minutes depending on how saturated your solution is, the temperature of your metal (hot metal takes the patina faster) and the density of your metal. 
I have found that there are issues when I mix metals in my solution.  So I try to do all bronze, all copper or all silver.  It doesn’t seem to get as dark when there is a mix of metals.
I have also found that bronze clay won’t patina well if it is tumbled to a high shine.  I also find that it needs to soak a bit longer, and will develop mostly after it is out of the solution.

5.  After your metal is done, rinse it well.  Some people use baking soda and water to stop the patination from continuing to develop, but since I seal my items afterward, I just rinse very well.  If it is a piece of jewelry, I usually wash it with soap and water too.

Here is that same pile of bronze after its rinsed.


After this I buff the high spots and or polish it and seal it to preserve the finish. This part is very messy.  When I do big batches like this, I often wear a mask while buffing so I don’t breathe in the dust.

6.  Liver of Sulfur can be disposed of in your septic system.  You can add baking soda to neutralize it, but it neutralizes itself fairly quickly anyway.

Ok, now for how you can use the gel version.  First, what I like about gel version is there is no risk of ruining the solution, since it is already mixed.  It also lasts for years.
You can use the gel the same way I outlined above, by adding the gel to hot water.  When I do it that way, I usually add just a little at a time until the solution seems saturated and nice and yellow.
Here is another method of using the gel. I use this often because I love the color you can get on your copper.

1.  Dip a Q-tip into the gel


2.  Rub the Q-tip onto your metal. I push down hard on it, like I am trying to rub it in.


3. Wipe off the gel from the metal.  I use a paper towel, and as it gets yellow, I use a new spot until it rubs off clean.  As I rub off the liver of sulfur, and am pressing down.  It gives the metal a nice warm brown tone to it.  I seal it soon after with either a spray lacquer or wax or both.  Please note this is messy, and you may want to wear latex gloves so it doesn’t get all over your hands.


4.  Here is what it looks like when it’s done.  The bottom photo shows two, the one on the left is antiqued and the one on the right is not.


5. There are also ways to apply liver of sulfur to create a rainbow effect, though I have never had success with these.


So there you go, just a little information on something I use ALL the time.  When you antique your pieces, and buff away the high spots, it accentuates your textures.  You can easily remove the patination by polishing or pickling your piece. 


Thursday, February 14, 2013

Social Media: Finding your niche and expanding your voice

by Barbara Bechtel

Blogging, Facebook, Twitter, Instagram, Nings, online classes,Pinterest, Flickr, Vine.....WHOOSH! It makes me tired just thinking of it. How do you find the right ones for you? What do you say? Let's talk about some strategies for managing and finding your authentic voice among all these.

Even if you're new to all of the social media or you're a seasoned professional, it's important to find your favorites and use them to your advantage. I've been doing some thinking over all of these and I've been pondering some of the following things:

1)Finding your voice.

Finding your voice is perhaps one of the most difficult parts to navigating online media.  Think of how you are in your day to day life. Are you the life of the party? or are you a wall-flower? Do you have a take charge type of attitude? Do you enjoy teaching? Do you enjoy learning? Are you a writer? Do you enjoy sitting down to record and document your work or your life? Perhaps you enjoy snapping pictures or consider photography an important part of your creative process. Maybe you love trolling the 'net looking for new projects or inspiration. This will be an important part of finding the social media outlets that are best for you.

2) Time Management.

For me, I want my social media time to be enjoyable. I want to interact with others and not feel like it's taking time from other areas of my life. Establishing a happy medium to that is becoming a very important key. Selecting 1-2 of my favorite outlets for interacting and letting the rest go and not worrying about whether or not I'm using to their best advantage is something I've been thinking about.

3) Take time to learn.

Many times we jump in fast to the new trendy thing without learning all the tips and tricks to really making it work to our advantage. This can definitely help especially when you are concentrating on 1-2 key areas. Visit your favorite pages and consider what makes you follow them or how you found them. It's not about duplicating someone else's strategy but more about why you find that inviting. As an example, there are blogs that I visit because I find their writing appealing, Instagrams I follow because their pictures are beautiful or inspiring, and Pinterest boards I follow because they are able to curate beautiful boards or collections. While this overlaps a bit on finding your voice, you found them because they had built a beautiful presence by finding their authentic voice through a specific platform and are using it well.

What obstacles do you have with social media? What things would you like to learn?


Tuesday, February 12, 2013

Want to know something cool?

 I though I would write a quick post on a great credit card processing companies. I used the old machine where I had to pay a % to the CC companies and then I had to pay a monthly fee for the machine and who knows how many more fees!

The studio where I work is owned by two artists. The day to day operations are done by my boss Doug, and my other boss is Jim Mckelvey. Jim is not around much because he is the co-founder along with Jack Darcy of Square

If you are looking for a CC processing company Square works with smart phones and a small unit to swipe your cards. The fees are very low and it is super easy to sign up for. 


I have been using it for a couple of years and have little to no trouble with it. Sometimes you may not be able to connect with service so you may have to take the information and key in the card and process it later.

It really is a great way to take cards at shows.