Wednesday, April 29, 2015

Fiber in Jewelry: Micro Macrame

Hey, kids!  Sherri Stokey here to tell you a little about my spin on using fiber in jewelry making:  micro macrame.  Haven't heard of it?  Picturing a plant hanger?  (Tell the truth.) When most people think "macrame", they think of thick jute and fist-sized ceramic beads tied together and used to suspend plants from the ceiling.  Or owls (what is it about macrame and owls?). 

 I made my fair share of plant hangers in the day and a fringed belt or two, but I didn't really go crazy for macrame until about a few years ago when I discovered nylon bead cord and found a renewed interest in knotting.  The cord I use is twisted nylon (usually C-lon or Superlon brand) and is available in four different sizes.  I favor the middle of the road size, which is .5mm in diameter.  It will fit through an 11/0 seed bead and an 8/0 bead will accommodate two cords. 

And the best part about nylon bead cord?  It comes in 104 different colors!  That means there's usually the perfect color to match my art beads:
Raku pieces by Star Spirit Studio

Let me show you a feew examples of what you can do with micro macrame, seedies and art beads:
Focal pieces from Dreams and Elements

Ceramic end pieces from Scorched Earth

Lampwork focal by Laurie Ament

If you haven't tried macrame before, but would like to give it a try, you might want to start with something like this piece with some half knots sections and regular old overhand knots between an assortment of beads (free tut here).  It's simple and a great way to use fiber to showcase some beads.  
Ceramic leaf from Marla's Mud

The strap on the necklace below is another easy one - I even have a free tutorial on how to do it on my blog (here).
Pendant by Humblebeads
Have I changed your mind about macrame?  If you're ready to up your fiber consumption (see what I did there?) using nylon bead cord and micro macrame techniques, you can find lots more information on my blog at KnotJustMacrame.com, including links to tutorials and online classes.  Oh, and in case you are still looking for that macrame owl...  You're welcome.


Tuesday, April 28, 2015

Show Crazy

by MaryAnn Carroll

I have pretty much been consumed with our first time Potters for Pets event this weekend at the CNY SPCA in Syracuse, NY. My husband Bill and I have spent a ton of time, along with the Developmental Director, Theresa Para to prepare this first time event. This all started with an idea from my son CJ who works there.

I have been a crazy person starting yesterday making sure I have inventory.... nothing like waiting until the pressure is on!! Last night I got a few new pieces made. I have such a hard time switching from making bracelets to earrings to necklaces. Last night I decided I would take my own advice and let my hands do the work and not let my brain interfere.

This is what I came up with (I still need to work on my picture taking skills)..... that'll be down the road.... probably in the distant future!


And my bracelets.... quick pic this morning.


I amaze myself that I am able to pull anything off with the way I work! I wish I had a more focused brain...


I would never have enough inventory to fill up a booth by myself, so fortunately, I do these shows with Bill and it is mainly his pottery. I find that the older I get, teaching all day poops me out! Maybe one day after retirement I will get better at this inventory stuff!

And, like everything else I do, I realized that I didn't order the little 3 x 5 bags that I love to use. They do end up costing me about 46 cents a bag, but customers always comment on them. Hopefully, my papermart.com order will be here before weeks end.

These are linen and they come in an assortment of sizes. I love them!!


Wish us luck! I did have a post started about how to create a successful show, but I don't know if it will be successful or not, so I will wait until after. I hope to take plenty of pictures. If you're local, we'd love to have you!

There are on Facebook http://facebook.com/cnypottersforpets and I also created a website (I tend to go a litte overboard)!  http://pottersforpets.com.

Since I mentioned the website, I would recommend wix.com for website building. It is, by far, the easiest I have ever used!

MaryAnn


Monday, April 27, 2015

Fiber Boot Camp - More silkiness from me!

Written by Patti Vanderbloemen for the Love My Art Jewelry Blog

I am still trudging along with this boot camp and spent lots of time on Pinterest and such, looking for inspiration.  I found tons of necklaces using silk, with a slider-style bail.  I have never made one of these bails before, so thought I thought I would try my hand at making one.  This technique involved setting a tube rivet.  While I have set commercially made rivets and/or tube rivets in the past, this time I tried cutting my own rivets from copper tubing and using tools I have on hand. 

I could not believe it worked!  I used a variety of dapping tools and the ball-peen end of my goldsmith hammer, as well as my embossing hammer to set the rivet.  I felt I was on a roll and if I did not repeat the process soon, I would forget how I did it, so I made a bunch.  The picture below is of the bails prior to adding a patina.


Still working with my stash of silk from Marsha (source), I selected a lovely lampwork focal from Susan Kennedy (source) and was so happy that the silk matched perfectly!


I am still playing around with PMC and recently made a batch of beads made from copper tubing to which I fired on some textured strips of silver clay.  Most of these beads had tiny little discs soldered to the top, but I left the tops off of a few of them for this very reason.


These copper tube beads are held in place by knotting this silk.


I knotted the silk to the simple copper clasp - which I soldered closed for strength.  Oh, the drape of the necklace is divine!  


I made a second, similar styled necklace, this time featuring a gorgeous lampwork flower bead by Donna Millard (source).


The two strands of silk blend so beautifully with the colors of Donna's lampwork.


This necklace is a bit longer than the first one (I STILL hate photographing necklaces).


In all honesty, I am not loving the two copper tube beads in this necklace and will probably be re-working this design.  The silk in this second necklace is a bit thinner than the silk in the first necklace - it's looking a bit chunky to me....but, you get the idea.


This fiber boot camp has been such a learning experience for me and taught me to "never say never". I NEVER thought I would be able to incorporate these silks amongst all of my heavy-metal jewelry...next thing you know, I will be working with seed beads...(NO...that I cannot do)!


This blog post was written by Patti Vanderbloemen for Love My Art Jewelry Blog.
If you are reading this on another site, it has been copied and used without permission of the author or blog owner.  Please do not copy and use this information without permission (many blogs are having issues with this kind of stealing).


Thursday, April 23, 2015

Silk Cord and Bead Obsession


I have an obsession.
It is with color. It is with texture. It is with feel.
It is with emotional connection to something handmade.

 There is something that moves me deep about colors and glass.
Seed beads - I cannot have enough!
And with my recent class using these TR5 Myuki beads (size 5 Triangle Beads), I decided to organize my stash.
Which then led to - what else can I make with these - and use the 2mm silks I carry & sell?


After looking around on Pinterest for simple wrap bracelets, I figured out a design that was quick and easy to do. Something that I could make and wear on the go.
Testing and figuring out a design like this took me days of testing and fiddling with different materials and styles.


My final decision was 1mm Waxed Cotton Cord (about a yard).
1 strand of 2mm Silk Cord (40-42" length).
And 50 of the TR5 glass beads.
And a favorite button or disc bead as the closure.
I am working on the detailed directions for kits, but you basically make a loop with the cotton cord, tie on the silk at the mid way point, braid the three strands, and move a bead up into the braid whenever it is time to move the cotton cord.
When you get it to the desired length, you tie on the button and wha-la!
Ready to wear.

I already have plenty of silk color palettes that I sell.
Now I've come up with a bunch of bead mixes that coordinate too.
The last step is me coordinating my glaze colors for the closure piece to go with these.

Internet buying and matching colors can be such a pain sometimes, and nobody wants to be disappointed in the way of losing money, and not having a fun project to do.


And to me - these colors are happy.
These silks are so soft. And this is what I want to wear as it gets warmer.

Being able to take a project with me to t-ball practice, waiting at the bus stop, waiting in a doctors office, as a passenger in a car, flying on a plane, sitting on the beach, whenever my hands want to be busy and able to complete a task - that satisfies me.


This has been such a good challenge for me to fiddle with what I've got.
Simple projects. Fun projects. 
And something that makes me feel the happiness that I had as a teenager:
making bracelets for my family and friends...
That is where this takes me.
Summertime bracelet fun!

This blog post was written by Marsha Neal Studio for Love My Art Jewelry Blog.
If you are reading this on another site, it has been copied and used without permission of the author or blog owner.
Please do not copy and use this information without permission (many blogs are having issues with this kind of stealing).

Wednesday, April 22, 2015

earth day and jewelry making - mary jane dodd - love my art jewelry

mary jane dodd


i couldn't be more happy to be writing here today... it got me to thinking about how caring for and honoring the earth relates to our daily craft. 

we owe almost everything we use in jewelry making to mother earth - metals, stones, glass, fibers. in choosing our resources, we should be mindful of process and source. 

fibers come from plants and animals - try searching 'plant dyed' or 'eco dyed' - the results are inspiring. 

natural dyed worsted wool yarn by turkish artisans

honor the stones you are using - learn about them, where they are mined, how rare or bountiful it is (and remember, everything has a finite quantity). find out if they are dyed. gemstones are believed to have metaphysical properties - whether you believe that or not, it can be interesting to read about and see why certain stones are chosen for specific reasons. 

or

can provide information and inspiration

labradorite

the beautiful stone labradorite is believed a stone of transformation and can impart perseverance and strength. 

then there are serious ways our work can impact the environment - 

the use of toxic chemicals for example.

did you know that instead of using commercial pickle for cleaning your metal, you can use white vinegar and salt? it's true. just be sure to keep separate containers for your brass and copper. and you don't even have to keep it warm.

there are alternatives to using pcb etchant for etching, like electro etching with saltwater. i found a kit on etsy here. please keep in mind that this kit is an example, i haven't used it. 

perhaps where we really can make a difference is in our choices of metals - let's face it, sheet metal and wire are the backbones of most work. 

sterling silver does not have to be mined - it can be made from post-consumer sources and is sold as 'recycled'. post-consumer sources can be jewelry, medical, electronics and giftware. you can send back your scrap to certain places like riogrande and monsterslayer (to name only 2).

argentium silver is a silver that stays bright and resists firescale and tarnish. but most importantly it is certified to be from reclaimed sources. 

i found a very good article about using argentium in jewelry making by megan martin. it was posted on the art jewelry elements blog and i encourage you to take a look at it. 

you put your time and money into your supplies and designs. these choices can be helpful or harmful to the planet. the last thing we want to do with the objects of beauty that leave our hands is to harm our most beautiful and inspiring resource, the earth. with a little thought and selectiveness, we can minimize our impact. 

happy earth day!


Monday, April 20, 2015

Fibers Galore! By Karen McGovern

Howdy all!  This post is going to be a bit short and sweet.  As some of you know, I am a conservation biologist in "real life", working with the Rare Species Conservatory Foundation. It is our breeding season and my life is full of baby parrots, antelope and primates.  At the moment I am hand feeding an orphaned pygmy marmoset, the world's smallest true monkey.  Hang on to your seats, this guy is STUPIDLY ADORABLE and will have you making baby noises at your computer monitor.  Meet Chispa (Spanish for "Spark").  He was born on Easter.  His mom didn't survive the birth, so we are raising him.  He's about the size of a tiny mouse.  I have to feed him every three to four hours around the clock.  He's killing me!  ANYHOOOO....

Bow down to the adorable-ness that is a baby pygmy marmoset!!!

This month the artists of LMAJ are all playing with fibers and discussing how to use fibers and textiles in jewelry designs. I have fooled around with fibers, I especially love working with silk yarns and multi-strand yarns.  Susan Lenart Kazmer inspired me initially, I love her take on long....REALLY LONG pendant designs that incorporate a mix of metals, textiles and so much more. One of the first truly epic fiber mix pendants I created incorporated a glass tube holding the skull of a tiny songbird.  I used a mix of silk ribbons and yarns knotted below the pendant hanging about 8 inches in total length below  the tube. I like to weave and tie other elements in with the fibers--beads, charms, etc. I've experimented with this look over the years and come back to it again and again.  

Some early fiber designs from around 2008 incorporating bone, silk moth cocoons, silk yarns and fibers.  CRAZY!!!

Most recently I created a couple fiber designs for Nunn Design as part of their Innovation Team. I used a Nunn channel bead wrapped in silk multi-strand yarns tied with a knot to create this crazy pendant.  I added some beads, a coyote tooth and some wire to really make it tribal.  I like these over-the-top pendants strung simply on leather or rubber cord. 


Next I made this woolly bangle using a furry silk yarn and simple macrame techniques.  The bangle is a simple copper wire design.  I wove the silk around the bangle in a basic macrame stitch, tied off the end and added a series of multi-stone dangles for a gypsy feel. This is a super fun bangle to wear, it's so FURRY and comfy on the wrist!


Using fabrics and fibers in jewelry design is fun and you are only limited by your imagination!  The cuff shown here was created by another favorite artist of mine, Richard Salley.  I love the explosion of fabric from the central element in the cuff....what a great POP of color and texture!!!


So, my advice to you--if you are considering working with fabrics and fibers--is to think outside the box. Start wrapping and knotting and see where the fibers lead you!  I've got an idea for a stitched pendant that I am itching to try....If it works I will share next Tuesday for my Tuesday Tutorial post. In the meantime, raid the fabric and yarn store and go make something AMAZING!!

Boot Camp: My Adventures Using Fiber

Written by Patti Vanderbloemen for Love My Art Jewelry Blog

I admit it - I do not use fiber in my jewelry ... with me... it's all about the metal. But, I also love to try new techniques.  So, I was ready, willing, and able to at least try!

I happened to have made several of these adjustable bracelets sitting on my bench. Completely naked of any adornment whatsoever, I was going to add a handmade charm of some sort. It was during my "lack of creative mojo" period where I could not decide what to do. It is during these "lulls of creativity" where I literally just sit at my bench and play with wire.


But, the latest issue of Rena Klinenberg's online newsletter arrived in my email box a few days after I made several of these bracelets. She had a free tutorial on how to make the bracelets, and spice up the look with fiber. As a matter of fact, she used old t-shirts - a most creative use of fiber! You can find her tutorial here. I will note that Rena's tutorial for the bracelet portion of the project uses 16 gauge wire - mine is a bit heavier at 14 gauge.

I received a package of free ribbon with a magazine subscription a few months ago. I almost immediately handed this ribbon over to my mother - a seamstress. 


But instead, I wrapped the adjustable copper bracelets with a couple of strands of ribbon, seed beads, and artistic wire (sorry Mom!)


These whip up quickly and add just the right amount of color to the wrist - so lightweight, too.


This photo of this last bracelet appears to amplify the size of those jasper chips- they really are not as large as they may appear! :)


The bracelets even look nice stacked.


I couldn't stop here. The next project features absolutely gorgeous silk ribbons from our own Marsha Neal - this palette of colors is so beautiful!! (You can find these silks here).


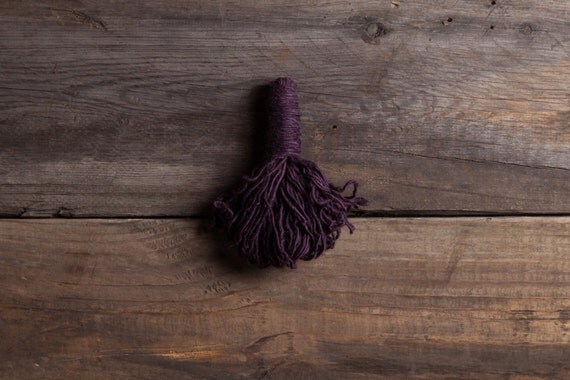
Recently, I have ventured into Precious Metal Clay. While waiting for my kiln to arrive (going on week 4 here....), I have been practicing by firing the clay with my torch. I happened to have a GORGEOUS purple lampwork bead by Susan Kennedy of SueBeads. I thought the purple silk would look beautiful with this bead. So I made a silver connector pendant from the PMC, and cut out a heart shape to mimic the heart-shaped bead.


(Oh how I absolutely HATE photographing necklaces..ugh..)

Anyway, luckily, Staci had just posted her tutorial on how to attach the silk to her necklaces, as I still had no idea how I was going to get that silk on that pendant!


I used 20 gauge sterling and just made additional wraps.  All the silver links have been soldered and textured.  Quite frankly, this was one of the hardest necklaces I have ever made. First, I felt the chain was too short, so I added more links. Then I thought the necklace was too long, so I cut out some of the silk. As it stands now, the necklace is about 18" in length with a 2" extender chain, which has a tiny heart I made from PMC to the end of the extender chain.  But, I am still on the fence with the length.


While on the subject of fiber, I want to share with you a few examples of other artist's work that I truly admire.  

First up is this lovely pair of earrings by Kristy Carrol Abner (Kristy's Kreations). The silk wrapped around the hoops (with lovely lampwork by her husband, I might add!) just screams boho to me. I love this pair of earrings - I wear blue jeans 364 days a year - and these would match my outfit every single day!
Source: KristysKreations.com
The bracelet below (also by Kristy) has just a touch of silk interspersed within the chain to mimic the pink color in the focal bead.  (Note how she fastened the silk to the chain - awesome idea)! My eye continues completely around the bracelet, due to the placement of the silk.

Source: Silk Rose Bracelet by KristysKreations.com
The pair of earrings below popped up in my Face Book feed just the other day. Linda Landig's jewelry is always the epitome of perfect colorways - love the way she weaved the hand dyed ribbon through the top of these earrings, which by the way, perfectly compliments the colors of the copper clay components by Kristi Bowman-Gruel.

Source: LindaLandig.com

This bangle, by Ann Shroeder of Bead Love, is the perfect blend of softness to me, in color and texture. During the Spring and Summer, I wear very little jewelry - it's just too hot! But I would wear this!

Source: BeadLove Blog

Now this last masterpiece is by Bobbie of Beadsong Jewelry.  It is a soutache masterpiece - I cannot even imagine creating something this beautiful - I just want to TOUCH it!! Can you even imagine the time and patience required?  I cannot!

Source:  Beadsong Jewelry
So, there you have it - my initial attempt to incorporate fiber into my designs. I do hope this trend continues!