Showing posts with label #micromacrame. Show all posts

Friday, December 4, 2015

8 Tips to Improve Your Jewelry Making Skills

by Sherri Stokey

Perhaps I should clarify:  even though I've titled this piece 8 Tips to Improve Your Jewelry Making Skills, please don't stop reading if you don't make jewelry.  Most of these tips (if not all) can apply to other crafts as well.  Either way, I've put a lot of thought into this article and since you're already here anyway, you might as well finish reading it.  Plus it's good manners.  If you get to the end and feel I've wasted your time or you don't agree with me on one point or another, you can always leave a comment and give me a piece of your mind.  With that out of the way, let's get to the list.  


1.  Practice!  Although we all like to think we are the 1% who can pick up something and do it perfectly the first time, it just doesn't work that way.  If you ask your most admired artists, they will tell you that they've come a long way and devoted a lot of hours to perfecting their craft.  Which leads us to #2...


2.  Strive for perfection.   This one might not apply to every art equally, but in some mediums, like micro macrame, neatness counts.  It's all about keeping the knots even with the same tension, crisp corners and straight lines.  In other mediums it might be a matter of getting a smooth solder or a perfectly coiled wire.  Mediocre isn't good enough - strive to do the best work you can.  You won't get this one without #1 (practice).  Fact.


3.  Play!  #1 and #2 make it sound like making jewelry is drudgery and it couldn't be further from the truth.  Allow yourself time to play around in whatever way is fun for you.  Sometimes I like to goof around with random knotting just to see what develops and sometimes I like to try the strangest color combination I can dream up.  Just for fun.


4.  Take a class.  I had never been able to take a class until last year, and I thought I'd done okay for myself with the self-teaching bit.  And I had.  But when I had a chance to take a class I was really excited by the whole experience.  There's just no substitute for learning from someone who really knows what he or she is doing.  I picked up some great tips and got a fresh infusion of enthusiasm for possibilities I hadn't considered.  


Even if you live in the middle of nowhere like me, with no access to local bead shops or experts, there are online classes available. Although a live class is nice so you can interact with the instructor and other students, online classes have some strong points of their own: you can pause them, replay portions and tailor the experience to your own schedule without disrupting other students.  Whether live or recorded, classes offer you an opportunity to grow and develop your skills.


5.  Network.  Find a local group of like-minded enthusiasts or join an online community.  It's fun!  I belong to several groups on Facebook and I really enjoy them.  I love to see the different styles of  artists from all over the world. Plus, having a group of friends who have the same interests can be helpful if you get stuck.  Usually there's someone  who has faced the same issue you're experiencing , or at least someone who can offer some creative solutions.  It's also a great way to find inspiration, which leads to #6...


6.  Look for inspiration.  Whether you find inspiration by taking a stroll through the park or a hike in the mountains or a trip to the zoo, or something more sedentary like scouring the Internet, inspiration is there and free for the taking.  Clear your mind and take a fresh look at everyday objects.  Think in terms of texture or color or lines, then try to replicate even one part of that in the medium of your choice.


7.  Experiment.  Don't be afraid to fail.  Try something different - if you usually work with polymer clay, try your hand at micro macrame.  If you are a knotter, pick up a bead weaving tutorial and give it a go.  Try torch fired enameling (make sure the blinds are out of the way first and don't ask me how I know that).  The point is to step outside your comfort zone, color outside the lines.  Sometimes when you do that, it blurs where you thought your boundaries were and opens the door to some amazing things!


8.  Find your style.   It has taken me a long time to put my finger on what makes one piece fantastic and another mediocre, even when the two are very similar and I've finally boiled it down to one thing:  authenticity.  The whole point of art is to express yourself.  It's great to learn from a class or follow someone's pattern, but in the end, you need to find a way to make it yours if you want to take your art to the next level.  Find your voice and then sing like nobody's listening (cliche, cliche, cliche - but accurate).  Do you like no one else can!


Friday, October 16, 2015

Sugar Skulls - It's the Season!

by Sherri Stokey

Some people are offended by skull art and put off by what they consider macabre, but in many cultures, skulls are viewed in quite a different light.  Revered.  Celebrated!  One of my very favorite traditions is the sugar skull, or Calavera, used to celebrate the Day of the Dead.


Mexico's Day of the Dead, or Dia de los Muertos, centers around a belief that the gates of heaven open for a short time and allow the spirits of lost children and loved ones to reunite with their families for a day.  How beautiful is that! Although traditions vary from area to area, the holiday is generally not a sad, sober one; it's filled with love and color, food and flowers, and is a time for friends and family to gather and remember loved ones who have died.  It is focused not on death but on remembering life.  If you're interested in learning more about it, you can find much more information and lots of great photos here.  


I just returned from a trip to Cancun (wonderful!!!) where I spent a disproportionate amount of time ferreting out skull/skeleton art.  I found full size Catrinas:


Little bitty pets:


Even a couple at a table next to us in a restaurant:


Several of us here at Love My Art Jewelry have been inspired by sugar skulls lately.  I've been making some micro macrame pieces:


Staci has been making some awesome pendants and beads:


Heck, Karen decorated herself!


Are you inspired?

Friday, September 11, 2015

Why DO We Sell Our Art?

by Sherri Stokey
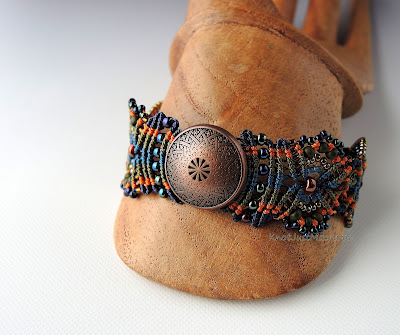
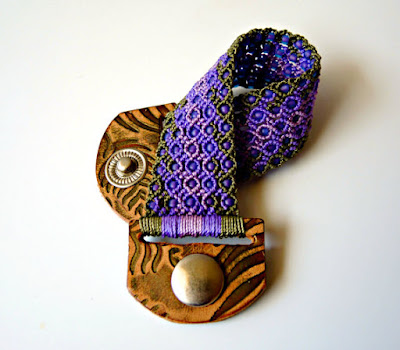
Micro macrame bracelet by Sherri Stokey.

"Why is selling your finished product important?"  This question was tossed my way recently by a student working on an economics project and it stumped me for a bit.  Why do I feel the need to sell my handmade pieces?  Why do any of us want to sell our art?  I think I speak for the majority of jewelry and jewelry component makers when I say it isn't for the money.  The reality for most of us is that a full-time minimum wage job would likely be more profitable.  What, then, could persuade us to put the results of our blood, sweat and tears out there for the world to judge (and hopefully buy)?

There are things which obviously contribute to the decision to sell.  I really love macrame and I practice my craft almost every day.  It's how I relax and I thoroughly enjoy experimenting with color and texture and pattern.  I'm curious and one thing leads to another.  Before I know it, I have three or four new pieces in the space of a week.  Even culling out the ones I deem unworthy of sale, I am still left with a steadily building inventory of micro macrame jewelry pieces - more than I can possibly wear.  Selling some pieces not only frees up space, but the resulting income allows me to purchase more beads and more colors of cord and do more experimenting.  That's a definite win-win for someone like me who wants to have all the beads and all the cord!

Practicality aside, further soul-searching revealed something that surprised me.  My answer to the student was "It gives me a feeling of "success" to think someone else thought enough of my work to purchase it."  If you take that a bit further, my reason for selling actually boils down to fulfilling an emotional need for approval.  Go figure!  

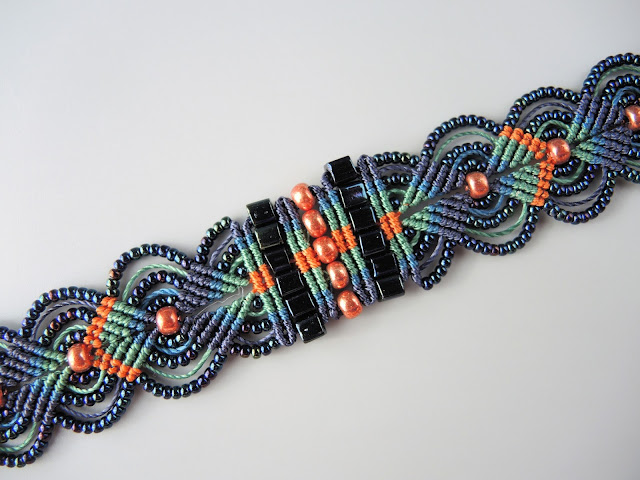
Micro macrame bracelet by Sherri Stokey of Knot Just Macrame.

I pride myself on not caring what people think of every little thing I do or say or how I look.  It's taken me years to get to the point in my life where I can say that with some degree of honesty.  I won't claim to be 100% there, but I'm certainly closer to it than I was when I was younger.  The trite saying "with age comes wisdom" isn't far off the mark.  Maybe it's just a matter of having seen more and having been through more that lets you start to prioritize better and figure out what really matters in the overall scheme of things.

Why, then, this need for validation when it comes to my art?  Why is there such an emotional connection to selling my "finished product"?  I did a little research and I found this: on a deep emotional level, feeling approval makes us feel more secure with who we are.  Hmm.  This is starting to make some sense to me.  I have a real problem with confidence.  I don't call what I do "art" (unless I go back and correct it for the purposes of this article) and I don't think of myself as an "artist".  I can apply those labels to others, but not myself.  But I can recognize the beauty of the pieces I make and take credit for the creation. So while I admit that for now I am still seeking validation, I will continue to work toward my goal of feeling good about who I am apart from my craft. And when I do reach that point, I will continue to sell just to share my joy with the world!

What about  you?  Care to share why you decided to sell (or not to sell) your art?

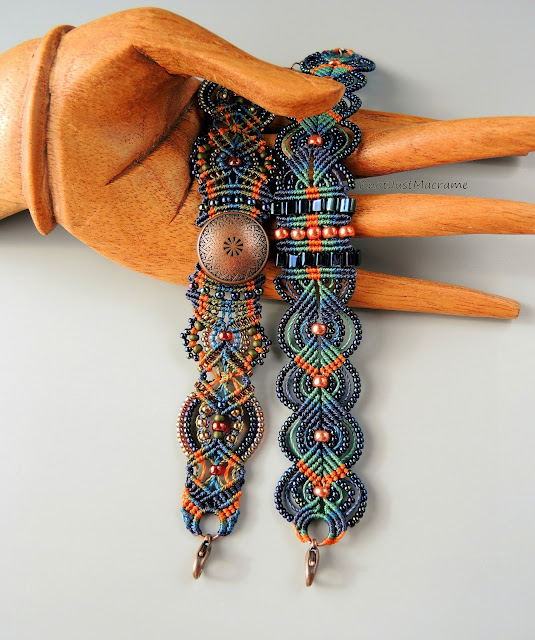
Colors of Autumn micro macrame bracelets by Sherri Stokey.


Friday, August 21, 2015

The World's First KnotAlong - A Micro Macrame Tutorial

by Sherri Stokey
Micro macrame pendant by Knot Just Macrame.

Today's the day, folks!  A couple of weeks ago, I promised I would teach you how to do micro macrame and I'm here to do just that.  If you don't know what I'm talking about, you obviously missed this post, but it's okay!  You can still join in whenever you are ready.  If you did catch that post, you should have the supplies and materials all ready to go for this project.

Here's how it works.  I've prepared a video lesson to walk you through the steps required to make the pendant shown above.  In the process of making this pendant, you'll be learning how to make larks head knots, square knots, overhand knots and double half hitches.  You'll also be learning some micro macrame basics, the terminology and some tips and tricks I've picked up after eight years of knotting.  

Since we can't all physically be in the same room to do this, I've set up a virtual room where we can meet up:  KnotAlong Event.  That's where you will be able to post photos of your work, ask questions if you get stuck and just generally commune with other people learning macrame.  

 Are you excited?  (I am!  I can't believe I'm going to try to teach macrame to a whole bunch of people all at once!)  Let's do this (oh, and don't forget you can make the video full screen if you want)!


If you're having fun with this project, do me a favor and share it with your DIY friends.  You can help me in my quest to bring macrame back!  And if you're really having fun, you can find more tutorials (.pdf format available for instant download) in my Etsy shop and more classes (which include videos) at CraftArtEdu.

To make everything a little bit more fun, I'm also doing a couple of giveaways!  I will be giving away one of my new Drunkard's Path bracelets in great colors for fall here on Love My Art Jewelry.  Enter to win the bracelet using the widget below.  I'll also be giving away a full set of micro macrame tutorials, and the sign up for that prize at KnotJustMacrame.com.

Micro macrame bracelet by Sherri Stokey of Knot Just Macrame.

Enter for a chance to win the bracelet using the widget below and I will choose a winner on August 31, 2015.  Good luck and happy knotting!!

a Rafflecopter giveaway

Friday, August 7, 2015

A Micro Macrame Primer and Upcoming KnotAlong!

by Sherri Stokey

Do you ever see a beautiful piece of handmade jewelry and get depressed?  Not because there's anything depressing about the piece, but because you think you'll never be "good" enough to make something that lovely?  Well, stop that!  This is a no-whining zone and self pity is counterproductive.  

Don't get me wrong, I've been there.  It's an easy trap to fall into, but basically you have two choices:  you can either admire the piece for its artistry and purchase it from the person who has probably spent countless hours creating it (and possibly several years learning before that) or you can take a stab at it yourself.  
 
I'm curious and I'm from a background where I want to try doing everything.  I wallpapered most every room in my house back in the 80s, learned how to give home permanents, make candles and can tomatoes just "because".  As you can probably guess, not all were wise decisions.  

 
(She's still mad at me about that one, by the way.)  Luckily, I'm now at an age where I know my limitations and instead of taking that as a personal failing, I'm getting better at appreciating the talent of others.  Even if I could make a polymer clay lotus pendant like the one from Staci Louise that I used in this necklace, I would probably never get the feeling she has in her piece. And that's okay - it means Staci is doing something right!


If you decide you do want to try something for yourself, find a good tutorial or class and then go into it with the right mindset.  Learn for the joy of learning and you will leave with a greater appreciation of the artist's process, even if you never use the technique again.  And if you do discover something new that you love, that's even better!

So, for those of you who've made it this far in the post (and hopefully the others are over shopping in my Etsy store), I'm going to give you a micro macrame primer.   I'm going to cover the tools and materials you will need to get started with micro macrame, then I'm going to give you a couple weeks to round up your "stuff".  While you're doing that, I'll be busy writing up/recording a special beginner project for us:  the world's very first KnotAlong!   I'm going to meet you back here  in two weeks (on August 21st) for your first "class".

Are you ready, kids?  I can't hear you! :)


If you want to play along with my KnotAlong (and why wouldn't you?), you have two weeks to gather up these things.  I've added some suggestions for sources* to get you started.

  • Pinning surface:  You can use cork or anything that will hold a pin.  If you want to purchase a foam board, here are some sources:   Amazon, Art Beads, Etsy, Walmart, Fusion Beads
  • Fray Check:  Fire MountainAmazonWalmart, my local Walmart carries this in the sewing aisle as do most fabric stores.
  • GS Hypo Cement:  Fire Mountain, Amazon, Walmart, Art Beads
  • Tex 400 nylon bead cord (I recommend C-lon or Superlon brand):  Bello Modo, South Pass Beads (they have Hypo Cement, too), Shipwreck Beads, Jewels in Fiber.  You will only need about 6 yards for our project, so you will have lots left on your spool for your next project.  Don't get hung up on the cord, either.  If you have some 1mm hemp on hand, it will work.  I don't recommend Rattail or other "slippery" cord.
  • Pins - straight sewing pins and/or T-pins:  can be found in fabric stores, the sewing aisle at Walmart, Michaels, Hobby Lobby
  • Scissors
  • Something to straighten cord (hair straightener, curling iron, regular iron, etc.)
  • Approximately 60 8/0 seed beads. Inexpensive craft store beads will work fine for this project.

You won't find a better time to jump into micro macrame than this.  Here's a peek at what we're going to make:


I might even sweeten the pot a little.  I'm thinking maybe a giveaway for those who participate...  So?  Who's with me?


*Sources listed are US suppliers.  Some others to try:  UK - Knotting Ways
Australia - Benjamin's CraftsOver the Rainbow, France - Perles & Co.  


Monday, July 20, 2015

Color Play

by Sherri Stokey


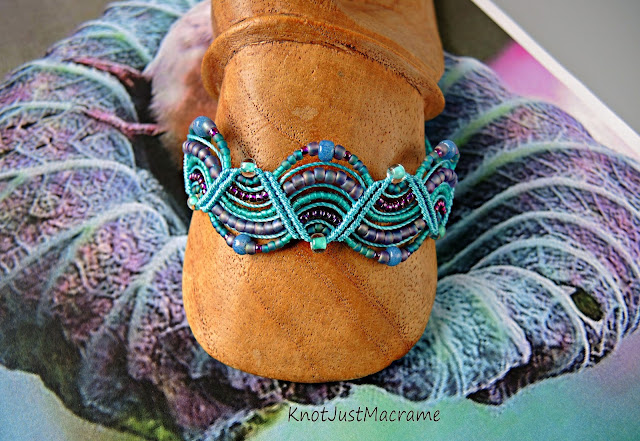
Have you noticed how many gorgeous pictures go scrolling by daily in your social media feeds?  Those photographs can be great color inspiration for design.  I loved the jewel tones in this one and pulled out beads and cord in aqua, lavender, orchid and slate blue, then started a design using the aqua cord and a mixture of beads.  (If you're trying this and are having difficulty pulling colors from the photos, there are some great sites online to help you with that like Kuhler and Color Palette FX.) 


Then I switched out the cord for orchid, but used all of the same beads.  It looks very different, don't you think?  


 Not only is the overall look different, but the individual beads even appear to be different colors.  That, of course, led to trying one more version with slate blue cord.


All of these pieces were inspired by that one photo and there are still many variations to be explored.  I could introduce a bit of the green into the mix or concentrate more on the pink tones.  I also see a ribbed texture and some webbing that would be fun textures to try to mimic.


Where have you been finding your inspiration lately?