Showing posts with label diy. Show all posts

Wednesday, September 16, 2015

Redneck Air Conditioner for Craft Fairs and Festivals

Carol Dekle-Foss
Hello everyone! For my very first post back in June of 2014 I promised I would share our crazy but fabulous handmade air conditioner, and here it is! I had scoured the internet looking for ways to keep cool during craft fairs and ran into the idea of making your own air conditioner. 
 My husband and I built it together using these genius instructions. There are TONS of tutorials out there on how to make them, but this guy beats them all with a built-in radiator!

Craft fairs and festivals can be challenging because you never know what the weather will bring. Torrential downpours, gusty winds, snowstorms, and even hot weather will clear out even the best of events. We try to combat the weather by using propane heaters for the cold and this air conditioner for the heat. It gets the customers attention and is a nice ice breaker. Also, it makes our tent cooler, so customers want to stay and shop longer! It also keeps my husband and I from passing out of heat stroke.

We just plug in the bilge pump and fan, add tons of ice and it lasts for a good couple of hours. Down the road we plan on investing in a heavy duty battery so we will be able to run all our gadgets and doohickeys without having to buy electricity.

So there you have it, our redneck air conditioner. I love it! So how do you combat the elements during outdoor craft fairs and festivals? I would love to hear your ideas!

Friday, August 7, 2015

A Micro Macrame Primer and Upcoming KnotAlong!

by Sherri Stokey

Do you ever see a beautiful piece of handmade jewelry and get depressed?  Not because there's anything depressing about the piece, but because you think you'll never be "good" enough to make something that lovely?  Well, stop that!  This is a no-whining zone and self pity is counterproductive.  

Don't get me wrong, I've been there.  It's an easy trap to fall into, but basically you have two choices:  you can either admire the piece for its artistry and purchase it from the person who has probably spent countless hours creating it (and possibly several years learning before that) or you can take a stab at it yourself.  
 
I'm curious and I'm from a background where I want to try doing everything.  I wallpapered most every room in my house back in the 80s, learned how to give home permanents, make candles and can tomatoes just "because".  As you can probably guess, not all were wise decisions.  

 
(She's still mad at me about that one, by the way.)  Luckily, I'm now at an age where I know my limitations and instead of taking that as a personal failing, I'm getting better at appreciating the talent of others.  Even if I could make a polymer clay lotus pendant like the one from Staci Louise that I used in this necklace, I would probably never get the feeling she has in her piece. And that's okay - it means Staci is doing something right!


If you decide you do want to try something for yourself, find a good tutorial or class and then go into it with the right mindset.  Learn for the joy of learning and you will leave with a greater appreciation of the artist's process, even if you never use the technique again.  And if you do discover something new that you love, that's even better!

So, for those of you who've made it this far in the post (and hopefully the others are over shopping in my Etsy store), I'm going to give you a micro macrame primer.   I'm going to cover the tools and materials you will need to get started with micro macrame, then I'm going to give you a couple weeks to round up your "stuff".  While you're doing that, I'll be busy writing up/recording a special beginner project for us:  the world's very first KnotAlong!   I'm going to meet you back here  in two weeks (on August 21st) for your first "class".

Are you ready, kids?  I can't hear you! :)


If you want to play along with my KnotAlong (and why wouldn't you?), you have two weeks to gather up these things.  I've added some suggestions for sources* to get you started.

  • Pinning surface:  You can use cork or anything that will hold a pin.  If you want to purchase a foam board, here are some sources:   Amazon, Art Beads, Etsy, Walmart, Fusion Beads
  • Fray Check:  Fire Mountain, Amazon, Walmart, my local Walmart carries this in the sewing aisle as do most fabric stores.
  • GS Hypo Cement:  Fire Mountain, Amazon, Walmart, Art Beads
  • Tex 400 nylon bead cord (I recommend C-lon or Superlon brand):  Bello Modo, South Pass Beads (they have Hypo Cement, too), Shipwreck Beads, Jewels in Fiber.  You will only need about 6 yards for our project, so you will have lots left on your spool for your next project.  Don't get hung up on the cord, either.  If you have some 1mm hemp on hand, it will work.  I don't recommend Rattail or other "slippery" cord.
  • Pins - straight sewing pins and/or T-pins:  can be found in fabric stores, the sewing aisle at Walmart, Michaels, Hobby Lobby
  • Scissors
  • Something to straighten cord (hair straightener, curling iron, regular iron, etc.)
  • Approximately 60 8/0 seed beads. Inexpensive craft store beads will work fine for this project.

You won't find a better time to jump into micro macrame than this.  Here's a peek at what we're going to make:


I might even sweeten the pot a little.  I'm thinking maybe a giveaway for those who participate...  So?  Who's with me?


*Sources listed are US suppliers.  Some others to try:  UK - Knotting Ways, 
Australia - Benjamin's Crafts, Over the Rainbow, France - Perles & Co.  


Wednesday, August 5, 2015

First attempt at making a silver sheet ingot

Carol Dekle-Foss
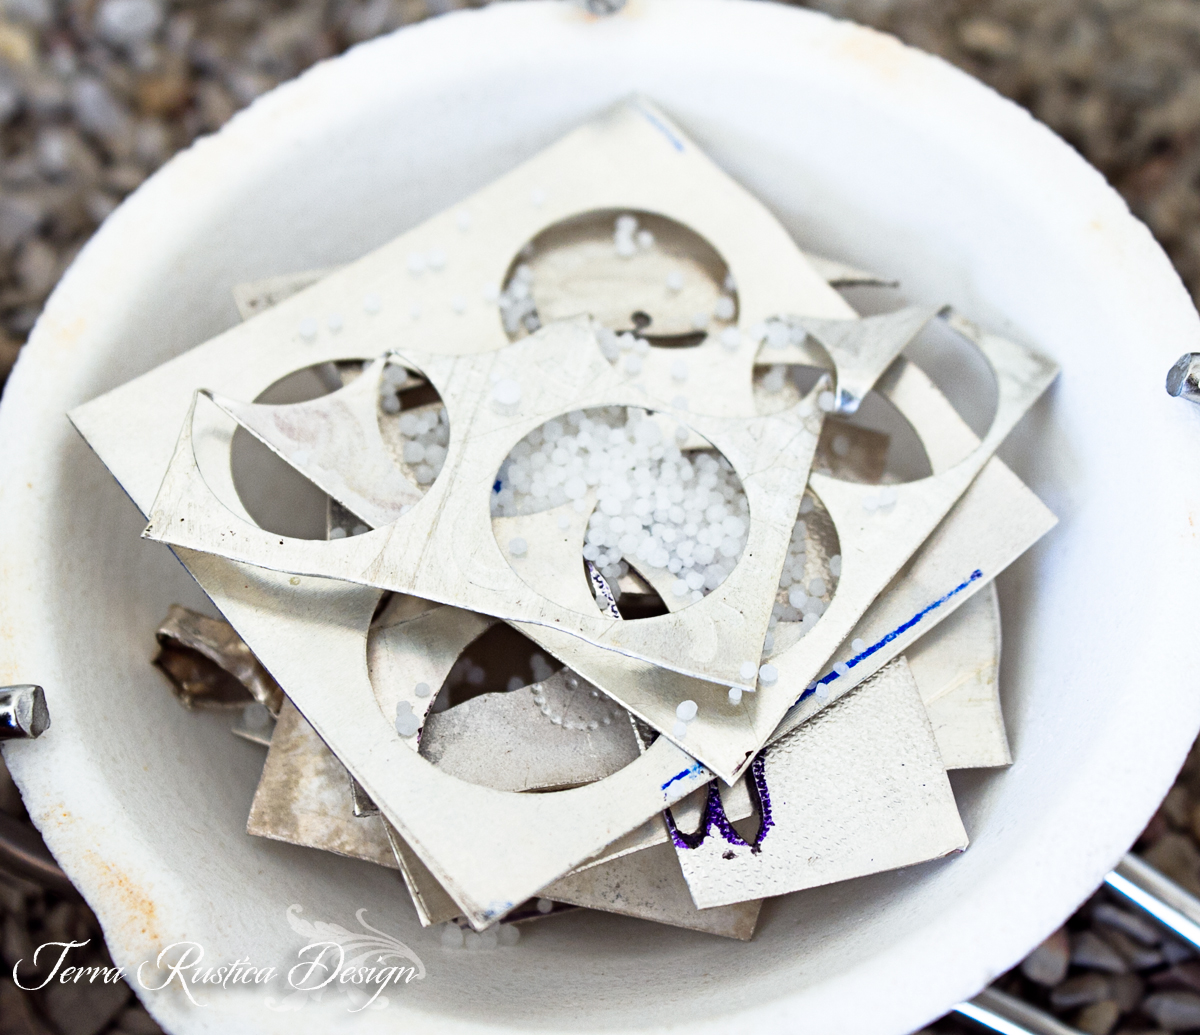
If you use silver or copper in your jewelry designs, at some point you will have to figure out what to do with your scraps. I've amassed about 10 ounces of sterling silver scrap and a MASSIVE amount of copper in about a 3 years time. It never appealed to me to turn in my silver scraps because I wouldn't be getting the amount invested in return. Especially now with silver prices so low and possibly dropping even more.

I've wanted to melt my silver into sheet ingots for rolling for awhile now, but honestly, I was too nervous. I had visions of it spilling and melting a hole in my toe! 

But.. I started thinking it's time. Time to do something with all the scraps I've accumulated and put them to use. So, with my husband taking pictures (making sure I don't burn the house down) I melted my first ingot yesterday! Yay! 

Here is how I did it and what I used. This is in no way a tutorial because I am still learning myself, but I wanted to share my results and a few things I learned along the way.

My supplies. 
The Ingot mold and Crucible I purchased at PMC Supplies on Ebay. I like the reversible one because you can make nice thick ring shanks. If you want to melt copper too, make sure you get the right ingot mold and crucible. 

Ohhh pretty flame. It's Photoshopped, I couldn't help myself! You get the idea though, you'll need a nice big beautiful flame!

The torch I use is a Smith Air/Acetylene torch, and for this project I used the #3 tip. 

First, I heated up the crucible and ingot mold. 
I then filled my crucible with a few pieces of silver and Borax. I guess Borax acts like a flux to help melt the metal quicker. After it started to melt, I added more pieces of silver.

Here we go!

When it started to get molten, I turned the crucible more to the side to get ready to pour. Anyone else see the creepy skeleton face?!?!!! WTH! Seriously. freaky.

And..pour quickly!

Ummm. yeah..epic fail. I poured too slowly and it created this interesting looking blob. Gotta pour fast!

I just reheated and poured again and got this. Much better. Although, I should have taken advantage of making the ingot shape smaller and it would have been a better shape. Oh well, next time!


So yeah..I made a boot. Hahahaha! That's okay, it's 20 gauge thick and will work well for backplates etc. Any suggestions on how to prevent cracking when rolling would be greatly appreciated. I did anneal it about 5 times. Maybe more annealing? 

What else have I been up to? I have a 2 day event coming up in September, so I have been preparing for that by making tons of earrings. 
I still have about 25 pairs to make, but here is what I've done so far.

I made these simple sterling silver earrings priced to sell at $18.00 each.  We will have to see how they do.

I then played with mixed metals and shapes by soldering together brass stampings to textured copper rounds.

I made these from some of my favorite ceramic beads my husband and I made.

I also played with a new shape and pattern for ceramic beads.

So that's what I've been up to! So what about you? Do you have tons of metal scrap just lying around? Have you ever done a metal scrap return? I would love to hear your thoughts.

Thank you for reading!

Wednesday, March 18, 2015

Make Your Own Clay Cutters-TUTORIAL

Carol Dekle-Foss
Yesterday, Staci Louise-Smith did a wonderful and heart-felt post about finding your creative voice and the importance of having cohesiveness in your work.  She also lists some very talented jewelry and bead artists who consistently nail the cohesive look.  If you haven't read it yet, be sure to check it out here, its a very positive and uplifting read!

As for my creative cohesiveness, well, it's a work in progress! I love to learn different techniques and while learning that technique I try and put my 'spin' on it. It's been so much fun playing with all the different mediums, and along the way I've discovered what I like and what isn't for me.

Right now, my latest love is with ceramic clay. Although, it was by chance how a kiln came into our home. Here's what happened. 

HUSBAND: I want to get a kiln.
ME: What, wait, WHAT?!
HUSBAND: Yeah, I never told you but I made a few things in high school. 
ME: Like what??? 
HUSBAND: An ashtray and a vase, but the vase broke. Yeah, let's get a kiln. I'd like to help you make beads and other things.
ME: Ummm. ok. (an hour later) Here's a nice new one on Craig's list, let's check it tomorrow. 
And, we bought the kiln.


I kid you not, that is how it went down in my house. My manly, truck driving, couch potato, adorable husband wants to play with clay. I'm really excited about this turn of events. I've been trying to get him more involved in the studio so we can do things together, so this is perfect! I will be sure to keep you posted on my husbands creative journey!  Unless there is a John Wayne marathon or some zombie movie on, I think he wants to start this weekend. 

 Ok, when making my very first pendants, I felt limited in what shapes I could create. I know there are places where you can buy cookie and clay cutters, but what's the fun in that?? I wanted the creative freedom to cut out whatever shapes I wanted, so I set to work on making my own cutters. These are the first three, and I'm sure tons more will follow. It's easy to get the hang of, and fun to do. Try it out for yourself!


Cookie Cutter Tutorial

WHAT YOU WILL NEED
Shapes. I cut mine out from a Silhouette Cutter, but you could also draw or print out your desired shape.

Copper sheet, I used 28g. I like the way copper work hardens and holds it shape. Plus over time it will develop that lovely patina.

File
Thread
Metal scoring tool
Needle nose pliers
Round nose pliers
Glue, I used Epoxy 330
Sharpie pen
Tiny clamps
Ruler
Metal shears
Sandpaper


Step One

Measure with string the length of copper that you will need, with at least 1/2" extra to be able to wrap around and glue.

Step Two
Score the length of the copper. The depth is up to you, depending on your designs and how deep you will need to cut out your clay. I made mine a little over 1/4" deep.


Now cut our your metal. Try not to stop too many times when you cut, because you will create burs that you will have to file later. I used my throatless sheer for this step, but you can also use metal shears.

Step Three

Oops, I forgot to take a pic of me filing the edges. You want to file the edges so there are no burs or sharp edges. Now run your fingers over the metal really fast back and forth. This helps straighten it and makes the metal soft and ready to be formed. 


Step Four

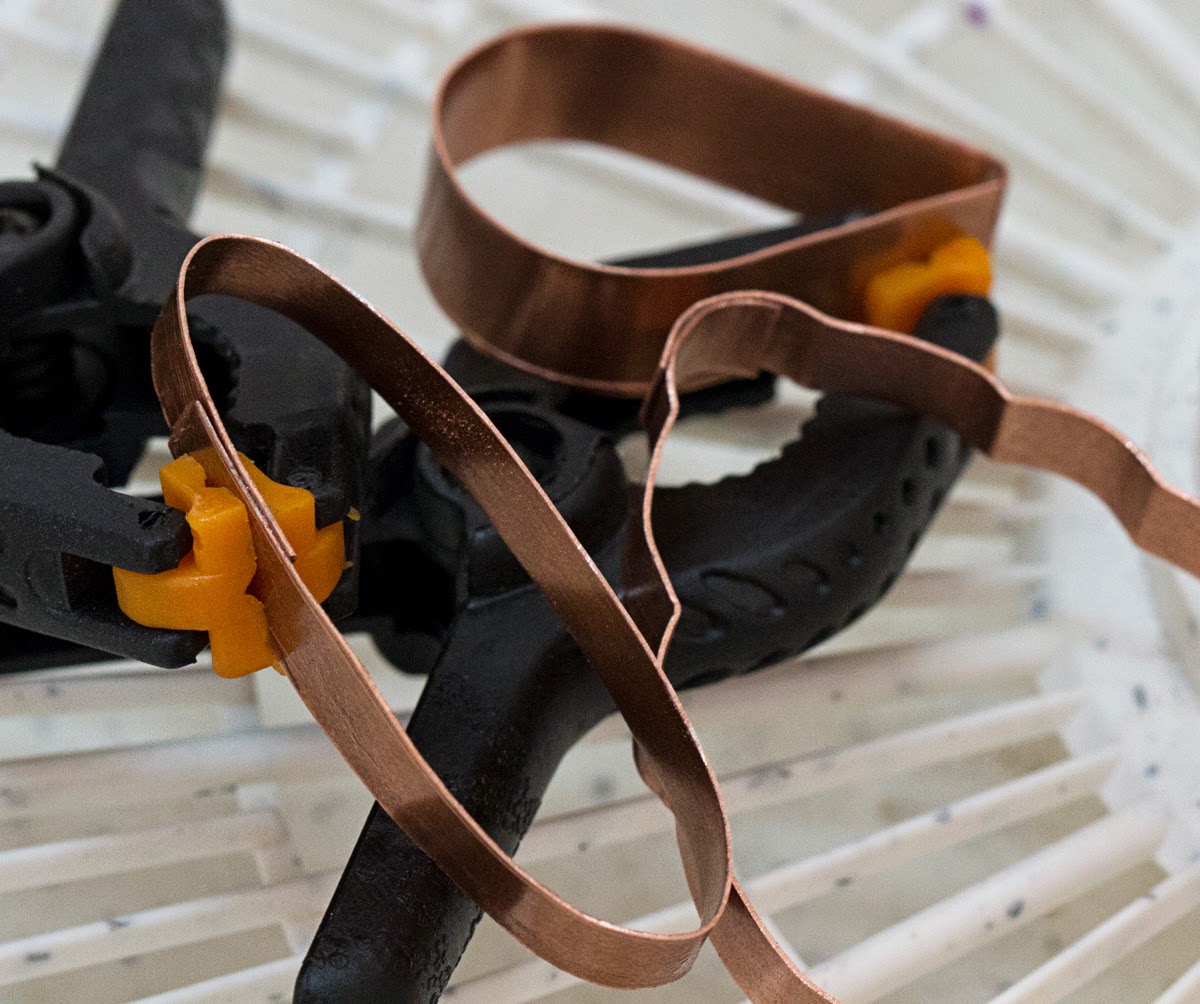
Now start forming the metal using the shape as a guide. I used my round nose pliers for the round corners and for the sharp corners, my needle nose pliers. Most of the time though, I just used my fingers to form the metal.


 I made plenty of mistakes, especially on this more detailed cutter. I just straightened with the needle nose pliers and started over. 


Step Five


At some point you want to sand the ends where the metal will be glued together. This is so there is some bite for the glue to hold. 


Mark with sharpie and then cut the end of the metal.


Press both ends tightly together with needle nose pliers to make sure there will be a good bond.


Step Six


Now glue cutter together and clamp tight. I couldn't wait for mine to dry so I left it in a food dehydrator for about 15 minutes.


Voila! Your very own, unique one of a kind cutters.


I am very happy with how these turned out, and look forward to creating more. I may even make some very special ones for holiday cookies! 

Thank you for reading, and I hope this tutorial helps you on your creative journey!

Wednesday, April 3, 2013

DIY Trendsetting: Leather Tassels


by Barbara Bechtel

Tassels are all around these days in jewelry trends.....Around last fall, I began making my leather tassels and today, I'm going to show you how!


My tassels are made of reclaimed leather, but after you try this easy technique, you'll see it's easily applicable to fabric or a vegan option like pleather or ultrasuede!

Product note: While you can purchase leather sheet from craft stores, I encourage you to source your local upholstery shop for leather scraps or purchase some leather that is reclaimed. My leather comes from Modern Fabrics, where I buy my leather. It is reclaimed leather from the furniture industry and this company purchases and resells it as it would otherwise end up in a landfill. For $20, you can get a whole box full that will last you for years making tassels and other things! Please note, you want the remnants...the other leather listed on their site is for full hides so that link is the one you want.

Supply List:
* Pieces of leather (about 2-3" x 3-4" pieces) They will be different sizes but depending on the thickness of your leather and the size/length of your finished piece, you'll want to gather a bunch of rectangles to play around! Start larger and work your way smaller as you gain confidence.
 
*extra tiny leather rectangles (about 3/8" x 1 1/2") for embellishing and making a loop.

* strong glue. (I use E6000) Make sure your glue is labeled to glue leather. This is a great reference for glue. I would not use a tacky or fabric glue as it will not hold.

*Sharp Shears (use a dedicated pair of long, sharp fabric shears) They will make nice, long straight cuts that will give you the nice fringe you're looking for here!

*metal ruler

*sharpie or marking pen

*wooden clothespins or clips (to hold your tassel while it dries)

*optional: waxed thread or linen and beads for embellishing.


I made this really high-tech diagram for you to see how you'll be cutting your fringe ;0)....You can mark all these lines with a marking pen if you're nervous. NOTE: The heavy black line above the dotted lines is for reference. You're not cutting this line. Normally, the dotted lines I freehand cut and the solid line I mark as a guide to make sure the fringe is even....but once you get the hang of it, you won't need to mark much.....

 Cut your fringe like above. Don't use tiny scissors! You want long SHARP fabric shears to make nice straight cuts.

This is the small tab rectangle you'll use to make the loop and will also form the core of your tassel. Fold this in half, securing it with a dot of glue at the base.

Place your loop at one end of the fringe, add glue and fold over. Draw a line of glue along the top edge and begin folding, taking care to keep the fringe, straight, tight, and even along the top.

Keep folding and adding glue and rolling....eh? starting to look very tassel-y.....

Once you reach the end, secure with a clothespin and let dry for several hours.

Practice making a bunch because it's fun and addictive!!!! Once dry, you can add another small rectangle around the outside of the top to add interest and a little extra security (as in the finished picture of my necklace above) or add a little strand of waxed linen (as in the grey tassel above).....


If you don't like to use leather, consider trying this with fabric, faux leather, or ultrasuede!

Let me know if you have any questions in the comments below! Enjoy!