Showing posts with label earrings. Show all posts

Wednesday, August 5, 2015

First attempt at making a silver sheet ingot

Carol Dekle-Foss
If you use silver or copper in your jewelry designs, at some point you will have to figure out what to do with your scraps. I've amassed about 10 ounces of sterling silver scrap and a MASSIVE amount of copper in about a 3 years time. It never appealed to me to turn in my silver scraps because I wouldn't be getting the amount invested in return. Especially now with silver prices so low and possibly dropping even more.

I've wanted to melt my silver into sheet ingots for rolling for awhile now, but honestly, I was too nervous. I had visions of it spilling and melting a hole in my toe! 

But.. I started thinking it's time. Time to do something with all the scraps I've accumulated and put them to use. So, with my husband taking pictures (making sure I don't burn the house down) I melted my first ingot yesterday! Yay! 

Here is how I did it and what I used. This is in no way a tutorial because I am still learning myself, but I wanted to share my results and a few things I learned along the way.

My supplies. 
The Ingot mold and Crucible I purchased at PMC Supplies on Ebay. I like the reversible one because you can make nice thick ring shanks. If you want to melt copper too, make sure you get the right ingot mold and crucible. 

Ohhh pretty flame. It's Photoshopped, I couldn't help myself! You get the idea though, you'll need a nice big beautiful flame!

The torch I use is a Smith Air/Acetylene torch, and for this project I used the #3 tip. 

First, I heated up the crucible and ingot mold. 
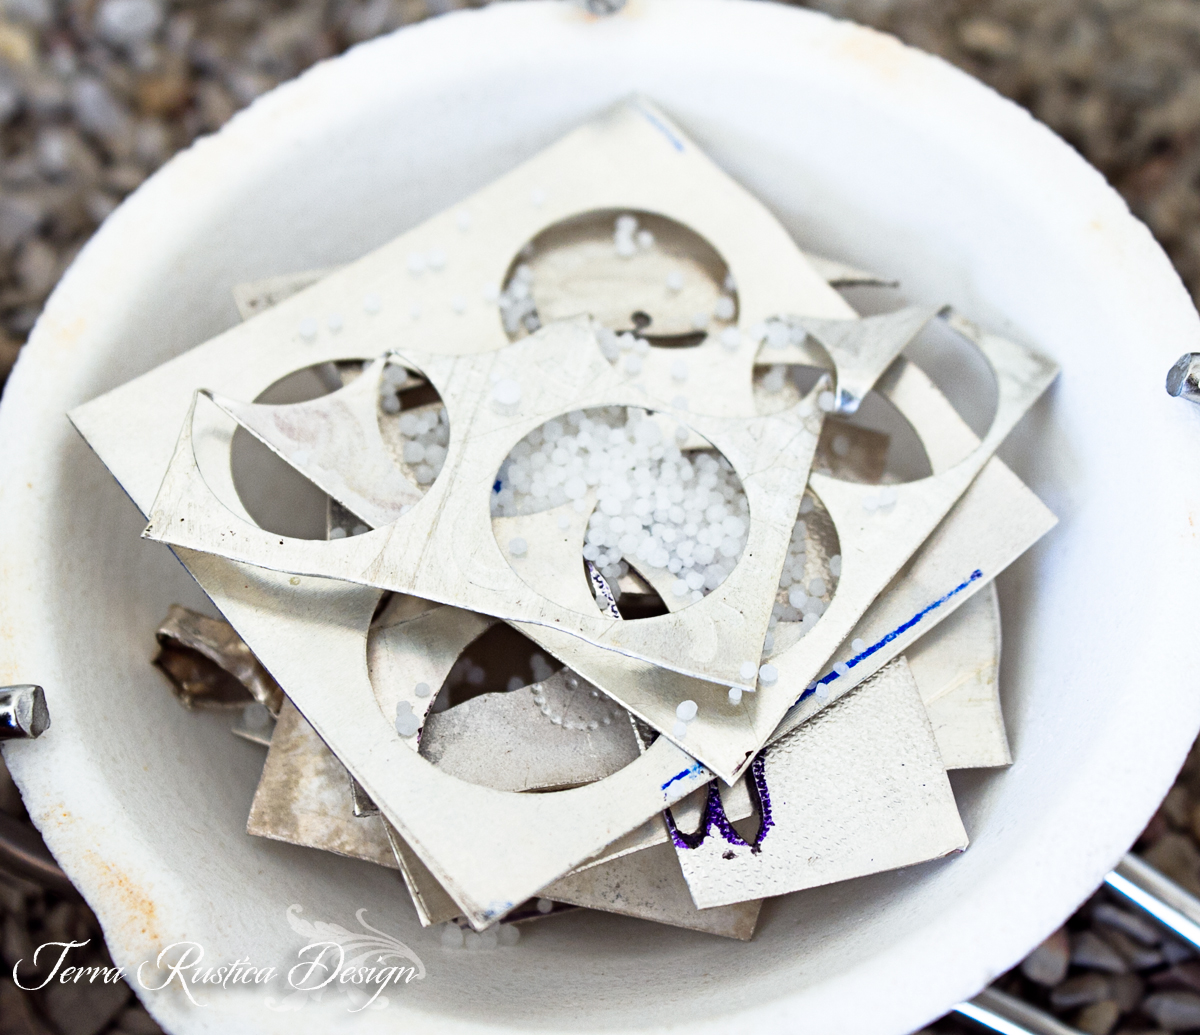
I then filled my crucible with a few pieces of silver and Borax. I guess Borax acts like a flux to help melt the metal quicker. After it started to melt, I added more pieces of silver.

Here we go!

When it started to get molten, I turned the crucible more to the side to get ready to pour. Anyone else see the creepy skeleton face?!?!!! WTH! Seriously. freaky.

And..pour quickly!

Ummm. yeah..epic fail. I poured too slowly and it created this interesting looking blob. Gotta pour fast!

I just reheated and poured again and got this. Much better. Although, I should have taken advantage of making the ingot shape smaller and it would have been a better shape. Oh well, next time!


So yeah..I made a boot. Hahahaha! That's okay, it's 20 gauge thick and will work well for backplates etc. Any suggestions on how to prevent cracking when rolling would be greatly appreciated. I did anneal it about 5 times. Maybe more annealing? 

What else have I been up to? I have a 2 day event coming up in September, so I have been preparing for that by making tons of earrings. 
I still have about 25 pairs to make, but here is what I've done so far.

I made these simple sterling silver earrings priced to sell at $18.00 each.  We will have to see how they do.

I then played with mixed metals and shapes by soldering together brass stampings to textured copper rounds.

I made these from some of my favorite ceramic beads my husband and I made.

I also played with a new shape and pattern for ceramic beads.

So that's what I've been up to! So what about you? Do you have tons of metal scrap just lying around? Have you ever done a metal scrap return? I would love to hear your thoughts.

Thank you for reading!

Thursday, May 7, 2015

Show Prep and Accepting my Limitations

by Staci Louise Smith


Show time has finally rolled around again.  

I think I almost always go into a show feeling somewhat unprepared.  I have notebooks of things I want to have made for each new show, and rarely get to finish them all.  Though I must say, I usually come pretty close.  People often say to me, "I don't know how you do it all, three kids and a business."  

My answer every time is, "I don't."  
Something is always not done.  I live with a half finished list, piles of laundry and dog hair filled floors.  I have projects that get back burner-ed in the studio all the time.

This year, I have had two extra months of no shows to prepare, and somehow, I am still not prepared for this show.  Life just keeps telling me, get out of the studio.  It seems to be one thing after another this year.  So, I am finally trying to listen.  I have been taking more time to rest, and to be with family.  I really burned myself out last year trying to do it all.

As a result, my list is not going to get done.  And though a small part of me is crying inside, dying to make all these new things in my head, the rest of me is actually ok with it.  

It is what it is.  My well being comes first, family comes first.  

I mean, it takes a month for me just to make all the components so that I can assemble jewelry.  A full component tray, with clasps and ear wires is a GREAT feeling.  It means I am almost ready to sit down and assemble things.  


(I also tried my hand at making large wire balls for beads- I love them and they will go so well with my style!)


I did get a bunch of new earrings made, which felt REALLY good.  


I also got a half day in the studio (after lunch and into the night with dinner and family time in between) to torch some metal and hammer things and make these rocking bangle bracelets.  I just love them.  Bracelets are never my strong point, so I tend to go with something different, like my leather cuffs, ect.  I have been itching to make bangles, and man, I am loving it.  Thanks to Maryanne, Karen for sharing different bangle techniques and getting my creative juices flowing. I am late to the bangle party!!!
(links to some great bangle posts)


and Patti's bangles have been very inspiring to me:


Bangles before finishing:

Bangles after fnishing


So, here is a little video mid-bangle production.  Messy studio, tools everywhere.....and I love it.  
(I am cranking some Cat Stevens, so you may want to turn down the volume.  I like to listen to Peace Train while I beat up metal....lol)


If you are local, my show is in Bethlehem PA this weekend.  Here is a link to the show info.  It is a beautiful town with lots of wonderful places to eat and shop and get a drink.  The show is full of wonderful artisans and artists as well.  I hope you can stop by!


Friday, March 29, 2013

Textured Earrings Tutorial

I wanted to put together a little tutorial using some metal chain that I had purchased from a garage sale last year.While looking around the house for something to use for texture, I came across it and wondered if the hoops would be hard enough to create texture with. It was. I probably should have annealed the 3/4" disc first, but didn't. As you can see, you can still texture without annealing; it just takes more work.

I hope you like them.....

Materials: 3/4" discs, 18 gauge wire (for jump rings), 24 gauge wire, ear wires, metal hoop (could be done without this), center punch, marker, hammer, bowl for water, torch, mandrel (disc could be held with pliers), hammering block, 1/4" tube, tube cutter (optional), 2 small beads.

1. Set your disc on the hammering block. Center the metal hoop.


2. Watching out for your fingers, gently hammer an indentation into the metal disc.


3. Punch one hole on the indentation.


4. Using the hole as your guide, make marks at 6 o'clock, 3 o'clock and 9 o'clock.


5. Continue to fill in the additional placements that you would see on an analog clock. Using your punch, lightly tap on each mark 4-5 times.


6. This is how it will look.


7. Turning punched side away, heat the disc with your torch.


8. Set orange hot disc in cold water. This step is personal preference. You can play around with how to get different colors. I'm not a pink kinda gal, so I kept experimenting until I got a color that I liked. As you can see, if you get it hot enough, adding the discs to cold water adds additional texture.


9. Having already cut your tube to 1/4" pieces (jump rings can be used instead), hammer them lightly until flattened.


10. Using premade 18 ga. jump rings, slide through disc and hammered tube.


11. Using 18 ga wire, make small hoop, slide through hammered tube and slide small bead on. Create hoop on top of bead.


12. Using 24 ga, wire, wrap hoops made on top and bottom of bead.


13. For the last step, I chose to experiment with Stacie's tutorial on adding texture to ear wire. I discovered that I still need a little practice with this. Also, darkening is optional. I used liver of sulfur for my final step to patina.

There you have it.... light weight and fun to wear.


As always, thank-you for supporting artists who create handmade with handmade.

MaryAnn

Friday, August 19, 2011

A Beginner Teaching a Beginner Tutorial....

by MaryAnn Carroll

So, I'm new to this enameling art and I've got to say I am really enjoying it.  What I think I like the most is that I can create pendant style pieces to coordinate with my ceramic beads.  I've decided to keep this a "semi" silent tutorial ;o)  ...one without words.....  one where I hope the pictures say all of the words.... 

If they don't, however, please feel free to leave a comment asking me anything that you have a question on.  I will be happy to answer asap.

The earrings....
They are reversible if you know how to switch around the ear wire.  If you like the side with a more solid color look like this....

or....  the backside like I prefer....
just simply reverse the ear wire and you have an entirely new set!

The style below is made in the same way, but I've kept this set closer to the actual enamel colors before I decided to use my artistic license with the torch ;o)


Let's get started....


I guess I will add a few words here for safety reasons:

Please keep in mind that the set up that I have include fire bricks which are the same bricks used to build my husband's wood-fire kiln.


Repeat until you get the desired colors.


Some smaller steps were left out.  Please feel free to ask if there is anything that you want to know. You can leave a comment and I will respond or contact me at artisanbeadsplus@gmail.com

Please check out the following sites for more about enameling:


Here is are a couple of great tutorials by Barbara Lewis:


~thanks for reading~

MaryAnn