Showing posts with label #handmadejewelry. Show all posts

Friday, December 4, 2015

8 Tips to Improve Your Jewelry Making Skills

by Sherri Stokey

Perhaps I should clarify:  even though I've titled this piece 8 Tips to Improve Your Jewelry Making Skills, please don't stop reading if you don't make jewelry.  Most of these tips (if not all) can apply to other crafts as well.  Either way, I've put a lot of thought into this article and since you're already here anyway, you might as well finish reading it.  Plus it's good manners.  If you get to the end and feel I've wasted your time or you don't agree with me on one point or another, you can always leave a comment and give me a piece of your mind.  With that out of the way, let's get to the list.  


1.  Practice!  Although we all like to think we are the 1% who can pick up something and do it perfectly the first time, it just doesn't work that way.  If you ask your most admired artists, they will tell you that they've come a long way and devoted a lot of hours to perfecting their craft.  Which leads us to #2...


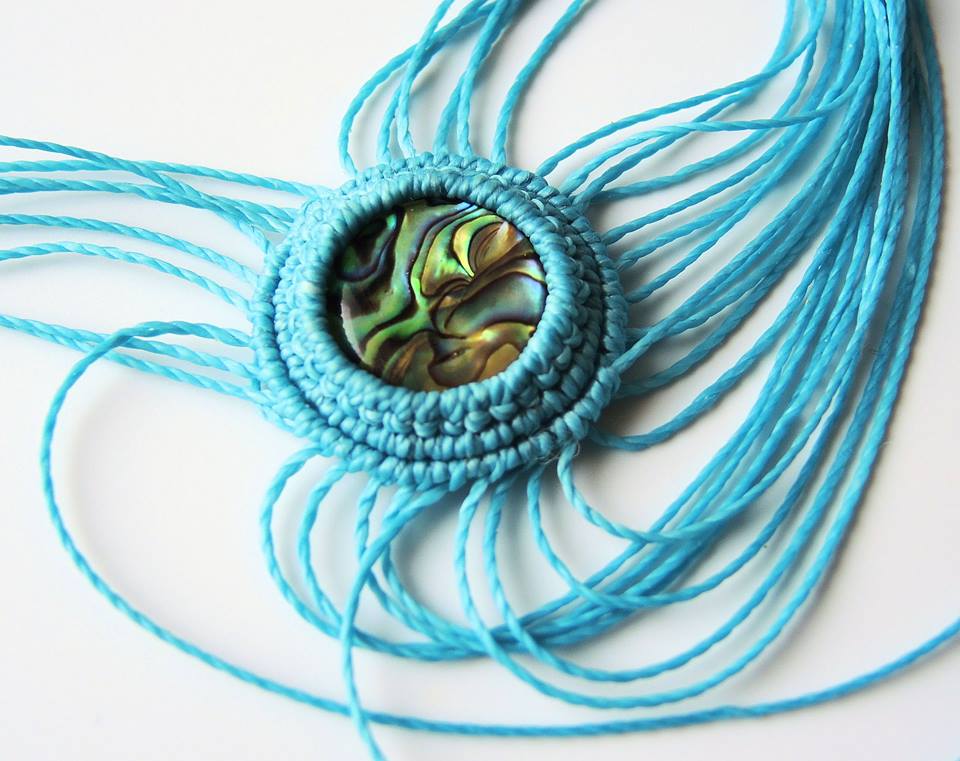
2.  Strive for perfection.   This one might not apply to every art equally, but in some mediums, like micro macrame, neatness counts.  It's all about keeping the knots even with the same tension, crisp corners and straight lines.  In other mediums it might be a matter of getting a smooth solder or a perfectly coiled wire.  Mediocre isn't good enough - strive to do the best work you can.  You won't get this one without #1 (practice).  Fact.


3.  Play!  #1 and #2 make it sound like making jewelry is drudgery and it couldn't be further from the truth.  Allow yourself time to play around in whatever way is fun for you.  Sometimes I like to goof around with random knotting just to see what develops and sometimes I like to try the strangest color combination I can dream up.  Just for fun.


4.  Take a class.  I had never been able to take a class until last year, and I thought I'd done okay for myself with the self-teaching bit.  And I had.  But when I had a chance to take a class I was really excited by the whole experience.  There's just no substitute for learning from someone who really knows what he or she is doing.  I picked up some great tips and got a fresh infusion of enthusiasm for possibilities I hadn't considered.  


Even if you live in the middle of nowhere like me, with no access to local bead shops or experts, there are online classes available. Although a live class is nice so you can interact with the instructor and other students, online classes have some strong points of their own: you can pause them, replay portions and tailor the experience to your own schedule without disrupting other students.  Whether live or recorded, classes offer you an opportunity to grow and develop your skills.


5.  Network.  Find a local group of like-minded enthusiasts or join an online community.  It's fun!  I belong to several groups on Facebook and I really enjoy them.  I love to see the different styles of  artists from all over the world. Plus, having a group of friends who have the same interests can be helpful if you get stuck.  Usually there's someone  who has faced the same issue you're experiencing , or at least someone who can offer some creative solutions.  It's also a great way to find inspiration, which leads to #6...


6.  Look for inspiration.  Whether you find inspiration by taking a stroll through the park or a hike in the mountains or a trip to the zoo, or something more sedentary like scouring the Internet, inspiration is there and free for the taking.  Clear your mind and take a fresh look at everyday objects.  Think in terms of texture or color or lines, then try to replicate even one part of that in the medium of your choice.


7.  Experiment.  Don't be afraid to fail.  Try something different - if you usually work with polymer clay, try your hand at micro macrame.  If you are a knotter, pick up a bead weaving tutorial and give it a go.  Try torch fired enameling (make sure the blinds are out of the way first and don't ask me how I know that).  The point is to step outside your comfort zone, color outside the lines.  Sometimes when you do that, it blurs where you thought your boundaries were and opens the door to some amazing things!


8.  Find your style.   It has taken me a long time to put my finger on what makes one piece fantastic and another mediocre, even when the two are very similar and I've finally boiled it down to one thing:  authenticity.  The whole point of art is to express yourself.  It's great to learn from a class or follow someone's pattern, but in the end, you need to find a way to make it yours if you want to take your art to the next level.  Find your voice and then sing like nobody's listening (cliche, cliche, cliche - but accurate).  Do you like no one else can!


Tuesday, October 20, 2015

More Peruvian adventures and giveaway announcement

Carol Dekle-Foss
Winner announcement at bottom of post

Did you think I was done boring you with Peru? Nope, not by a long shot. In fact, I just have to share with you my most amazing day! First of all, my son had one too many pisco sours, and the next day was nursing a classic Peruvian hangover. He was down for the count. Our day was supposed to be spent together exploring Lima's oldest district, including a stop at a mineral museum and a handmade marketplace so I could shop for cabs and beads. So let me ask you, would YOU venture out alone in a country known for express kidnappings of tourists to buy beads?? Would I? You betcha! Even the hotel manager looked a bit nervous as I explained my plans for the day.  Okay, maybe not the smartest move, but man did I have a blast! 

My first stop, Museo Andres Del Castillo.
This place has amazing specimens indigenous to Peru. The only problem is they don't let you take photos of the them. DANG! I wanted to share them with you! You can see a few on their website, and I added some to my pinterest board here. They have a gift store, so I bought these two as small ones as souvenirs.
Sphalerite and Rhodochrosite on the left and Azurite on the right. I could have stayed here all day, but I was on the hunt for beads and cabs! 

While making my way through Plaza De Armas, I noticed crowds of people huddled in corners with different music playing. 
I was able to capture a little of the entertainment for you. Keep in mind I was constantly looking around for would be kidnappers, so the videos are fair at best. They are short videos, less than a minute.

You have to see how she dances at the end of the video. So adorable! 

I love this ladies confidence. Are those mimes in the background? I have no clue what that was about.

My next stop, Centro Artesanal Santo Domingo.
 I was determined to find a cabochon dealer here.

Score! Right when I saw this place I realized I didn't bring enough soles. Damn! Still kicking myself for that one, but here is what I could afford.
Lapis Lazuli, Chrysocolla, Amazonite, Peruvian opal (my favorite), fluorite, and citrine cabochons. Umm..I need to go back. I found a few more stores after I left this one with even more cabochons. Anybody want to go to Peru with me??

Once the sun started setting I hightailed it to the bus and made my way safely back to the hotel. My loot safely tucked in my bra;)

Peru is so rich and steeped in tradition with symbols and colors that overwhelm and excite at every corner. There was one symbol that kept jumping out at me though. The crescent moon in this shape. 
I did some research on the moon related to the incas and they worshiped the Inca goddess, Mama Quilla, or mother moon. When the spanish conquered them in the 1500's and converted them to catholicism, they still included symbolism of her in their artwork. Such rebels.

Being a moon lover myself, I designed this necklace with Mama Quilla in mind.


Made with black onyx, peruvian opal, and one of my porcelain handmade cabochon moons. Listed here.

Finally, the giveaway announcement.
Congratulations Sharlyn Premuda, you are the winner! I will be contacting you on facebook for your mailing info.


Thank you everyone for reading!

Monday, August 3, 2015

There has been a death in my tool family.....


I have always been careful with my tools.  I am convinced I have a bit of OCD.  I actually clean my studio (well, clean is a relative term - I put my tools away) after every single work session.  That does not mean my studio is clean, but I cannot work without my tools, and if I am in the middle of something and cannot find one...I go a little ape!

Well, my bench vice was one of the very first tools I purchased YEARS ago, I believe from Fire Mountain Gems.  I knew the device was on the outs and I was just waiting for "it" to call it quits.  It's not an exciting tool by any means, but I use mine every single day.

My old bench vise - there is a lever on the side allowing me to turn the vice portion 360 degrees.
Well, I was twisting wire last week, and the lever that controls the swivel on the vise literally gave out on me.  I swear...I ended up on my backside on my concrete floor (thank goodness there were no cameras)!

The jaws on this old vise were rough. I covered them with painters tape each week, as the the jaws were practically gouging my metals.


I found, what I thought, would be a solution to the rough jaws, aptly named Soft Jaws.  


These are available from most jewelry supply stores, and, while the idea was great, they did not fit within the jaws of my vise.


I still used them when twisting wire, but that's all they were good for. Very cumbersome if they don't fit the vise, as I need the top to be flush! :)

I did lots of research before buying a new vise, and I selected this one.


I purchased it here at Amazon for $10 cheaper than a well known jewelry supplier (don't want to get in trouble here and mention the name!)  If only I had purchased stock in Amazon in the beginning - I swear I would be rich - my hindsight is 20/20...

Anyway, this vise is awesome!  There are removable soft jaws!!!!


Perfect for twisting wire - the ends stay smooth, instead roughed up from old vise.

Sorry for the blurry picture, but you get the drift!
The soft jaws also help to keep me from marring metal when I am fold forming.


Jump-ring cutting in process - a monotonous but necessary task!  I removed the soft jaws to securely hold the wooden dowel.


I prefer a clamp-style vise that I can place on a table of my choice.  My jeweler's bench already has my forming stakes and my Flexshaft permanently affixed - there is no more room for another tool! This particular bench vise has the option for mounting permanently to a table, as well (my old vise did not offer that option).

Lastly, this vise easily swivels 360 degrees - a feature that I need in my studio!

Tube cutting jig

Swiveled 90 degrees to securely hold my hole punch
No glamour/jewelry pics today.  But, without the tools...I cannot make the jewelry!  What about you...are there any tools that you cannot live without? (My list is long)!

Thanks for stopping by!!!