Tuesday, June 16, 2015

Time. Treasure It. By Karen McGovern

I don't know how to start this post. As I sit here I am fraught with anxiety because I am late.  I'm late to begin this post, I'm late to go grocery shopping, I'm late to feed my bajillion critters, I'm late FOR EVERYTHING because I don't have enough time.

Time.  TIME.  That elusive, ephemeral, intangible thing WE ALL STRUGGLE TO FIND. Sometimes I HATE time. I hate how fast it passes and how little of it I seem to have. I sometimes hate what my time is often filled with. Minutia, stress, RIDICULOUS PEOPLE. 

I also fear what time can represent. Age....UGH...mortality....UGH AGAIN. I think a lot about time these days--when I have the time to think.

There are upsides to the passage of time as well--don't get me wrong.  Wisdom (hopefully), focus, acceptance, tolerance, love, embracing ADULTHOOD (can I get another UGH here??).


I would like to think I am on the track to finding focus.  For me that means taking time, even when I don't think I have any, to be conscious of  what I do in my life. I try to remain aware as much as possible. WHAT THE HELL IS SHE BABBLING ABOUT, you ask? Well, it's hard to describe.  My close friends of a certain age (WE'RE ALL PAST 50, OKAY?) get what I'm talking about.  Self awareness. True self awareness. I'm working on it. I think it's reflected in my artistic life as well. I'm focusing on work that feels right to me, speaks in my voice. I'm not 1000% there yet, but I'm on the path. 

When I turned 50 I wrote this poem. Maya Angelou influenced, but how I felt in that moment, how I still feel. The words fit perfectly with a necklace I created for a photographer friend of mine. It features photographs of vintage nudes wrapped in steel. That's what we are as women--curves and beauty wrapped in steel. Some of us may feel caged, but we're strong...so strong. Central is a pendant with a crowned mirror, vials of affirmations feature throughout.

I'm almost on the verge of liking myself right now, and time, that elusive BITCH, is precious to me. NEVER feel the time you take to create is stolen or wasted. IT'S VITAL, it's the time that makes the rest of our lives fuller, makes us fuller as individuals. Take time. MAKE time. Appreciate time and EMBRACE time. You are worth ALL THE TIME IN THE WORLD.

I mean, seriously, it's not like we can dodge time....so I'm trying to befriend it. 


What age am I you ask?

I'm the age where I answer to no one but myself

I'm the age where the opinion that matters most is my own

I'm the age where my hair, my clothes and my body are configured, adorned and displayed to please only me

I'm the age where a great sense of humor and a strong sense of self
are a thousand times sexier than any muscle a man can flex

I'm the age where the people I love and choose to spend time with understand what that time is--

A GIFT

I'm the age where time has meaning and if you waste mine you have stolen from me and I will have none left for you

I'm the age where the brand, make and model mean nothing, but quality and craftsmanship mean everything

I'm the age where art is like breathing and I choose to breath deeply

I'm the age where I can weep for the world--and I do

I'm the age where I could choose to look away--but I don't

My age is a wave that carries me across time, and I'm riding the swell as long and as fast as I can

My age, in a word, is ENVIABLE.


Now, go make something AMAZING!

Monday, June 15, 2015

Giveaway Winner Announced and Progress with Texture

Written by Patti Vanderbloemen for Love My Art Jewelry

Thank you to everyone for leaving such lovely comments on these toggle clasps! I hope I have inspired you to create some of your own components, as well!


The winner of these two clasp is.... Kottage Kreations!!!  I just checked out her Etsy shop, and she does beautiful things with metal!!


Kottage Kreations, please send me an email (pattivan@verizon.net) and include your mailing address and these toggles will be sent to you ASAP!

************************************************************************
I am sticking with my theme of textures in this post. I have been practicing just a bit with the rolling mill and I am getting a bit deeper impressions on the copper! 


Now, I fully admitted to being a tool hoarder in my last post. Well, after I made a few 6" long pieces of textured copper, I set out to make some components to be finished with more tube rivets. Making the holes large enough for my copper tubing was cumbersome - lots of filing! I turned my head to one of the shelves sitting right next to my bench, and I remembered I had this large hole punch - I have had it for years and NEVER.USED.IT. Shame on me!


The link on the picture takes you directly to the RioGrande site.  But, Amazon.com has it a few dollars cheaper, too!

When I bought this, it was under $30 - I spent more than that on my Swanstrom punch! I remember the day I received it. I was such a newbie with metal - it appeared heavy and clunky. I tried it once and put it right back in the box where it has remained. It comes with 6 different punch and dies for making various hole sizes.  Well, the 3/32 size is nearly perfect for this size copper tubing to be used in tube rivets.


It is very easy to line up the metal with the intended placement of the hole.


The absolute best part of this tool (which is so simple to use) is the release of the metal, once the hole has been punched. I get frustrated when the metal gets "stuck" in my  "regular" hole punch (is this a user error???)  Just lift the top handle - it pulls the metal with it, and then it promptly releases. Three quick swipes of the hole with my round file, and I am ready for the rivet!


So pleased with the results! I made 12 connector tabs from one 6" length x 7/8" width strip of textured copper.

Lapis and Sodalite gems

I added just a slight curve to the tabs for added interest.


These tabs work great for earrings, too.

Sodalite gems

Turquoise gems
Lapis gems

Ancient Roman Glass Beads

I am thinking that a bracelet made with just the connectors would be lovely, too.

Have you discovered any new tools lately???  Please share!

Thanks so much for stopping by today!


Friday, June 12, 2015

BIG Displays.... small Spaces

by MaryAnn Carroll

So, the idea for this post came from my most recent request for my very talented husband Bill to make me a necklace display. We do shows together, but the space I have compared to his is very small. It works out since I teach full time, have work in galleries and am usually unable to make a ton of jewelry. The problem with a small space, however, is that .... well.... it's small.

As you can see in the first picture (not the best quality), that I have a small space in comparison to all of the pottery. My spot is next to Bill in the back. 


Here a a view that is a little better. As you see I have a small table and use the ends on the long tables. After many experimental displays (not that he's thrilled that my ideas are always evolving), I decided that the best use of space is to build up not out. 


Here is a necklace/bracelets display from the past. My original idea with the one on the left was to dangle necklaces and then put bracelets on the bottom. This design is much too big and also much too wide. It does not make the most of the space that I have. It is also too busy. On the right is my most recent. It is simple, tall, and a pretty good width. I get lots more out of it.


Then I have a had a few different earring displays. This one was designed to offer a rustic look. I guess the idea was okay, but the size was way too big. The paint for the colors came from colors that were in an issue of Belle Armoire magazine.


These next two are what I have used recently. The one on the right is okay, but I really don't like the space down the middle and it needs a different color paint. I'll keep it, but need to fix it up. The one on the left is what I typically use today. The earrings pop out more (which was the idea) and they slide off to the sides for easy storage when tearing down. I just slip this into a pillow case and wrap some rubber bands around it. It could probably use a better back drop, but I am not going to worry about that anytime too soon.


Here is a close up of how the earrings display and bracelets look together.


These little guys are for end spots. The sit up on the 2nd shelf so they are at eye level. I put a pair of earrings on there for scale.


Next is the issue with necklaces. Ughh..... I don't have any easy answers for that. I read that having pieces dangle always attracts people. There is truth to that. I do have a spot for my pieces to dangle from a piece of wood that juts out from one of the pottery shelves. I didn't, however, have a nice little display for how they might look when worn. Once again, after researching a little (I've gotten smarter about doing my homework first), I found some ideas that I liked. Bill assured me that he would take care of it.

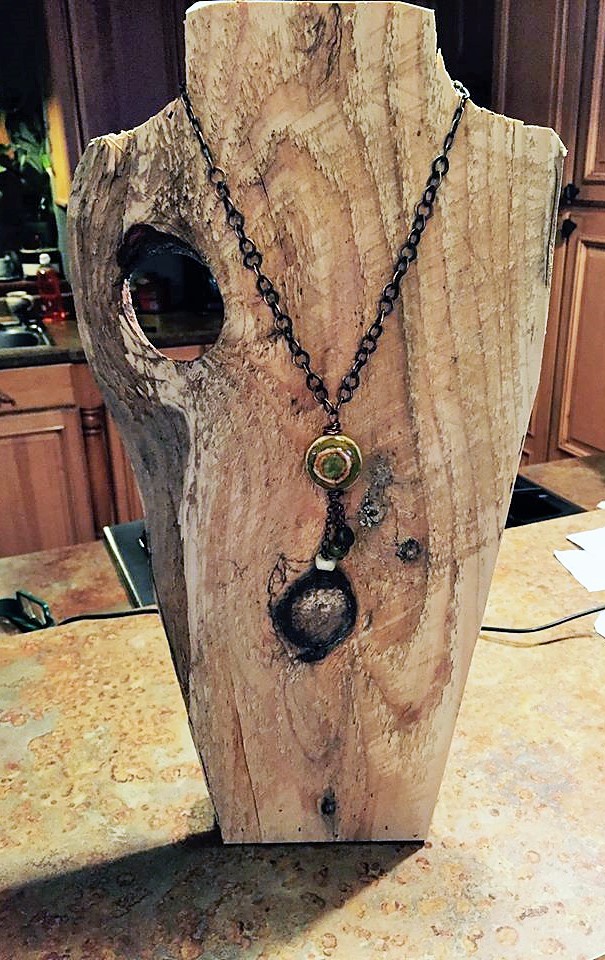
My request to him: Will you please make me a couple of tall necklace displays? I would like them made with wood with the least amount of grain that you can find so the jewelry pops out! I don't want anything that is too busy. He's retired so he told me he would make it while I was at work. I got home and this lovely display was sitting on the counter. I was a little taken aback!!


I did ask for a smooth piece of wood with little to no grain, didn't I? Now, this is a lovely piece of wood loaded with LOTS of character AND a big hole, but it wasn't quite what I envisioned. 

How do I approach this when he walks in the house?

"Thanks for making that for me, Bill. It's really nice. It has lots of character. Did you remember that I wanted one with little to no grain? 

Of course, he was put out and told me that he is constantly making and remaking displays for me! That was a dilemma because he DOES always make and remake when I come up with different design ideas. I really didn't want to say that it was not going to work.

so......................................................................................................................................................................................................................................................................................................................................................................................................................................................................................................................................................................................................


he headed down to the other room and...

SURPRISE!

He really did know what I wanted! I love him and them!!!

Now, THAT is more like it!!


My displays have evolved like my jewelry making has evolved.  It will probably continue to and maybe three years from now when I retire from teaching I will need a bigger space!

In terms of displays, this my favorite. People are drawn to it as it is tall and almost to eye level. This is built from the largest dowel I could find at Lowes.


And I still like this. It is going on the second summer of shows. I can bend the tubing to fit the earring length.


 And here is one necklace display.I have one for each table end. This show was in the backyard of a home at Westcott Art Trail in Syracuse. 


The other along with my piece of wood to dangle necklaces off of. I probably should have hidden my jacket and plastic work box for the picture!


So, that is a sampling of what I have used. It is not a complete list since I have used pieces of logs for bracelets and some other experimental ideas that didn't work out.

How do you handle your display area? What works best and what have you tossed to the curb?


Thursday, June 11, 2015

Making Mechanics Part of the Design

by Staci Louise Smith

Design is by far my favorite part about making jewelry.  I get excited when I have a bunch of items I'd like to see together, and the challenge is to put them together in the most appealing and eye pleasing manner.

The possibilities of this mess excite me!!!!

Sometimes during this process we are thrown curve balls- there are connections and mechanics that have to happen to make things solid, and hold items together, and the challenge is to make them look like an intended part of the design instead of a connection or an afterthought.  

I could probably find a million great examples, but I will focus on a couple, since this is what I was doing in the wee hours of last night as I prepared for my upcoming show.

I really wanted to use up some of my extensive bead stash on the pendants and focal arrangements I had laying out on my desk.  However, I did NOT want to use the dreaded Beadalon and crimp beads.  So, I once again grabbed my irish waxed linen.  One of the reasons I have not stuck with using the cording is because I have no idea how to finish it and make it look nice.  I would always tie small knots or add one or two beads at the end and tie it, and it never looked right enough to me.  So, I thought I would try to incorporate the ends into the design itself, the way the Kristin Oppold of Yay Jewelry does so effortlessly.  

Here are some samples of Kristin's work!!!!  She has really created a signature style for herself using cording!


I love how she has taken those ends and made them into the design itself.  So I tried it out too, and I love the results.

First up, I had two of my choker style focals laid out and wired together.  I wanted to do gemstones instead of chain, so I got out my linen cord and went to town.  On the first one I even added extra dangles on one side, to accentuate the asymmetry of the piece.


One this one I just left the single dangles on each side. (plus the chain dangle I added)

Then I came to the next two pieces I had to string up.  They were trilobite polymer pieces that I had riveted to a copper backing, and were awaiting completion.

The two on the left

These were a little more challenging to use the cording on, but I really wanted to use my new sea urchin spines with them, and I they way they stuck out the sides, it definitely needed more dangles around the focal for balance.  I was starting to get the hang of this cording stuff, and, I was really enjoying the little details and textures it adds, since I usually work in bulking wire.


When these were all said and done, I was thrilled with them.  They have such a nice feel to them.  It was a lot of work though, I had no idea all these tiny details took so long!  (Hats off to you Kristin!  that's a lot of knots and tiny composition to work out)

Then I got to thinking about my trilobite focal pieces...........and I realized that the rivets that hold those together became part of the design as well.  I started using ball rivets on my polymer pieces for a few reasons, the first is decorative.  When I rivet my pieces together, I try to use an arrangement of rivets that compliment the design as well.  And so this blog post was born, we do it all the time, incorporate the mechanics of a piece into the design itself.....and I bet we don't even realize it.

So, it can be challenging, but really fun,  to find ways to make every part of your jewelry flow into the design of the piece.  It's what creates continuity, it's what makes people just want to look at it over and over, finding new details............and I don't know about you, but I love the challenge of it.

I don't plan to give up my wire work anytime soon (or ever....lol)  But I do love the option this gives me as well.  Thank you again to Kristin for the inspiration to embrace cording!!!!

Is there anything you have worked into your design out of necessity???  

Tuesday, June 9, 2015

where jewelry and small objects meet

mary jane dodd

mjd - 2014 offering bowl 

i've been pretty absent - i haven't felt like what i have been doing related to the blog - i mean, we have these powerhouse jewelry and component designers and makers. i had kind of wandered off down a spiritual and slightly bigger scale of working. 

mjd - 2014 sacred space

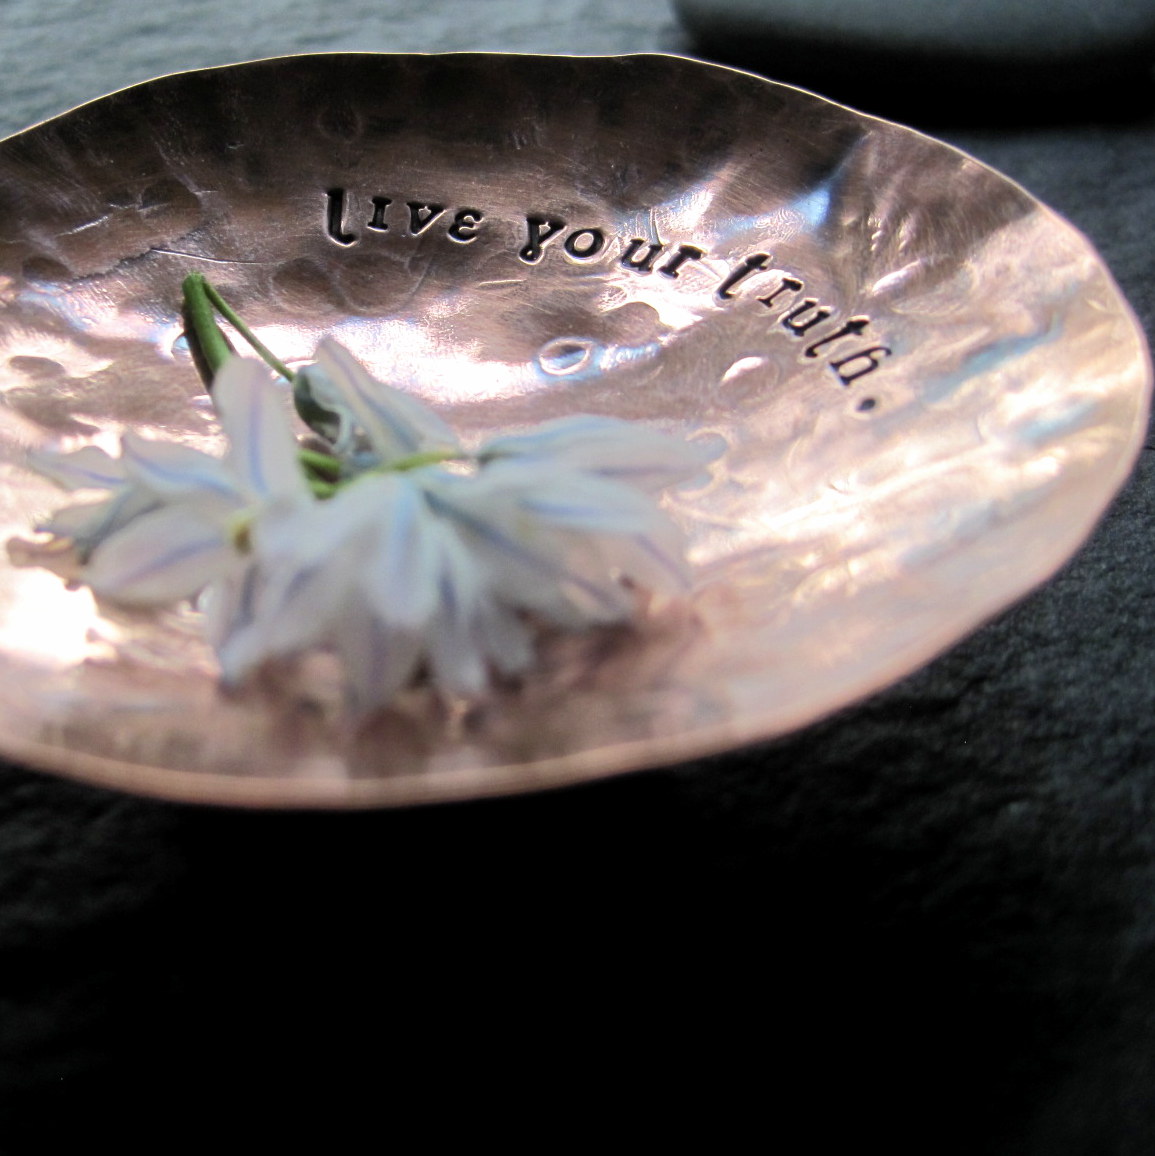
late last year i had a strong desire to make offering bowls - to use as part of sacred spaces. i am a firm believer that life is stressful and harried and we all need places to stop. to breathe. to be. whether they are religious or spiritual or not is up to you. 

at first, they had a short phrase, a mantra or something specifically requested.

mjd - 2014 offering bowls

mjd - 2015 bowl foot

they also filled my desire to make something on a scale larger than jewelry.

but that small scale used for adornment always calls - 

mjd - 2015 be still

and they got scaled down to use as the most portable offering bowls.

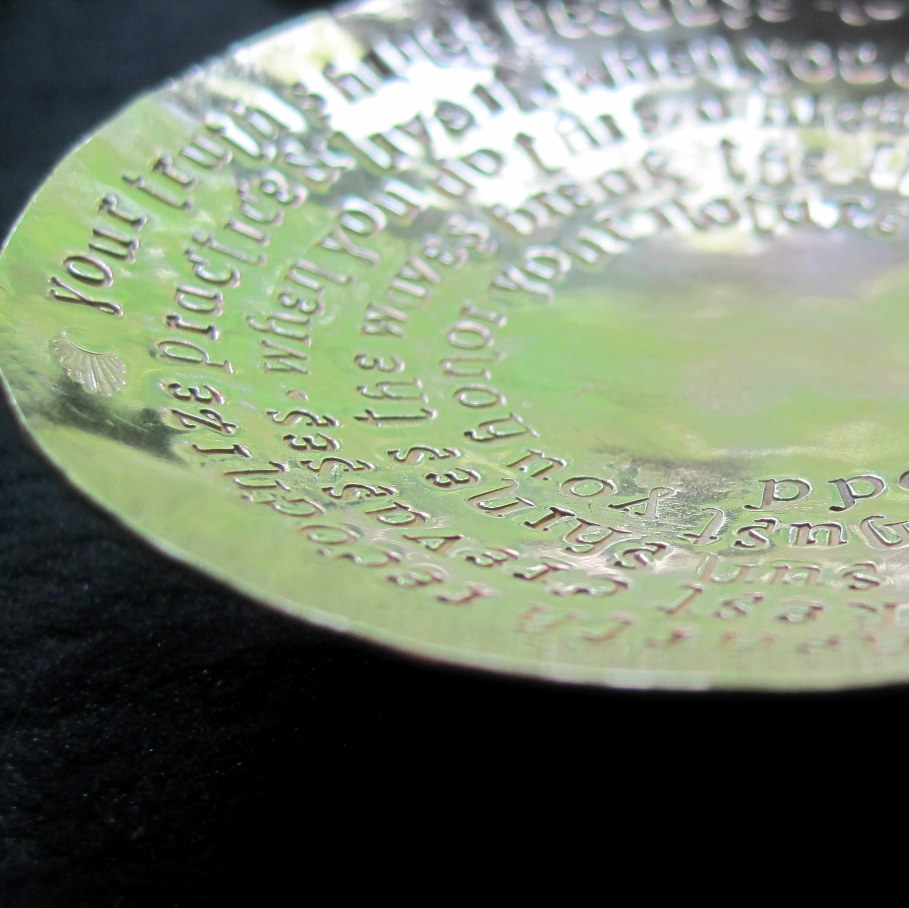
i was asked to use a full piece of writing in a bowl - and had gone up from my first ones in size a bit, so i set approx. 250 characters. 

mjd - 2015 live your truth

so the writing that went with 'live your truth' became this - 

mjd - 2015 offering bowl

mjd - 2015

and then the portable wearables followed -

mjd - 2015

foot

and the mats/pouches i put them in came into have matured as well.


what has been interesting is going back and seeing how things developed. i didn't foresee where i am now. and i have ideas for them being used on walls and such. 

this has been a rather new experience  - really sticking with something and working with it thoroughly. there is a lot to be said for the process. and i plan on continuing it. even though it may be boring for followers on instagram or facebook, it is rewarding. 

have you done any work that is larger than jewelry? or did you start as a different kind of maker and found yourself going to the smaller scale? 


Friday, June 5, 2015

Balance Between Weird and Wearable


by Staci Louise Smith


I have a constant struggle I face when my imagination takes over, and it is between weird and wearable.  I don't mind calling my jewelry weird, at times it really is!  And that is fine, because it is what I am going for.  

However, I am a huge stickler for making sure things are comfortable and wearable.  I understand that what may be comfortable for one person may not be for another, and so I try to make a variety of sizes, shapes and materials to suit many different styles.

However, there are more days then not when my heart screams "Bigger!  Weirder!"
and then my head must say no.

One of the times I ran with it was for this piece, my Frida piece that was made for the Art Bead Scene monthly contest (create a piece of jewelry using art beads that is inspired by the painting they designate)........
(Here is the latest challenge for June challenge http://artbeadscene.blogspot.com/2015/06/june-monthly-challenge.html)


I am happy to say it is wearable- but not so comfortable (by my standards....I mean, nothing pokes you or anything, but you cannot wear it without knowing its there!).


I loved the design though, so I later created this necklace, a spin off the thorns.  It ended up being much more comfortable and wearable.  


It felt good to be able to indulge both sides of creative spirit.  I am hoping to allow myself some more of these BIG and Weird pieces, and then challenge myself to make spin offs that are more wearable.

Another example is my Bead Dreams entry, Earning my Stripes


It was made for the competition, so it needed to have that POW!  So I went huge with it.  Here is a picture of it on the bust (with my ribbon- my pieces took second and third in polymer clay- total brag moment)

The displays are 18" high!  So you can get an idea of how big the pieces are.

So, I created a couple of these necklaces, much more wearable, similar idea- bold and big, but comfy too


My Carved piece, Ta Moko is gigantic, 
it comes to my belly button!!! 


 So made a few short necklaces that still had that carved look and some real chunk to the beads


So that is it, my constant struggle between over the top and wearable.  I am enjoying these contests and such, that allow me to make more of an "art" piece, and then spinning off onto wearable pieces from that.

Do you have a heart vs brain topic that cramps your design style?  

Have you learned to allow them to work together?