Showing posts with label hammer. Show all posts

Saturday, March 23, 2013

What kind of Metal can I texture?

by Staci Smith

This was the first question I asked when buying my metal supplies.  I remember how shocking it was that you could use 24 gauge metal and it wasn't paper thin.  I was thinking in wire terms, and thought it would be frail and thin.  Now, the number gauges run in the same way wire does, smaller number, thicker gauge, but they certainly feel very different.
 
So I thought I'd give you a little information on metal sheet.
 
The most popular metals are sterling silver, copper and brass.  I highly recommend starting with copper.
 
Copper is softer then brass, and cheaper then sterling silver.  So it works easy, and if you make a mistake, it's not a devastating financial loss like it would be with sterling silver.


When you go to buy sheet metal, some places sell set cuts- like 3x6" or 6x12".  Others (like www.thunderbirdsupply.com) let you choose your own cut size.  This is handy to know depending on what you plan to do.
 
For example, at Thunderbird, you can order 10 pieces cut at 2x7.5" if you are planning to make cuffs (not sure what cuff standards is, I just picked that measurement at random)- they are pre-cut to the size you want.  They also have the option of set sizes.
 
Another thing to consider when ordering or buying sheet, is how you plan to cut it, and what you want to use it for.  26 gauge is very thin, very lightweight and easy to manipulate.  This is great for fold forming items that may be used in earrings.  I also use 24 gauge often for earring designs so they aren't too heavy. 
 
If you need something to be sturdy and unbendable under stress, you want to use a thicker gauge, 22-18 gauge.  Keep in mind how you plan to cut these sheets.  You can only use metal shears up to 22 gauge (usually).  So if you need thicker metal sheet, you will need to saw it.
 
I have ordered the standard large sheets of metal 6x12" and I found them too bulky to work with.  I don't have a quick way to cut them down, so it's been awkward to work with them, which I why I like to customize my sheet size.
 
I hope that helps with some questions you may have on buying sheet metal.  For a beginner, especially for our Metal texture Boot Camp, I highly recommend copper.  It cuts and stamps like butter!
 
We can't wait to see what you guys are working on.  Remember- the blog hop is April 8th.  On that day, you will be able to link up to our site.  Happy hammering.


Monday, March 18, 2013

Boot Camp: Alpha-Texture

by Staci L. Smith

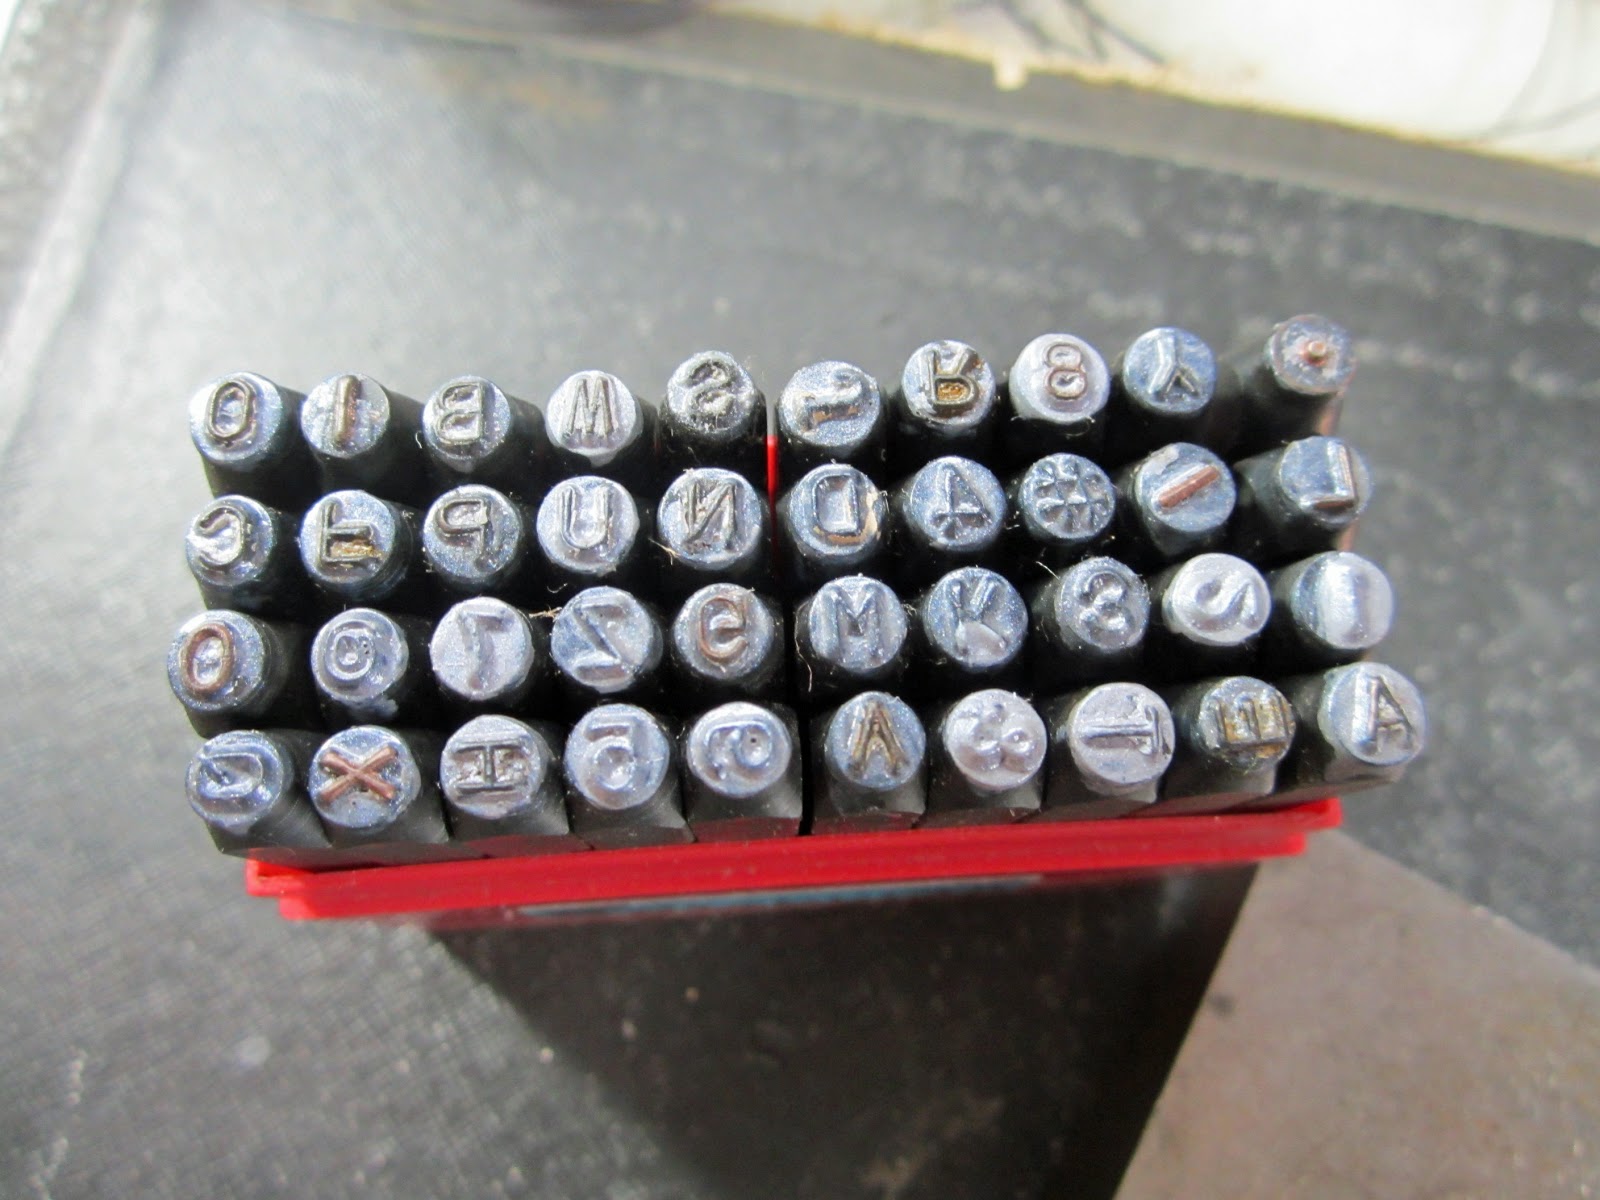
I think that when people decide to try out metal stamping, the first thing they buy is a set of letters.  I know I did.   I got this very basic set ages ago. It's capital letters, and numbers and a few symbols.  I didn't use it very much for letters though.  I'd like to share with you some of my favorite ways to use my letter to make patterns and textures on metal.  Remember- using letters as letters is NOT part of this challenge.

Here are my stamps, very basic.  I think I got these at Cool Tools many years ago.


Here is the hammer I like to use for stamping.  It's shorter, which gives me good control, (I hit my finger a lot less) its heavy, and its cheap, so I don't care if it gets marred from striking the steel stamps.  I got this one from Melinda Orr of Orrtec.


I took some discs I had lying around, they are made from about 24 gauge copper sheet.  Then I took my capital letter I.  In this simple set, it is just a straight line, and I use it a lot!


I hammered it over and over in some random patterns to create a sort of trail across my disc.


Then I took my letter O.


And I filled in the gaps, randomly changing the direction of the O so it gave it more natural look.


So using two letters, I created a kinda modern organic pattern on my metal.
 
Now we will get fancy. You can use a whole bunch of letters to make a really cool Boho like pattern.
 
I started with the period. I love using this as a dot texture.  I stamped it around the entire outside of my disc.
 

Then I did the same thing using my S going side-ways.  For the next inner ring I used the letter W.


After the W's were done, I took my letter X and stamped it, turned it on its side, and stamped it again in the same spot, to create these little star bursts in the center of the disc.


I thought I would show you one more thing I love to use as texture.  It's not an alphabet stamp, its my awl.  It's just a steel awl from the hardware store, sharp point on one end.  I use it with a rubber block, ILO a steel block to get the effect I want.
 
 
I hammer it hard into the metal (a brass strip this time).  It will curl as you do this, and that is fine. 
 
 
Then you can take your rawhide or rubber mallet and hammer it gently flat on a steel block.
 
 
I like it for the reverse side texture, with the bumps sticking up.  Sometimes I even break through the metal on purpose to create a rustic torn up effect.
 
Here they are, all done, I used Liver of Sulfur to antique the copper discs and then cleaned it off the high points.  It really brings out the textures that way.


If you didn't get to see Barb's post and video from last week you can view it here.
 
The blog hop will be on April 8th- so get those creative juices flowing.  Remember, we hope you will not only try to hand texture metal, but then, use it in a design, be creative with it.  Let's inspire each other!
 

Monday, March 11, 2013

Art Jewelry Boot Camp: Textured Metal Challenge

Welcome to our second Art Jewelry Boot Camp challenge of 2013.....Textured Metal!

For the next few weeks, we will be sharing innovative, inexpensive ways to texture metal by hand. There are plenty of wonderful options in a fully equipped metals studio for texturing metal and plenty of neat products out on the jewelry craft market these days for achieving wonderful textures and patterns, but we want to see what you can do with what you have!

Today, I'm sharing a video about different textures I've achieved with simple household materials...and some tips for getting you started on your texture journey!


HIGHLIGHTS/TIPS from the video:

*If you have "nice" hammers, keep them separate, so in your creativity, you don't use your good hammer for hammering, let's say a piece of wire or a steel screw!

*Keep your eye out in thrift stores and discount stores for items that will make interesting textures! Old hammers, screwdrivers, and other steel bits like steel window screen will fuel your creativity!!!! By that same token, don't use household tools that you would like to use again for their intended purpose! You (or your significant other!) will be really sore that you messed up a screwdriver to make texture next time you need it for a household task....

*Anneal your metal with a torch so it's nice and soft to receive the texture.

* Use an old bench block or anvil when texturing or hammering. After lots of texturing, your block or anvil will become dented and rendered a bit more useless if you need it for finer applications. I FLIP mine! One side is nice and smooth and shiny and the other is a bit pitted and dented from repeated texturing.


Our next Art Jewelry Boot Camp hop will be on April 8th! LET'S GET TO WORK, RECRUITS!!!! Remember to upload your lovelies to our Flickr group and remember to check out the rules if you haven't done so.


Remember, this challenge is about texturing by HAND. For the purposes of this challenge, we DO NOT want work textured by the following:

*Etching
*Sandblasting
*Rolling Mill
*Alphabet/symbol Stamping (unless you are using it in an innovative way to make fabulous texture)
* Textures from craft embossing machines

All these have their place and may be in a FUTURE challenge, they're just not for THIS challenge. :) Thanks!