What is cohesive?
How does that apply to jewelry?
First lets talk about finding your voice.
We all start somewhere. As we learn new techniques and try out new materials, our styles change and grow. Eventually, we find our voice. It should be the goal of every new jewelry / component designer out there. YOUR voice. Not someone else's voice that you change a little bit. Your's. Your's alone.
You may not think you have one, but you do, somewhere in there. And, you may be surprised to find it is totally different then the people you admire. I know I often admire styles that are just not me. When I started making jewelry, I went through many phases and tried many things that did not stick.
(I used crystals, shiny rainbow crystals.....lol. There is nothing wrong with that, but it was not me. At all.)
I don't' have many pictures from the early years, but I did a lot of symmetrical (gasp) gemstones on memory wire necklaces and such. Then I got into sea glass and I made what everyone makes with sea glass.


This was a custom order, it was very very glittery


Over time my sea glass jewelry started to evolve and change, and become more of my own voice. Below is what I was really wanting to do with sea glass.


It continues to evolve, but I think it still has that same feel that I did even back then.
Now- this is what my sea glass jewelry looks like.

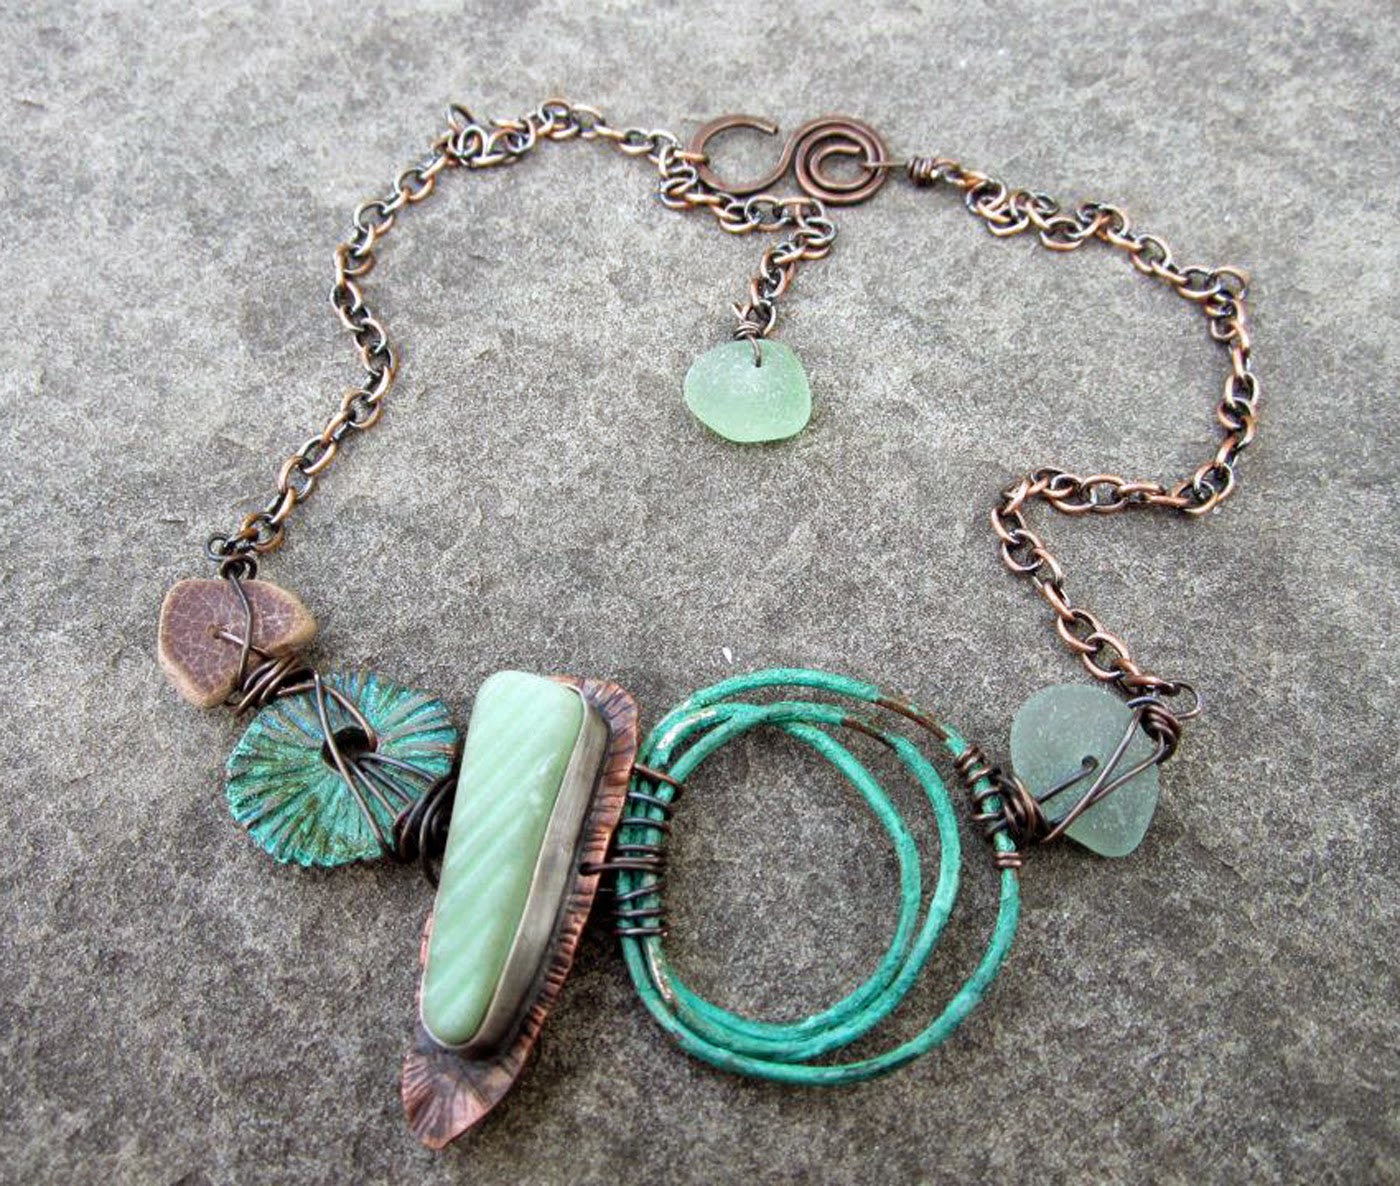


I remember how good it felt when I finally stopped making what I thought I should made, or what I thought would sell, and started listening to that funky rule breaker inside of me. I never thought they would sell. In fact, people told me, "oh, i like your necklace but I would never wear that". Well, I am glad I didn't listen to them, cause people are wearing them! It feels so good to create from your gut, from your heart!
Anyhow, when you are done laughing at my early work, we can move on (I know I do.)
I think many new artists are scared, they thing they don't have something special inside them, but you do. You have something as unique as you inside, and you need to allow yourself time to play so you find it.
It takes courage to grow up and become who you really are.
– Anonymous
I am really against jumping right into a business from the start, because I think until you have really found who you are, the business end of things- making things to bring in $$, keeping record, ect.....take away from that time you should be enjoying your art and learning and growing. Trust me, once you go fully into business, play time is greatly diminished.
I think many new artists are scared, they thing they don't have something special inside them, but you do. You have something as unique as you inside, and you need to allow yourself time to play so you find it.
It takes courage to grow up and become who you really are.
– Anonymous
I am really against jumping right into a business from the start, because I think until you have really found who you are, the business end of things- making things to bring in $$, keeping record, ect.....take away from that time you should be enjoying your art and learning and growing. Trust me, once you go fully into business, play time is greatly diminished.
Finding your voice is important for many reasons. The first being, why would you want to make what other people are making? There is enough competition out there in the jewelry world. What is going to get you noticed and have stay power, is being unique. Putting your voice into your work. Put a little bit of YOU in there, and people will see that. Since you are unique, your creative voice will be as well. Like a fingerprint.
Originality is a by product of sincerity.
– Marianne Moore
Originality is a by product of sincerity.
– Marianne Moore
Second you deserve to express yourself. Stop thinking you have to do what customers want, or what is popular or what other artists are doing. You are cheating yourself if you do not let yourself be expressed the way you need to.
He who trims himself to suit everyone will soon whittle himself away.
– Raymond Hull
Every time you don’t follow your inner guidance, you feel a loss of energy, loss of power, a sense of spiritual deadness.
– Shakti Gawain
He who trims himself to suit everyone will soon whittle himself away.
– Raymond Hull
Every time you don’t follow your inner guidance, you feel a loss of energy, loss of power, a sense of spiritual deadness.
– Shakti Gawain
Once you begin to do this, you begin to create from inside you, your work will be cohesive without too much effort.
cohesive: cohering or tending to cohere; well-integrated; unified:
cohesive: cohering or tending to cohere; well-integrated; unified:
a cohesive organization.
Now, when I go to a show and walk in a booth, or I go into an etsy shop, nothing turns me off more then when I can't get a feel for the artist in once glance. That is right, ONE glance. If I am online and have to look at picture after pictures, of styles that look like 10 different artists work, I am out of there. Same with a booth at a show. I will not take time shopping in a booth that has a little bit of everything. I go to an art show to find that something unique. I want to look in a booth and KNOW what that artists style is. I want to feel like I know who they are a little bit from their work. Are they edgy? Tough? Dainty? Soft spoken? Feminine? Innovative? Earthy?
I also want to invest in handmade, and that means, I want to invest in YOU. The artist, the maker. It is a personal thing. Art is personal. You put a little piece of you out there. And people who like, are people who "get it, they get you".
Being cohesive in your work only benefits you. You can still grow and play and evolve. I hope you never stop! However, everything you do will have your stamp on it, your little something....your spark.
Always be a first rate version of yourself, instead of a second rate version of somebody else.
– Judy Garland
Always be a first rate version of yourself, instead of a second rate version of somebody else.
– Judy Garland
I would like to share some shops that I think are great examples of cohesive. Shops where, everything they do, is totally their style, and I can spot it a mile away.
First up, Kristin Oppold of Yay Jewelry
 You can visit her shop here
https://www.etsy.com/shop/YaYJewelry?ref=l2-shopheader-name
First up, Kristin Oppold of Yay Jewelry
https://www.etsy.com/shop/YaYJewelry?ref=l2-shopheader-name
Another person, who despite growing immensely from just beads to metal work, has not lost her unique style, Nikki Z. of Love Root

https://www.etsy.com/shop/LoveRoot?ref=l2-shopheader-name
The last jewelry artist I would like to feature is Genevieve Williamson of Jibby and Juna

She is a polymer artist, and I never get tired of looking at her new work. It is so crisp and clean, yet earthy and soft. It marries modern and naturally wonderfully. Most of all, you can tell its one of her pieces every time she makes something new.
You can check out her work here
https://www.etsy.com/listing/172263998/oxblood-loop-wearable-sculpture-ring?ref=shop_home_active_13
and if her etsy shop is not open, you can view her work here
http://jibbyandjunablog.blogspot.com/
I think this also applies to bead makers as well. I also think it is very hard to do- to have a unique stamp that is yours in the bead world.
Two bead artists that stand out to me are Joan Miller and Lisa Peters
Joan Miller Porcelain is famous for her textures and glazing technique.
 You can find her work here
https://www.etsy.com/listing/226191473/set-of-six-colored-porcelain-beads-three?ref=shop_home_active_1
Lisa Peters Art has a way with artsy unique beads, and even as she makes new series and changes back and forth from raku to regular glazes, you know its her work

You can find her work here, and check out her shop
https://www.etsy.com/shop/LisaPetersArt?page=3
What I hope you take away, whether you are just starting, or you have been doing this for awhile now, is that having a cohesive look will benefit you. You will find "your people", your customers, who get your work, who love your work, and who invest in your work. And they will find YOU because they know at a glance, that you are their beady soul mate!
I leave you with one more quote....mine: "BE YOU, because you are worth being". -staci (lol) That has probably been said before....anyhow....
Have fun and happy creating!
You can check out her work here
https://www.etsy.com/listing/172263998/oxblood-loop-wearable-sculpture-ring?ref=shop_home_active_13
and if her etsy shop is not open, you can view her work here
http://jibbyandjunablog.blogspot.com/
I think this also applies to bead makers as well. I also think it is very hard to do- to have a unique stamp that is yours in the bead world.
Two bead artists that stand out to me are Joan Miller and Lisa Peters
Joan Miller Porcelain is famous for her textures and glazing technique.
https://www.etsy.com/listing/226191473/set-of-six-colored-porcelain-beads-three?ref=shop_home_active_1
Lisa Peters Art has a way with artsy unique beads, and even as she makes new series and changes back and forth from raku to regular glazes, you know its her work
You can find her work here, and check out her shop
https://www.etsy.com/shop/LisaPetersArt?page=3
What I hope you take away, whether you are just starting, or you have been doing this for awhile now, is that having a cohesive look will benefit you. You will find "your people", your customers, who get your work, who love your work, and who invest in your work. And they will find YOU because they know at a glance, that you are their beady soul mate!
I leave you with one more quote....mine: "BE YOU, because you are worth being". -staci (lol) That has probably been said before....anyhow....
Have fun and happy creating!


