Monday, March 30, 2015

Boot Camp: Fiber in Jewelry

by Staci Louise Smith

Well, we are finally going to get some boot camps in again!  Boot camp is a time when we, as a group, concentrate on one area of jewelry making or design.  We bring you ideas, tips, resource links and tutorials to help you try out a new area of jewelry making.

This one is on fiber in jewelry or fiber jewelry.
You can see a Boot Camp post the 2nd and 4th Monday of both April and May, as well as scattered through the month on personal posts.  

I first fell in love with fiber for jewelry way back when I was making mainly sea glass jewelry.  I went to a bead show and found Marsha Neal's silks.  I was smitten.  I ended up coming home and ordering from her online.  I was hooked on the variety of colors.  


I have never stopped loving fiber in my jewelry.

I thoroughly enjoy the softness fiber can add to a piece- it adds a softness and contrast against the hard beads.  

We will be sharing lots of ways to use fiber in your jewelry, as well as showing you some of our favorite places to buy it!  Fiber in jewelry is not limited to cording!  That is just what I have always been drawn to.  

We cannot wait to have you join us as we explore this medium.

Here are some teasers of my favorite fabric cording to start you off drooling, or in case you want to get some so you have it to try out as we go along!
I love the rustic look of recycled sari silks.  This is my favorite go to shop

Marsha had me at hello- and I am still a fan


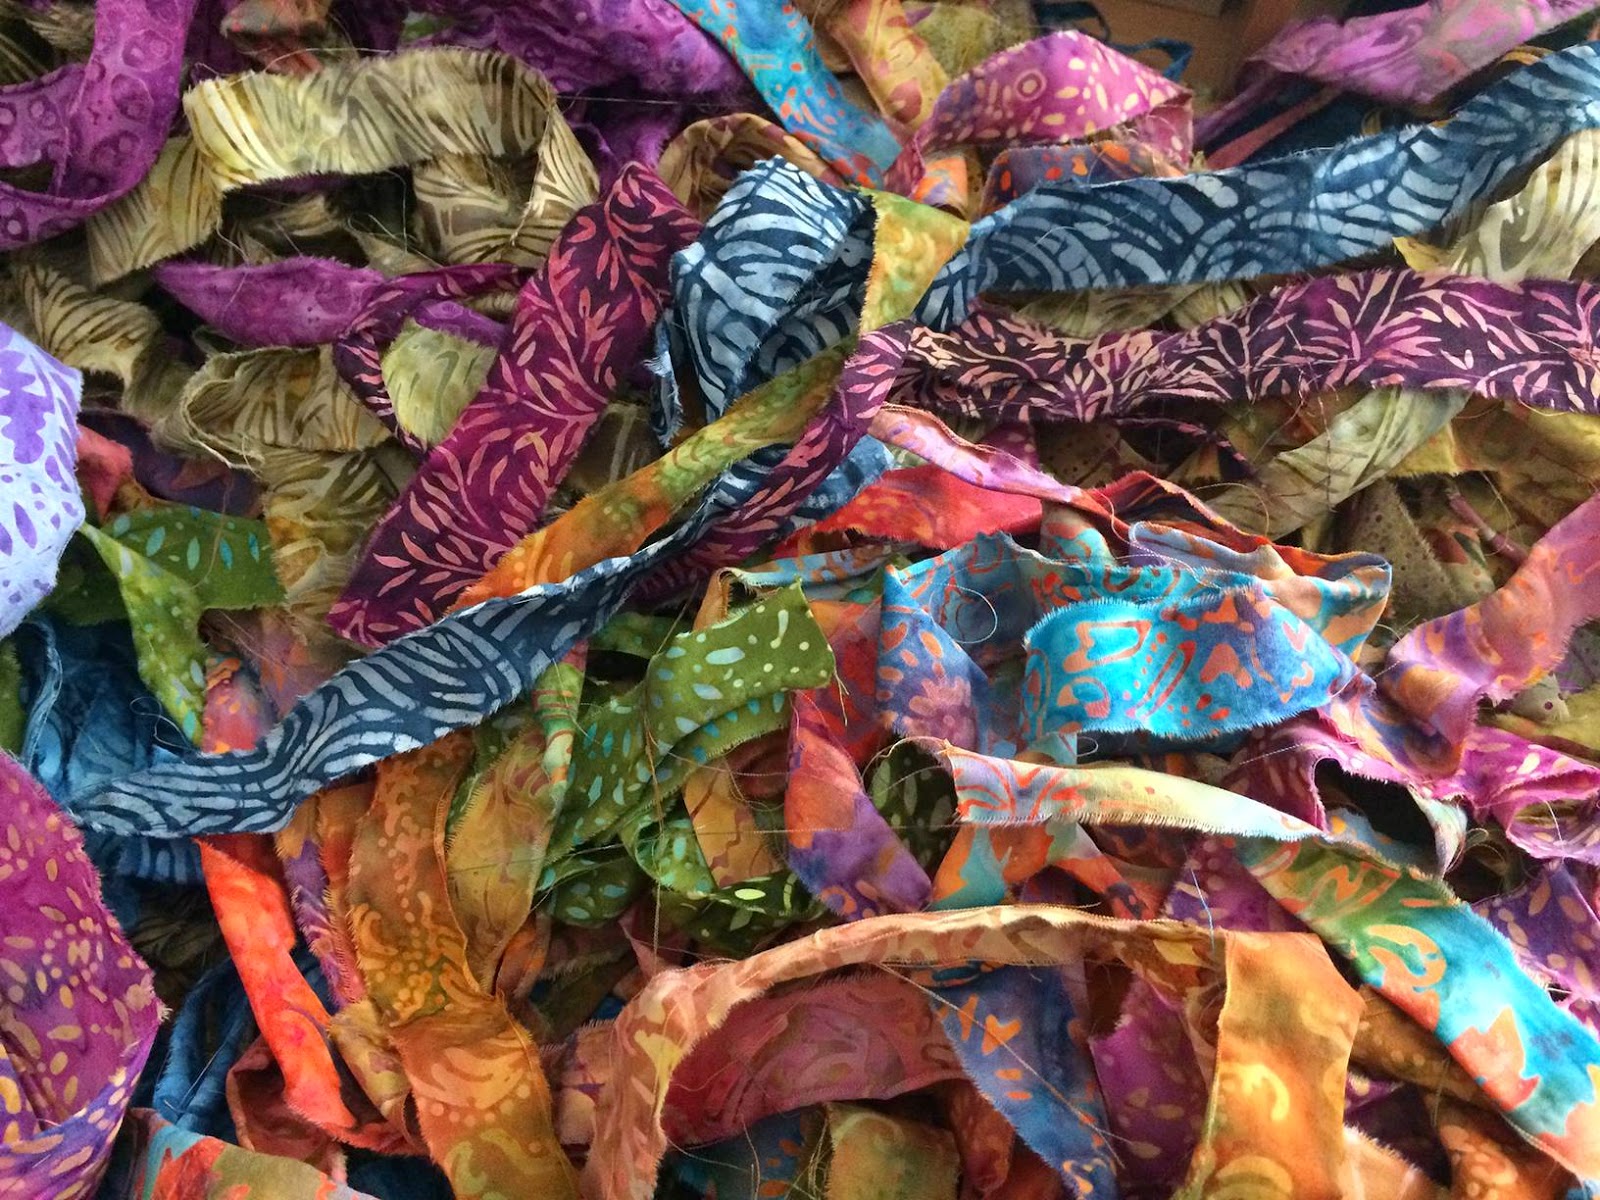
And recently, Karen Totten has decided to use BATIK FABRIC to use as cording.  My first batch is on the way.  I have always loved batik fabric- to wear, to drool over, anything......so I am uber excited to use it for some jewelry.  Stay tuned...


I leave you with some more recent necklaces I have used fiber in......


I started a Fiber in Jewelry Board on Pinterest- you can check out lots of great artists using fiber in many ways in jewelry.

https://www.pinterest.com/stacilouise/fiber-in-jewelry/

Hopefully it brings you some inspiration!
Enjoy!

Thursday, March 26, 2015

Fibers Galore!

I don't know about you, but I really love the softness and texture that fibers add to every day life.

When it comest to using fibers in adornments, there are so many possibilities.

I find some good books (pretty much anything I can get my hands on to get my mind going) and I let the inspiration fill my mind. Not only from a design perspective, but also from historical, and other uses point of view. 

How do the techniques used many years ago affect our every day lives? It is such an amazing topic, and one I really look forward to exploring here on LMAJ through the next BootCamp!


And one can never quite have enough fiber material and fun tools to play with right?!

Keep an eye back here to see more fiber related posts!

Tuesday, March 24, 2015

Tutorial Tuesday! Pipe Bezels by Karen McGovern

As a jewelry designer, I try to set my standards quite high---I want my clients and collectors to be assured that when they purchase from me, they are getting the best quality.  That's why I only buy my copper plumbing pipe from reputable hardware stores.  Wait...what?

Yes, today we will be working with one of my favorite things...copper pipe from the hardware store! This quick and easy tutorial is a great way to begin working with solder and a great way to experiment making bezels in differing depths. There are so many things you can do with copper pipe bezels!!!

What you'll need:


Copper pipe from Home Depot, Lowes, etc.  The pipe comes in different diameters, so pick up a variety. You can usually find short lengths, or ask if they will cut lengths to your specifications.

Pipe Cutter. You can buy this in the same section  you find the pipe.

Copper Sheet - Etsy, Rio Grande, Cool Tools

Easy Solder Paste - Cool Tools

Micro Torch - Amazon, WalMart, Etsy

Metal Shears - Rio Grande

Sandpaper/Sanding Sponges - Hardware Stores

Flat and Needle Files - Etsy, Hardware Stores, Rio Grande

Fine Line Sharpie

Liver of Sulfur or Patina of your choice - Cool Tools

What You'll Do:

First, begin writing a tutorial about making bezels using copper pipe and HAVE YOUR COMPUTER EAT ALL THE IMAGES YOU TOOK FOR IT THE DAY YOU WANT TO POST IT.  Oh, wait...that's not for you to do, THAT'S WHAT HAPPENED TO ME. CRAPCRAPCRAPCRAPCRAP. 

So, this tutorial may or may not have pictures that make sense.  I will do my best to describe the process.  SORRY, FOLKS!

First, decide how deep you want your bezel to be and mark a cut line on your pipe using a fine line Sharpie.  


Place the pipe in the cutter, lining the cutting disc up with your mark and tighten the cutter enough to hold the pipe in place but still allow you to rotate the cutter around the pipe. Tighten the cutter after each rotation until the pipe is cut through.  Viola! You have your bezel wall.


Clean the cut pipe by sanding edges smooth, file away any excess metal, etc.  At this point you can texture the sides by hammering on a ring mandrel if you wish. You can also texture the lip of the bezel as I did using a hammer.

**PICTURE THAT NO LONGER EXISTS**

Place the pipe bezel on a sheet of copper and trace around the bezel leaving a bit of extra room for ease in soldering.  At this point you can get creative, depending on what you plan to make here.  You can cut a free form shape for a pendant, or just create a simple bezel cup for a ring.  Go NUTS!

Dab 2mm dots of Easy Solder paste on the bottom of the bezel then set on the copper sheet.  Place on a solder block and heat with a micro torch, moving the flame around the bezel and bezel plate until the metal begins to glow red and the solder flows.  

**NEXT PICTURE THAT NO LONGER EXISTS***

Note:  Cool Tools has great videos and tutorials on their site that show how to use their solder pastes.  I love solder paste--it has flux in it so you save a step and it holds pieces together sort of like glue for quick soldering.  If you have not tried it go for it!  I also show more about this in and earlier tutorial for LMAJ here.

Quench and pickle.  

*****NOTE ABOUT PICKLE*****I ran out of commercial pickle powder (which I get from Cool Tools) when I was making this tutorial.  (Do you get the idea this tutorial was doomed from the start?  Computer ate all the photos, ran out of pickle...If your computer starts to smoke while you read this, RUN!) Anyway, I made vinegar/salt pickle for the first time and it worked LIKE A CHARM (take THAT stupid tutorial).  One cup white distilled vinegar, one heavy teaspoon coarse salt, heated in a clean crock pot.  Smelled a bit, but firescale will literally float off whatever you pickle in a remarkably short time!  Keep your pickle clean and separate.  By that I mean use one pot for copper, one for brass and one for sterling.  If you don't have a line of labeled pickle pots, be sure to make a clean, fresh batch for each metal you pickle.  If you combine metals in the same pickle you will plate your metals with copper.  Brass and silver will turn pink and require a lot of cleaning and sanding to get the copper deposit off.  SCIENCE!!!

Back to the tutorial that is trying to kill me....

At this point, simply clean and finish your bezel.  If making a ring, invert on a solder block and solder on a ring blank (which you can make from pipe, by the way!!!).  If making a pendant, drill or punch holes for split rings or solder on a bail.  The possibilities are endless! You can make an open back bezel using copper washers (Home Depot). There are just so many options with this easy design. Patina if you wish, and then fill the bezel with WHATEVER YOU WANT.  These bezels are great for resin work, mixed media, riveting, you name it.  Another note: Yes, there will be a line of silver at the base of your bezel where it meets the copper back plate.  If you patina with liver of sulfur that should blend away nicely.  If you are really bothered by the silver line, patina, then color with a deep brown sharpie marker.  Seriously.  This will blend with the copper and works quite well.  I cover the silver, blend with my finger and let dry. Then I seal with clear coat, wax, whatever.  Sharpies are magic.....

Trimmed and sanded bezel.  I haven't used any patina yet....

TIP:  You don't have to leave the bezel round.  I cut larger diameter pipe, then bend and shape the bezel free-form depending on what I want to make.  For the ring below I shaped the cut pipe to an oval-ish shape, soldered on a back plate, cut and trimmed, and then used more pipe for the ring shank.  The pearl is in a commercial silver bezel I soldered to the side.  I resin set abalone veneer inside the bezel.  As you can see, I'm into abalone these days....THERE ARE SO MANY WAYS TO USE PIPE BEZELS!!  


The image below is the direction I am going with the bezel I made for this tutorial.  It fits a sea urchin shell perfectly, and I plan to rivet or micro-screw the pearl in the middle, through the bezel back and abalone shell which will hold the bezel on the abalone shell. The urchin will be resin set inside the bezel....it will hopefully be a pretty  cool pendant by the time I am done.  


So, what will YOU make with your pipe bezels???  Show us!!! Now, go make something AMAZING!

Friday, March 20, 2015

Creating a Custom Bead Tree

by MaryAnn Carroll

Some History:

It has been awhile since I used my little doll kiln to fire beads. I do fire in our large wood-fire kiln, but that is only when Bill has enough large pieces to fill it up. A few weeks ago I decided I would sit down and create lots of mid-fire (approximately 2200 degrees F) cone 6 beads and a bunch of cone 10 (can fire to approx. 2400 degrees) beads for the wood kiln so I would be better prepared.... I am the type that is often scrambling at the last minute!!

Here they are completely dry and getting bisque fired. I bisque fire to about 1850 degrees F and that preps them for the glaze that will be applied. There are a few other things in there that I am making for our upcoming show that we are organizing called Potters for Pets that will be at the CNY SPCA in Syracuse, NY.  We also have a Facebook page for this event. We are really hoping for a big turnout, since this is the first show that we have been in charge of. (A little promo here) If you are in the Central New York area, it would be great if you could share our event! It is a first annual, so we need all the help we can get!!


So, I typically leave my warped, very used bead trees in my kiln after use. This time I went to look and there were two of the four! I searched and searched..... no luck. Being that I have a husband who most of the time likes to please, he made me a couple more, but it will be weeks before they are ready to use.  My bead trees are made to get the most out of my kiln. The original group has gone through at least 40 firings and are badly warped. Even warped, I make them work.

Since I use a mid-fire clay, my bead trees are made from a higher fire clay (cone 10) which can go to up to about 2400 degrees F. You could make this out of the same cone that your clay is, but I don't know how well it will hold up. My original trees have been fired to cone 12 in the wood-fire kiln many times. They have taken a bit of a beating as you can see. That's okay.... it is just the beads that need to be pretty!


What we originally did is take the measurements of my little kiln. We then designed trees (this was a few years ago) that would work just right inside the kiln utilizing the most space.  The new ones are a tad bit narrower as it was always a tight squeeze getting all four trees in and there is nothing worse when you carefully set the last tree in a your hear, "ping!" A bead has left one the of trees!!!! Yup, that means that they ALL come back out to start all over. Needless to say, loading the kiln is not one of my favorite things.

With all of that said, I thought I would share how to custom make some of your own bead trees. I cannot compare these to what you can purchase online, but I can say that I can use the most space possible with my own design. You certainly need to start by taking your own kiln measurements and go from there. Also, take into consideration that as a rule the clay will shrink 15%.

The Tutorial:

Here is one of the new trees shortly after being built. This time Bill added some supports on the side to see if this will help slow down the warping. To create this, he use a slab of clay that was rolled out. He then scored and slipped the clay to connect the sides and the base.

Here is a link of a score and slip demonstration. 

After doing that we waited until it dried to a leather hard stage.


In the leather hard clay, I used a pencil tip to begin the spacing that I want. It is best to stagger them as you will see later. I start by measuring approximately 1 inch apart.


I did pull out the ruler after the first row. so that I could stagger more accurately to make the most holes that I could. That is another benefit to making your own. 


After the pencil measures, I started to puncture the holes with a toothpick (I use toothpicks for everything when it comes to clay!) Never just push it through. You need to use a rolling motion.


What I found, however, was that the clay was a little too hard and I was afraid that I wold break the tree. I grabbed what was closest to me. I get lazy sometimes and don't like to get up when I am in the middle of something! I then took a that little piece of nichrome wire in my reach (the same high fire wire that you will hang beads on when you fire them) and used that to puncture the rest of the holes.


As you can see, I did not put the hole all the way through. Instead I pushed it (turning the wire) until it just started to poke out the other side. You don't want to put too much pressure on the clay. If it broke, it would be a very sad day.


You then go to where it was punctured on the opposite side and push the wire through tuning while doing that. This process gets repeated multiple times. I think I did this at least three or four times. 

Once you are satisfied,, you can take one of your clay tools. I would tell you what this one is called, but at the moment I cannot remember. If you are over 50, you get it! You can pick a tool that you are most comfortable with. This happens to be my "go to" tool.


Then I wiggle the holes to make them bigger than the nichrome wire that will be used to hang the beads. The reason for this is that the clay will shrink 15% as stated earlier. I also do not like them to fit too tight. I like to balance the beads on the wire.


Here it is after an hour of work. It takes many times to get it just right. Leather hard clay is not something you want to be rough with. It will break. Now the only thing left is to let it dry slowly. It will be a couple of weeks before I can fire this tree for use with my beads. You do have to fire this before using. I would recommend at least a full firing to cone 6. Certainly, if you use lower fire clays such as earthenware, you would have to make some adjustments.


So, as those dry, I am going to use my old dependable warped trees to fire this batch of beads that I made. As you can see I have glazed beads balancing on the nichrome wire.


These are all fired now. It took two firings for all of them.


By custom making my bead trees, I am able to avoid using shelves like you see in this picture. This was a pain and takes up space that I cannot afford.


Here is on group fired. One took a hit by tipping into the kiln brick. I was able to use my dremel to sand that white off of it. It is the pendant on the top left. that is because I just balanced a broken tree between two kiln bricks. Not the the best move...... live and learn.


And..... guess what was found a day after making the new trees.  I am sure that I don't need to tell you that the answer is... the two missing bead trees!!!! Yup, Bill found them out by the wood-fire kiln. Isn't that always the way? The good news is that now I have some extras.


Enjoy your Friday.


Thursday, March 19, 2015

How To Be A Jewelry Designer by Karen McGovern

First....

Get a GREAT IDEA


Think about GREAT IDEA for a while—assemble/construct in head 
or on paper to convince yourself that said idea is, in fact, great

Decide idea is great
                                              
Find *FREE TIME to create GREAT IDEA

*FREE TIME is a mythical stretch of uninterrupted time to be
spent completely at your discretion

Fix cup of coffee

Go to studio

Stare at the wreck that is your work space


Shrug and sit down

Begin assembling needed items to create GREAT IDEA

 Immediately misplace KEY ITEMS needed for GREAT IDEA

**Search

**Search

**Curse

**Curse

**In no particular order

Begin actually creating GREAT IDEA

***Drop and have to fish out from under your bench/work space 
approximately 1,000 things, many of which will cause you to crawl
around on your hands and knees using your smart phone as a flashlight

***Incorporate Cursing

Hammer at least one finger

GET IN THE ZONE


Have THE ZONE completely ruined because 
THE PHONE IS RINGING/DOG IS BARKING/KIDS ARE SCREAMING

Curse

Curse some more


Get up to deal with interruption of *FREE TIME

Realize YOU HAVE TO PEE LIKE YOU HAVE NEVER PEED BEFORE

Skip all interruptions and barely make it to the bathroom for epic peeing

Scream at everyone to JUST SHUT UP FOR A FEW MINUTES, OKAY?

Go back to studio

Grab your cup of coffee and realize that you put your 
needle files in it while IN THE ZONE

Remove and clean needle files

Eye cup of now ice-cold coffee for .52347 seconds and drink it anyway

Continue creating GREAT IDEA

Realize the thing you JUST HAD IN YOUR HANDS RIGHT 
BEFORE INTERRUPTION has now VANISHED


Freak Out


Search

Search

Search

Find thing right where you left it

Get back IN THE ZONE


Repeat any and all steps above as many times as needed until 
GREAT IDEA is actually completed


Freak out a little bit at how great GREAT IDEA really is

Realize you have to pee AGAIN

Smile foolishly for the rest of the day


Repeat for the rest of your career!

Now, GO MAKE SOMETHING AMAZING!

Wednesday, March 18, 2015

Make Your Own Clay Cutters-TUTORIAL

Carol Dekle-Foss
Yesterday, Staci Louise-Smith did a wonderful and heart-felt post about finding your creative voice and the importance of having cohesiveness in your work.  She also lists some very talented jewelry and bead artists who consistently nail the cohesive look.  If you haven't read it yet, be sure to check it out here, its a very positive and uplifting read!

As for my creative cohesiveness, well, it's a work in progress! I love to learn different techniques and while learning that technique I try and put my 'spin' on it. It's been so much fun playing with all the different mediums, and along the way I've discovered what I like and what isn't for me.

Right now, my latest love is with ceramic clay. Although, it was by chance how a kiln came into our home. Here's what happened. 

HUSBAND: I want to get a kiln.
ME: What, wait, WHAT?!
HUSBAND: Yeah, I never told you but I made a few things in high school. 
ME: Like what??? 
HUSBAND: An ashtray and a vase, but the vase broke. Yeah, let's get a kiln. I'd like to help you make beads and other things.
ME: Ummm. ok. (an hour later) Here's a nice new one on Craig's list, let's check it tomorrow. 
And, we bought the kiln.


I kid you not, that is how it went down in my house. My manly, truck driving, couch potato, adorable husband wants to play with clay. I'm really excited about this turn of events. I've been trying to get him more involved in the studio so we can do things together, so this is perfect! I will be sure to keep you posted on my husbands creative journey!  Unless there is a John Wayne marathon or some zombie movie on, I think he wants to start this weekend. 

 Ok, when making my very first pendants, I felt limited in what shapes I could create. I know there are places where you can buy cookie and clay cutters, but what's the fun in that?? I wanted the creative freedom to cut out whatever shapes I wanted, so I set to work on making my own cutters. These are the first three, and I'm sure tons more will follow. It's easy to get the hang of, and fun to do. Try it out for yourself!


Cookie Cutter Tutorial

WHAT YOU WILL NEED
Shapes. I cut mine out from a Silhouette Cutter, but you could also draw or print out your desired shape.

Copper sheet, I used 28g. I like the way copper work hardens and holds it shape. Plus over time it will develop that lovely patina.

File
Thread
Metal scoring tool
Needle nose pliers
Round nose pliers
Glue, I used Epoxy 330
Sharpie pen
Tiny clamps
Ruler
Metal shears
Sandpaper


Step One

Measure with string the length of copper that you will need, with at least 1/2" extra to be able to wrap around and glue.

Step Two
Score the length of the copper. The depth is up to you, depending on your designs and how deep you will need to cut out your clay. I made mine a little over 1/4" deep.


Now cut our your metal. Try not to stop too many times when you cut, because you will create burs that you will have to file later. I used my throatless sheer for this step, but you can also use metal shears.

Step Three

Oops, I forgot to take a pic of me filing the edges. You want to file the edges so there are no burs or sharp edges. Now run your fingers over the metal really fast back and forth. This helps straighten it and makes the metal soft and ready to be formed. 


Step Four

Now start forming the metal using the shape as a guide. I used my round nose pliers for the round corners and for the sharp corners, my needle nose pliers. Most of the time though, I just used my fingers to form the metal.


 I made plenty of mistakes, especially on this more detailed cutter. I just straightened with the needle nose pliers and started over. 


Step Five


At some point you want to sand the ends where the metal will be glued together. This is so there is some bite for the glue to hold. 


Mark with sharpie and then cut the end of the metal.


Press both ends tightly together with needle nose pliers to make sure there will be a good bond.


Step Six


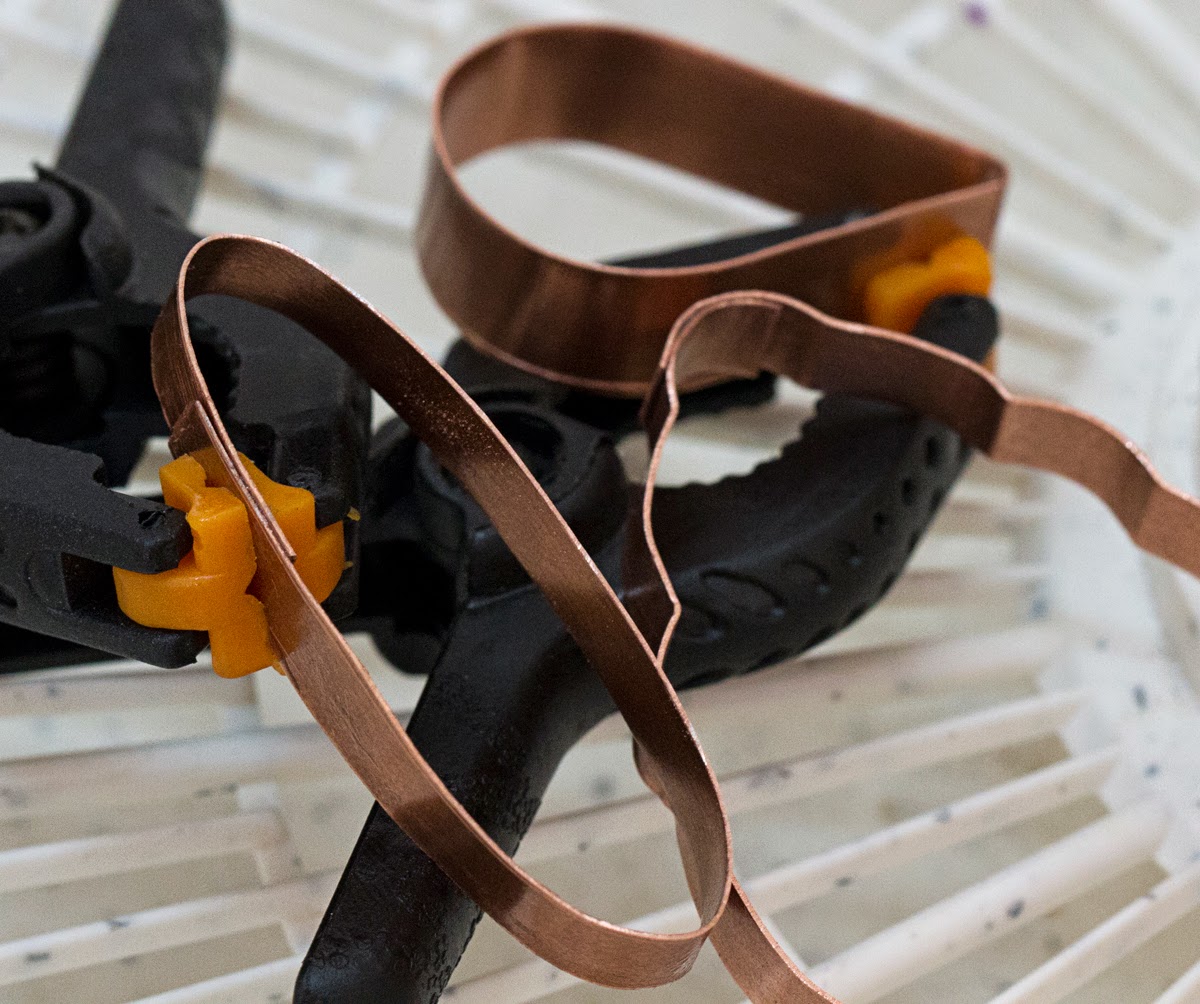
Now glue cutter together and clamp tight. I couldn't wait for mine to dry so I left it in a food dehydrator for about 15 minutes.


Voila! Your very own, unique one of a kind cutters.


I am very happy with how these turned out, and look forward to creating more. I may even make some very special ones for holiday cookies! 

Thank you for reading, and I hope this tutorial helps you on your creative journey!