Monday, August 17, 2015

Tool talk...again!

Written by Patti Vanderbloemen for Love My Art Jewelry

This is a two-part post - Part One is a discussion of my most used tool in my studio, and Part Two is related to a brand-new-to-me tool.  Grab a cup of something wonderful and read along!

PART ONE
I receive lots of comments on the "finishing" of my metals - copper in particular.  I always patina the copper (with liver of sulfur), and hand buff with steel wool, though I also also use a variety of buffs on my flexshaft (but this step is not necessary).


The sheen that I achieve in my metals is not from shellac or a protectant - it's from the buffing AND the tumbler. Every single piece of jewelry I make that contains metal (that would be all of it!) has been tumbled.

This is my tumbler set up.  I have used the same Lortone Tumbler for years (this model).  I use 2 pounds of mixed stainless steel shot (this shot),  2 drops of regular, blue Dawn Dish Detergent (and only Dawn), and enough water to cover the shot and the jewelry.  I place the tumbler inside an old plastic shoe box. Why?  Once - and only once - I misaligned the cover to the tumbler, added water, turned it on and walked away.  When I came back 20 minutes later, I had water all over the floor.  So, this is just my way of containing that spilled water ('cause I still put that cover on crooked!).


I always put my finished pieces in the tumbler for 20 minutes or so BEFORE I add patina.  I have found that patina "takes better" to a completely clean piece of metal.  Yes - this adds time to my finishing work, but I prefer the final finish I achieve when I take this extra step.

As a test for this blog post, I made three sets of samples of textured copper.  For one set, after texturing, I tumbled for 20 minutes, added liver of sulfur, buffed, and then placed the patinated pieces back in the tumbler for an additional 20 minutes.  For the other set, I textured, added liver of sulfur, and buffed - no tumbling.  The following pictures are the result of my test (click on the pictures to make them larger and really see the difference). I took 2 pictures of each sample.

Sample 1: Left - tumbled / Right - no tumbling
Sample 2:  Left - tumbled / Right - no tumbling
Sample 2: Left - tumbled / Right - no tumbling
Sample 3: Left - tumbled / Right - no tumbling
Sample 3: Left - tumbled / Right: no tumbling
The burnishing effect of the shot with the copper pieces, while tumbling, adds a shine that I just cannot achieve without tons of buffing.  Even the color of the copper is enhanced, and tumbling  also hardens the metal - always a plus.

When the tumbler is done after 20 minutes or so (I have been known to keep some metals in the tumbler, such as bangles, for hours), I simply pour it out in a strainer in my sink and rinse.


Once the water runs clear, I dump the shot onto a clean, white towel and spread it out to dry.  THIS IS AN IMPORTANT STEP.  You do not want the shot to get rusty (never happened to me...yet...but my basement studio is freezing)!


STORING YOUR SHOT - Once dry, I just keep in the shot in the dry tumbler barrel.

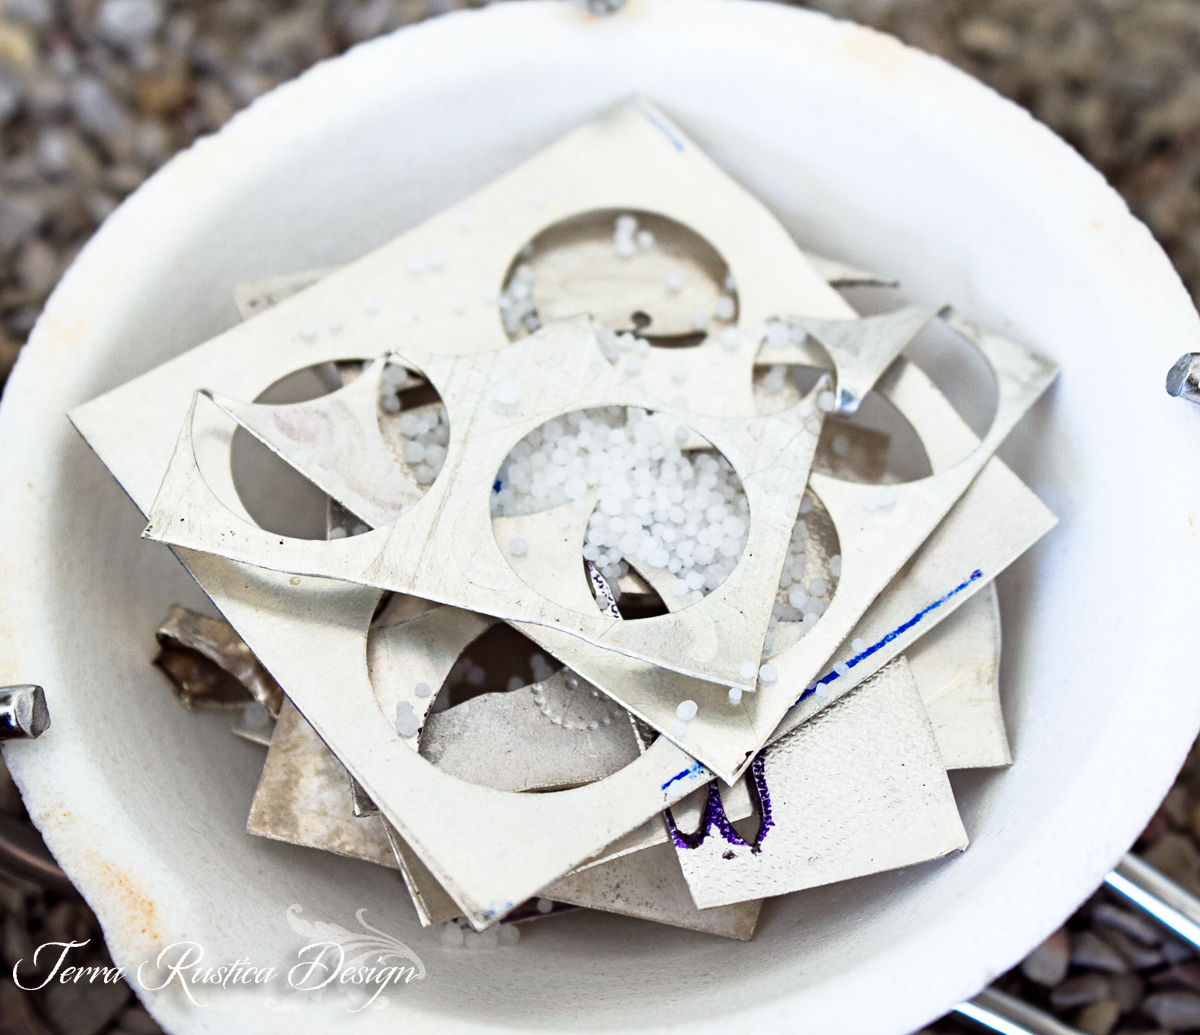
CLEANING YOUR SHOT - A spanking new bag of shot is bright and shiny stainless.  After years of use (see photo above), it does turn dark.  I clean my shot about once every 2 months or so in one of 2 ways.  1)  I add the shot with some room temperature coca-cola (enough to cover the shot) for about 2 hours, rinse, dry.  2)  I have also cleaned my shot with water and baking soda (I do not measure - couple of tablespoons and enough water to cover), tumble for about 2 hours, rinse, dry.

A WORD ABOUT TUMBLING GEMSTONES AND CERAMICS  Now, I do not tumble anything with gemstones. If I bezel set a gemstone cabochon, I add patina to the silver, buff, and tumble AND THEN set the stone.  I actually keep a supply of both copper and sterling silver wire that I have patinated with liver of sulfur, buffed, and tumbled - in a coil - for use with gemstone beads. Yes - the wire hardens a bit - but I like the finish of tumbled wire.  Several years ago, I learned the hard way and tumbled a bracelet with turquoise beads. What a waste! Lampwork beads tumble beautifully!  I have never even attempted to tumble a piece with ceramic - I have just never wanted to take that chance of ruining the piece!

So - no secrets here - the tumbler is my best friend in the studio!  There is no hard and fast rule for tumbling - everyone has there own method...I simply found this method works best for me.


PART TWO  
I belong to several metal-related Face Book groups.  I am mostly just a lurker. Well, I started seeing a picture of a shot plate on several of these group pages, and I knew I had to have one!  I intentionally took a picture with my fingers so you could get an accurate aspect ratio - it's small!  


From my online research, I have read that Tucker Tool Company is the one reputable maker of this tool (link here). (There may be other makers - I am just not aware of any names at this point). These Tucker Tool shot plates are also available at Indian Jewelers Supply (link here) and Monsterslayer (link here), but as of the writing of this blog post, Monsterslayer it is currently out of stock.  Onward.

I researched online (outside of Face Book) how to use this tool - and it is really simple, but this technique can add such a bang to a completed piece of jewelry!  Much more intricate than just adding a ball of silver (which I still do and still love)!  Here is what you do.

Take small bits of sterling silver, and melt it on your charcoal block.  I used bits from my bowl of to-be-recycled sterling. The holes in that shot plate are small - you do not need a lot of silver!


Once melted, wait until the silver turns back to gray before you quench it in water.  I have, in the past, been too quick and picked up the red-hot ball of silver.  It is still quite malleable when it is red and can be deformed by your tweezers!


Melted balls are in my hand for size reference - tiny!
Place the ball inside the depression, and hammer.  I do not use my "good" hammers for this - this is my brass hammer that I use for stamping.


Each time I made a decorative shot (that's what the end result is called!), the shot became stuck in the shot plate.  Just grab your center punch...


Place the punch in the middle of the depression, and hammer.  The decorative shot will "stick" to the center punch and will release from the shot plate.


It does not matter that you will have a depression from your center punch in the bottom of the decorative shot, as you be soldering this to your piece of jewelry.  However, while the shot is still "stuck" to the center punch...


I use my files to round the bottom edges.


A quick whack with my hammer and the decorative shot will release from the center punch.

A picture of 4 completed decorative shot flowers.


I soldered these flowers to some hoop earrings, flanked with tiny little balls.


Finished!  A complete pair of 100% handcrafted sterling silver hoops with flower accents...that began as wire!

In my mind, I am imagining many ways to use this decorative shot - place one inside an "upside down" bead cap and you have a flower with petals; accents on a the back plate of a bezel-set pendant, etc.

To those of you that made it to the end of this extremely long blog post - thank you!  I am on the verbose side....:)

Thanks so much for staying with me and visiting Love My Art Jewelry today!!

Patti

Friday, August 14, 2015

Electric vs. Wood-fire Beads GIVEAWAY

by MaryAnn Carroll

For many of you who have know me for a long time, I was mainly known for my beads. I fell out of the bead making addiction a few years ago and have never really gotten into it for sales since. I do, however, still make beads and use them in my own jewelry. I plan on getting into sales again, but might wait until Handmade on Amazon gets started. I left Etsy awhile back, despite the fact that they are probably the best place to sell handmade items currently. Like everyone knows, Etsy also added manufactured items and, in my opinion, that is like nails on a chalkboard.... enough said!

Since I have made a few beads lately and do have a stash that I have been hoarding, I thought I would share some of what I do.

Mostly, I make mid-fire porcelain beads. Mid-fire means that the glazed beads are fired to about 2200 degrees F.


There are a few things I love about mid-fire electric firing. One of those things is control. The other is that there is a wide variety of colors. As for control, once you're up close and personal with your glazes, you can make them do just about anything that you want. The electric firing is very dependable and the results that I get are often what I expect. I do like to buy new glazes occasionally because I like to keep it interesting. I am actually glazing today and trying a turquoise that a friend gave me. I never do test tiles ..... just give it a shot on about 10 or so beads. I can pretty much commit the results to memory.... I cannot believe I said that because if you ask me to come up with a word for something, it takes me awhile and a few times guessing...

The other thing I make are wood-fired beads. I am VERY lucky to have a husband that fires all of his pottery this way. The wood-fire kiln is 34 cubic compared to my little electric kiln which is less than 2 cubic feet. Wood-fired kilns are not designed for bead makers!!!

As for wood-fired beads, you have to give up control. The kiln is stoked every few minutes for about 20 hours (longer if you have a bigger kiln) so the heat is much more unpredictable. The temps go up and down as you open the door to throw in more wood. You can get a basic idea of what you would like your work to come out like, but  the kiln has the final say (that happens a with electric too, but not to the same extent).

Different kinds of wood ash deposit on the pottery creating unique effects on each one. During this last firing I wanted my beads to be back in the kiln a little further so they didn't get bombarded with ash. Here is the most recent result.


Today I would like to offer a giveaway of  7 random beads. You will receive 7 wood-fired and 7 porcelain. They won't necessarily be the ones shown, but I will pick out some nice ones. If you are a bead collector or you love to use assorted beads in your designs, then this giveaway is for you.

No question today..... Just leave your name and a contact where I can reach you if you win. I will try to pick the winner by this Sunday evening providing life goes smoothly between now and then. My life has a way of throwing  (right now I am trying to recall the word I want to use!!) got it..... A WRENCH INTO THE WORKS!!!

I will contact you personally if you leave a contact. If you don't.... well, sorry about that!


Thanks for reading. 

Thursday, August 13, 2015

Bud Vases as Needle Holders at Bead Fest Philadelphia

In just a week I will be arriving at Bead Fest in Philadelphia to get my artist table set up.
This is the first time in 6 years I have done this show myself.

Marsha Neal Studio Artist Booth 570A Bead Fest Philly Aug 21-23, 2015
My friend Darlene of D7Studio
(booth 366) has been taking my bead work with her to bead shows here in the north east US since I stopped doing shows. And I feel that at least for Bead Fest (and Bead & Button) it is time for me to reconnect in a physical presence way with my friends and customers.

Darlene will still have the majority of my "bead" work at her booth 366 with all kinds of cool jewelry supplies and other artists work (Nolly from Nolly's Folly).

My artist table 570A will focus more on my bracelet kits, sculptural beads, vessels and small terrarium pieces. And I am right with Staci, Diane, and Nikki - it is going to be such a fun creative area (all of the show will be - but especially the area where the artists are!)


So for those of you that do work with any kind of crafting needle - you should swing by and get one of my small vessels. They were originally intended to be used as bud vases for teeny flowers (my little kids like to pick flowers for me - but usually they don't have much of a stem) but they sweat water, so they are now only for "dry use".


Here is a quick shot of the various stages of me making these small vessels. I use my own bisqued clay texture plates that I made with flowers and seed pods from my garden. The clay is cut to a general size, and is rolled into the plate to get the reverse image. I have to work quick to not have cracked walls, as these are not large pieces of clay. 


Here they are drying out on a piece of drywall scrap after being made (the drywall helps absorb the moisture from the clay and helps avoid stress drying cracks).

The bottoms are kept a bit thicker to allow the piece to stay upright while in use.


And one of my favorite parts of figuring out the design of these is allowing the bottom of the piece to come up around the sides and create this organic line and bevel. The line collects the glaze during the firing and allows for puddling. The bevel conveys a sense of the piece being lighter.


And above you can see the dried seed pod from a newer plant (Begonia) that I used to press into the clay a couple of years ago. Makes me want to start to make some new plates with the growing season coming to an end in a couple of months. My favorite time of the year to collect!

And if you are attending Bead Fest Philadelphia August 2015 copy and print this $5 weekend admission pass! The regular fee I believe is $14 for the weekend pass (free if you are taking classes).

Hope to see you there!

Friday, August 7, 2015

A Micro Macrame Primer and Upcoming KnotAlong!

by Sherri Stokey

Do you ever see a beautiful piece of handmade jewelry and get depressed?  Not because there's anything depressing about the piece, but because you think you'll never be "good" enough to make something that lovely?  Well, stop that!  This is a no-whining zone and self pity is counterproductive.  

Don't get me wrong, I've been there.  It's an easy trap to fall into, but basically you have two choices:  you can either admire the piece for its artistry and purchase it from the person who has probably spent countless hours creating it (and possibly several years learning before that) or you can take a stab at it yourself.  
 
I'm curious and I'm from a background where I want to try doing everything.  I wallpapered most every room in my house back in the 80s, learned how to give home permanents, make candles and can tomatoes just "because".  As you can probably guess, not all were wise decisions.  

 
(She's still mad at me about that one, by the way.)  Luckily, I'm now at an age where I know my limitations and instead of taking that as a personal failing, I'm getting better at appreciating the talent of others.  Even if I could make a polymer clay lotus pendant like the one from Staci Louise that I used in this necklace, I would probably never get the feeling she has in her piece. And that's okay - it means Staci is doing something right!


If you decide you do want to try something for yourself, find a good tutorial or class and then go into it with the right mindset.  Learn for the joy of learning and you will leave with a greater appreciation of the artist's process, even if you never use the technique again.  And if you do discover something new that you love, that's even better!

So, for those of you who've made it this far in the post (and hopefully the others are over shopping in my Etsy store), I'm going to give you a micro macrame primer.   I'm going to cover the tools and materials you will need to get started with micro macrame, then I'm going to give you a couple weeks to round up your "stuff".  While you're doing that, I'll be busy writing up/recording a special beginner project for us:  the world's very first KnotAlong!   I'm going to meet you back here  in two weeks (on August 21st) for your first "class".

Are you ready, kids?  I can't hear you! :)


If you want to play along with my KnotAlong (and why wouldn't you?), you have two weeks to gather up these things.  I've added some suggestions for sources* to get you started.

  • Pinning surface:  You can use cork or anything that will hold a pin.  If you want to purchase a foam board, here are some sources:   Amazon, Art Beads, Etsy, Walmart, Fusion Beads
  • Fray Check:  Fire MountainAmazonWalmart, my local Walmart carries this in the sewing aisle as do most fabric stores.
  • GS Hypo Cement:  Fire Mountain, Amazon, Walmart, Art Beads
  • Tex 400 nylon bead cord (I recommend C-lon or Superlon brand):  Bello Modo, South Pass Beads (they have Hypo Cement, too), Shipwreck Beads, Jewels in Fiber.  You will only need about 6 yards for our project, so you will have lots left on your spool for your next project.  Don't get hung up on the cord, either.  If you have some 1mm hemp on hand, it will work.  I don't recommend Rattail or other "slippery" cord.
  • Pins - straight sewing pins and/or T-pins:  can be found in fabric stores, the sewing aisle at Walmart, Michaels, Hobby Lobby
  • Scissors
  • Something to straighten cord (hair straightener, curling iron, regular iron, etc.)
  • Approximately 60 8/0 seed beads. Inexpensive craft store beads will work fine for this project.

You won't find a better time to jump into micro macrame than this.  Here's a peek at what we're going to make:


I might even sweeten the pot a little.  I'm thinking maybe a giveaway for those who participate...  So?  Who's with me?


*Sources listed are US suppliers.  Some others to try:  UK - Knotting Ways
Australia - Benjamin's CraftsOver the Rainbow, France - Perles & Co.  


Wednesday, August 5, 2015

First attempt at making a silver sheet ingot

Carol Dekle-Foss
If you use silver or copper in your jewelry designs, at some point you will have to figure out what to do with your scraps. I've amassed about 10 ounces of sterling silver scrap and a MASSIVE amount of copper in about a 3 years time. It never appealed to me to turn in my silver scraps because I wouldn't be getting the amount invested in return. Especially now with silver prices so low and possibly dropping even more.

I've wanted to melt my silver into sheet ingots for rolling for awhile now, but honestly, I was too nervous. I had visions of it spilling and melting a hole in my toe! 

But.. I started thinking it's time. Time to do something with all the scraps I've accumulated and put them to use. So, with my husband taking pictures (making sure I don't burn the house down) I melted my first ingot yesterday! Yay! 

Here is how I did it and what I used. This is in no way a tutorial because I am still learning myself, but I wanted to share my results and a few things I learned along the way.

My supplies. 
The Ingot mold and Crucible I purchased at PMC Supplies on Ebay. I like the reversible one because you can make nice thick ring shanks. If you want to melt copper too, make sure you get the right ingot mold and crucible. 

Ohhh pretty flame. It's Photoshopped, I couldn't help myself! You get the idea though, you'll need a nice big beautiful flame!

The torch I use is a Smith Air/Acetylene torch, and for this project I used the #3 tip. 

First, I heated up the crucible and ingot mold. 
I then filled my crucible with a few pieces of silver and Borax. I guess Borax acts like a flux to help melt the metal quicker. After it started to melt, I added more pieces of silver.

Here we go!

When it started to get molten, I turned the crucible more to the side to get ready to pour. Anyone else see the creepy skeleton face?!?!!! WTH! Seriously. freaky.

And..pour quickly!

Ummm. yeah..epic fail. I poured too slowly and it created this interesting looking blob. Gotta pour fast!

I just reheated and poured again and got this. Much better. Although, I should have taken advantage of making the ingot shape smaller and it would have been a better shape. Oh well, next time!


So yeah..I made a boot. Hahahaha! That's okay, it's 20 gauge thick and will work well for backplates etc. Any suggestions on how to prevent cracking when rolling would be greatly appreciated. I did anneal it about 5 times. Maybe more annealing? 

What else have I been up to? I have a 2 day event coming up in September, so I have been preparing for that by making tons of earrings. 
I still have about 25 pairs to make, but here is what I've done so far.

I made these simple sterling silver earrings priced to sell at $18.00 each.  We will have to see how they do.

I then played with mixed metals and shapes by soldering together brass stampings to textured copper rounds.

I made these from some of my favorite ceramic beads my husband and I made.

I also played with a new shape and pattern for ceramic beads.

So that's what I've been up to! So what about you? Do you have tons of metal scrap just lying around? Have you ever done a metal scrap return? I would love to hear your thoughts.

Thank you for reading!

Monday, August 3, 2015

There has been a death in my tool family.....


I have always been careful with my tools.  I am convinced I have a bit of OCD.  I actually clean my studio (well, clean is a relative term - I put my tools away) after every single work session.  That does not mean my studio is clean, but I cannot work without my tools, and if I am in the middle of something and cannot find one...I go a little ape!

Well, my bench vice was one of the very first tools I purchased YEARS ago, I believe from Fire Mountain Gems.  I knew the device was on the outs and I was just waiting for "it" to call it quits.  It's not an exciting tool by any means, but I use mine every single day.

My old bench vise - there is a lever on the side allowing me to turn the vice portion 360 degrees.
Well, I was twisting wire last week, and the lever that controls the swivel on the vise literally gave out on me.  I swear...I ended up on my backside on my concrete floor (thank goodness there were no cameras)!

The jaws on this old vise were rough. I covered them with painters tape each week, as the the jaws were practically gouging my metals.


I found, what I thought, would be a solution to the rough jaws, aptly named Soft Jaws.  


These are available from most jewelry supply stores, and, while the idea was great, they did not fit within the jaws of my vise.


I still used them when twisting wire, but that's all they were good for. Very cumbersome if they don't fit the vise, as I need the top to be flush! :)

I did lots of research before buying a new vise, and I selected this one.


I purchased it here at Amazon for $10 cheaper than a well known jewelry supplier (don't want to get in trouble here and mention the name!)  If only I had purchased stock in Amazon in the beginning - I swear I would be rich - my hindsight is 20/20...

Anyway, this vise is awesome!  There are removable soft jaws!!!!


Perfect for twisting wire - the ends stay smooth, instead roughed up from old vise.

Sorry for the blurry picture, but you get the drift!
The soft jaws also help to keep me from marring metal when I am fold forming.


Jump-ring cutting in process - a monotonous but necessary task!  I removed the soft jaws to securely hold the wooden dowel.


I prefer a clamp-style vise that I can place on a table of my choice.  My jeweler's bench already has my forming stakes and my Flexshaft permanently affixed - there is no more room for another tool! This particular bench vise has the option for mounting permanently to a table, as well (my old vise did not offer that option).

Lastly, this vise easily swivels 360 degrees - a feature that I need in my studio!

Tube cutting jig

Swiveled 90 degrees to securely hold my hole punch
No glamour/jewelry pics today.  But, without the tools...I cannot make the jewelry!  What about you...are there any tools that you cannot live without? (My list is long)!

Thanks for stopping by!!!